
The Seasoned Kids
Lesson 3: How to Mash

As we continue this series of showing our kids cooking in the kitchen, we hear two questions a lot:
- How do you start getting your kids involved with you?
- How do you get your kids to eat so well?
To us, these two questions go hand in hand. You get your kids eating well by offering them a variety of dishes, flavors, and colors from the very beginning and allowing them to explore food on their own in the kitchen. Mashing things is a super easy tasks for kids to feel like they are accomplishing something and *for the most part* not extremely messy. {{We are talking about kids here, there is always a risk of mess!}}

How to Start
Kids enjoy mashing so much because they are learning how to transform one thing into another. It’s just like how they feel about play-doh and re-creating it into different shapes. The difference between food and play-doh though is that you are teaching them valuable life lessons in the kitchen that will shape their outlook on food forever. Think about everyone you know. Someone you know has a “texture issues” and often it’s over mashed type of food. Getting kids in the kitchen as soon as possible, gets them exploring on their own and learning to love all types of textures. It’s also why we recommend starting with Baby led weaning instead of pureed baby food after 6 months. Bananas, avocado, or potatoes are great first ways to learn to mash.

Tips for teaching your kids to mash
- Use a learning tower to get them stable at the counter
- Standing on a stool or sitting on the counter, doesn’t stabilize kids as much as a tower will
- Use oversized bowls or plates in the beginning
- To help contain some of the possible mess, giving them something bigger with help as they learn that mashing with spread things out and they need to learn to keep it contained
- Pick Your Tool
- The best things to mash with would be a fork, masher, or mortar and pestle. Depending on your child’s size, you can pick what you are most comfortable with.
- No hot ingredients in the beginning
- Stick with foods that are cold or room temperature at first. Bananas are great at first and from there you can move up to room temperature potatoes and eventually for an older child, a hot potato.
- Let them taste test!
- Remember you are in the kitchen to teach them a love of food, to try new foods, and grow their palate. Let them taste their creations!

Recipe Time!
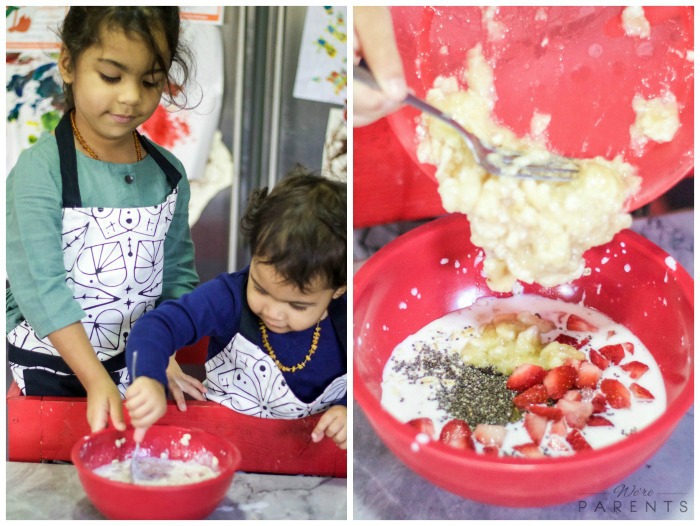
We’re excited to share these three Overnight Oat recipes with you today. We helped measure out the ingredients (check out these awesome measuring spoons for kids!), but the girls mashed the bananas and stirred the ingredients together. These are awesome recipes to start with mashing!


- 1/8 cup water
- 1 cup vanilla greek yogurt
- 1/2 cup creamy peanut butter
- 2 tbsp chocolate powder
- Additional water if necessary
-
Mix the 1/8 cup water and vanilla yogurt together in a container. Set aside.
-
Mix the peanut butter and chocolate power together. *Note: this needs to be pourable - depending on the type of peanut butter you are using you may need to pour in water to get a thick, pourable mixture.
-
In popsicle molds, fill halfway with yogurt.
-
Lightly tap to remove all air bubbles.
-
Fill to the top of your molds with the chocolate mixture.
-
Lightly tap again to remove any remaining air bubbles.
-
Freeze for 6 hours or overnight.
-
Enjoy!
This post is a part of our “The Seasoned Kids”, kid’s cooking series. Learn more about The Seasoned Kids here.
Previous Lessons!
Week 1: Teaching Importance of Washing Fruits and Vegetables + Berry Parfait Recipe
Week 2: Learning to Stir + Cranberry Coconut Energy Bites
![]()
Funny Blooper Time!
Each week, we’ll share at least one funny blooper that happened during our shoot! This week, while we were trying to shoot, the little one decided she was done with mashing, she was just going to use the fork to eat them! She was so proud of herself!


The kids are having fun while cooking.The photos are amazing too.