We're Parents

  • Home
  • About Us
    • About Us
    • Privacy Policy
    • Contact Us
    • Disclosures
    • Media Kit
  • Parenting
    • Pregnancy and Postpartum
    • Breastfeeding
    • Car Seat Safety
    • Mental Health
    • Babies
    • Toddlers
    • School Age
    • Older Kids
    • Holiday Crafts & More
    • Green Living
  • Recipes
    • Breakfast
    • Lunches
    • Dinner
    • side dishes
    • Crockpot
    • Desserts
    • Lactation Recipes
    • Snacks
    • The Seasoned Kids (Recipes by Kids)
  • Travel
    • Kid Friendly Outings
    • Restaurants
    • Travel Tips

Easy Halloween Crafts for Kids

October 22, 2018 by Larisha Campbell Leave a Comment

Kids love fun halloween crafts! Find easy halloween crafts for kids that are homemade! Plus, gets tips on preserving children’s artwork.

Whether you are a parent or a teacher, every season that a new holiday rolls around you are looking for fun holiday crafts for your kids to do.  With Halloween quickly approaching, you want to find easy halloween crafts for kids to do. Typically, you are looking for some fun halloween crafts, but they also need to not make you loose your  mind.

Some halloween crafts for kids call for things…Ahem, glitter…that literally no parent on the face of the earth feels like dealing with. Other halloween crafts take hours, and quite honestly, no one has time for that either. However, you still want to spend time with the kids every holiday making something memorable with them.

What materials do I need on hand for Halloween Crafts?

While every easy Halloween craft is going to be unique in what it calls for, there are definitely some specific craft supplies that you should always keep on hand. Not only will these help you with Halloween Crafts, but it’s great to have for most kids’ crafts that you may be doing.

  • Colored Pencils, Crayons, and/or Markers
  • Glue Gun
  • Paint Smock
  • Paint Brushes
  • Tempera Paints
  • Construction Paper
  • Pipe Cleaners
  • Popsicle Sticks
  • Pom Poms
  • Glue (Sticks and bottles)
  • Beads and Gems
  • Stickers
  • Tissue Paper

Obviously, there’s so much more that you could have, but this quick list is something that you should always have on hand.  Doing so will mean that you will be able to do most holiday crafts, including the easy Halloween crafts for kids we’ve listed below.

What is a good way to preserve my child’s holiday crafts?

Whether it’s Halloween crafts or any other season, as parents, it is easy to want to hold onto everything. Out littles ones created something so unique to them and it’s adorable. Parents always want to remember their kid’s when they were little, thus want to hold onto as much as possible.

In a perfect world, you’d be able to keep everything your little one(s) ever made.  Unfortunately, you’d be looking at an entire room just filled with crafts.  Here’s three ideas for preserving your child’s holiday crafts.

  • Keep the one best craft from each holiday and store it inside of a small container.
  • Take a picture of the artwork and print out the picture. This way you are able to remember the craft without so much space taken up. Store the photos in one collective photo album that holds a large amount of photos.
  • Display a photo wall of their art. Every season you can switch out the photos. Save your favorite one or two from each holiday and reuse your favorites next year.

What’s a great alternative to preserving holiday crafts?

Unfortunately, as much as you want to keep every single little thing each child brings home, it’s just not feasible. Especially, if you have a child that thrives on being artistic.  Somedays there could literally be dozens and dozens of pieces of artwork. Luckily, there are alternatives to saving every single craft.

Some great ideas that you can do are:

  • Make an art book for a grandparent. Do this by placing similar sized art pieces together and then “bind them” with a piece of construction paper or put them in a portfolio book.  Use a heavy duty stapler or hole punch with yarn to make it stay together.
  • Mail it out. Ask friends for their address and send a piece of artwork along with a positive affirmation.
  • Hand it out. Whether at a nursing home, hospital floor, or if you live in a major metropolitan area, to homeless citizens. Something so simple can truly make someone’s day.

At the end of the day, don’t be afraid to toss the artwork either.

Easy Halloween Crafts for Kids

Ready for some really amazing Halloween crafts to do with the littles. We’ve complied a list of more than 30 fun Halloween crafts to do.

An InLinkz Link-up


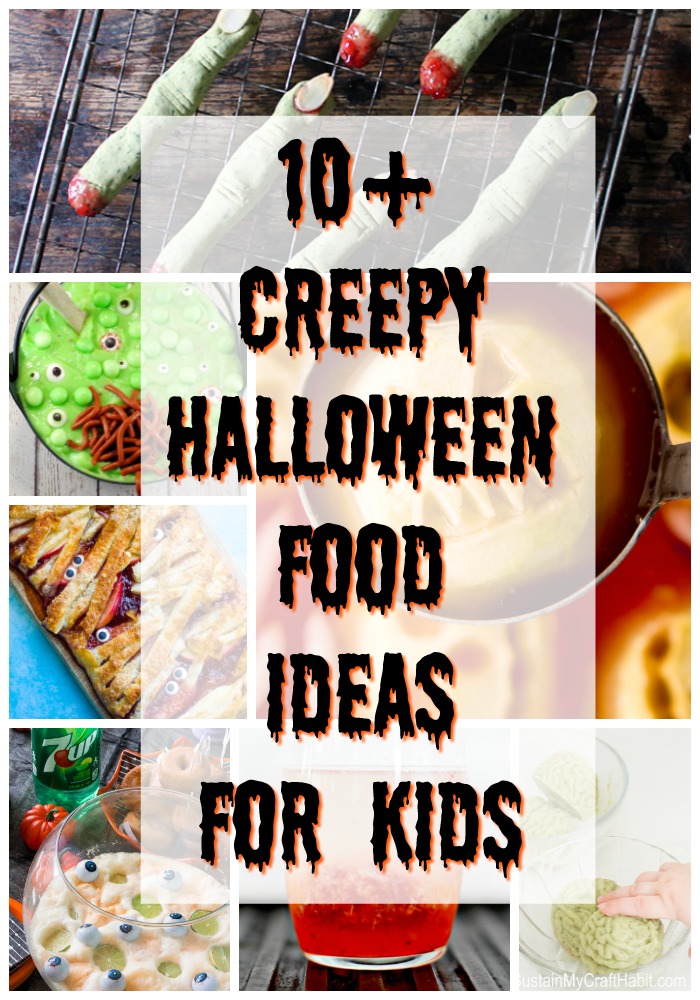
Looking for more Halloween posts? Check out our Halloween Safety Tips and Creepy Halloween Food for Kids below! 

  • Halloween Safety Tips

  • Creepy Halloween Food Ideas 

Filed Under: Home, Parenting Tagged With: crafts, halloween

How to Make Slime (Christmas Slime)

December 15, 2016 by Larisha Campbell Leave a Comment

diy-christmas-slime

As a mom, I’m obsessed with anything that is going to keep at least one of my kids busy for an extended amount of time. Recently, the big one saw a video on YouTube kids where they were playing with slime.  She has relentlessly asked me for slime ever since. (yay).  I remember making slime in science class in grade school, so I knew it was something possible for us to do together. To make me even happier, it was ridiculously simple to make after a little tweaking.

As soon as we were done making it, she played with it for what seemed like forever. (PARENTING WIN). Not only that, but she has continued to ask to play with it every day since.  We’ve added some cookie cutters and various molds into the equation and insert endless fun.

On a side note….slime is actually an amazing stress reliever. It has been so much fun for me to play with as well. There’s something just so relaxing about doing things that make you relate to the fun times of your childhood. So go on, play with it alongside your littles! There’s no judging going on here. 🙂

diy-slime

Materials

  • Water
  • 2oz (half regular size bottle) of school glue
  • 1 tsp borax
  • food coloring

Directions

  • In one bowl, mix 1/4 cup water with glue and mix together until well combined.  Add 10 drops of desired food coloring.
  • In a separate bowl mix 1/4 cup water with borax until dissolved.
  • Slowly mix the glue mixture into the borax mixture.
  • Once both bowl are combined, mix really fast to make ingredients react creating slime.
  • Repeat directions for additional colors. We did red and green to make Christmas inspired slime.
  • Store slime in an air tight container in the fridge.

**Tip: for a goopy slime (like the green one in the video) add an additional 1/4 cup of water to the glue mixture bowl before combining with the borax mixture. 

Watch our video of us making it, then grab your ingredients and make your own!

Filed Under: Home Tagged With: christmas, crafts, diy, the seasoned kids

DIY Christmas Tree Ornament

December 12, 2016 by Larisha Campbell Leave a Comment


diy-christmas-tree-ornament-popsicle-stick-craft

Since we started homeschooling this year, I’ve found us doing more and more craft activities.  Obviously it’s fun for both of our girls, but at the same time, I also know if I hand Skibs a bottle of glue, some paper, markers, and a bowl of pom poms, that I’ve guaranteed myself at least 30 minutes of silence, sometimes even an hour. Win/win in the parenting world.  Art is such a brain boosting, sensory stimulating activity too that I don’t even mind.

With Christmas right around the corner, we’ve been doing a lot of fun, holiday inspired activities.  I saw a lot of different Christmas tree ornament activities on Pinterest, but ultimately came up with this idea based on the items that we already had on hand (ain’t nobody got time to be running all over the place).

img_4586

If you have an older kid or are in a rush to get this to dry faster (super last minute), then we suggest you use a hot glue gun instead of school glue.

Watch the full video of us making one, then you can grab the material list and instructions below.

Materials:

  • 3 Large Green Popsicle Sticks
  • 1 regular popsicle stick
  • 1 gold pipe cleaner
  • 2 green pipe cleaners (cut into 3 pieces sized: 2.5″, 3.5″ and 4.5″ )
  • Variety of colored pom poms
  • Brown or Copper colors marker

Instructions:

  • Glue together the 3 green popsicle sticks into a triangle.
  • Starting at the top, from smallest to largest, glue cut green pipe cleaners from left to right on the triangle.
  • Using your brown marker, color one side of your regular popsicle stick.
  • Glue the popsicle stick to the back of the bottom of the triangle.
  • Glue pom poms onto the green pipe cleaners.
  • Twist ends of gold pipe cleaner together.
  • Glue twisted ends onto the back of the top of the triangle.
  • Let dry overnight.
  • Hang on tree as an ornament.

Another option would be to hang this on a door as a door hanger. It’s large enough to do so!

Don’t forget to write the name, date, and age of who did it so you don’t forget!

We hope you enjoyed this craft!

PIN IT!

christmas-tree-diy-ornament-popsicle-stick-crafts


Filed Under: Home Tagged With: christmas, crafts

5 Minute Santa DIY Advent Calendar

November 30, 2016 by Larisha Campbell 2 Comments

diy 5 minutes advent calendar

Affiliate links contained in this post

This holiday season took me by complete surprise. It’s always been my favorite time of the year, personally, and I have loved the last 3 years of making it fun for Skibbles, but she never really understood what was going on then.  Fast forward to this year and she suddenly gets it.  It has made it so much more fun the last few days and inevitably the next few weeks. Every time I turn around she’s asking about Santa, singing Jingle Bells, or wondering why there isn’t snow falling on the ground.

Truth Moment — I didn’t know until this year if we were going to “do Santa”.  I have some reservations about it, but Andrew is pretty insistent on it.  After seeing her reaction this year and the fact that Andrew’s never really asked to do anything parenting wise until this, I’m going with it.  And really happy we have! 

So last night when a friend from high school, who is also a nanny, posted this idea for a Santa DIY Advent Calendar that she’s been doing with her nanny family for 5 years, I knew that I needed to make one for us.  We do have a Melissa and Doug Advent Calendar, but this one is simply too cute not to do also.  Skibbles is super into crafting right now so it’s great. And best of all it literally took about 5 minutes.

making diy advent calendar

I wrote out the little poem my friend shared on one page, then freehand drew on Santa’s face on another page with the numbers 1-24 representing the days before Santa comes in December. Then we taped the page together, glued on a cotton ball to Santa’s hat and VOILA! You’re done!  It’s literally that simple. I taped it up to the wall, along with a bucket of cotton balls and we will do it every morning!

I’m so excited, and so is she to do this and I can’t wait to see what other fun things we come up with this holiday season!

toddler advent calendar diy

If you love this craft, we’d love for you to share it on Pinterest with your friends!  Just hover over the image and you’ll see the Pinterest button!  Feel free to share on other social media sites too! Merry Christmas!

What you need for this project:

  • Sharpie
  • Construction paper
  • Cotton Balls

diy santa advant calendar

GRAB THE PRINTABLE!!! 

Parenting is already hard enough!  Don’t stress trying to draw this yourself!  Grab some red paper (or keep it white and let your kid color it)!  Grab the printable here.

DIY santa advent calendar printable 5 MINUTE


Filed Under: Home Tagged With: christmas, crafts

Valentines Crafts for Kids – A Canvas of Love

February 10, 2015 by Melanie Leave a Comment

**Disclosure:  Affiliate links contained in this post

valentines crafts for kids

Looking for the perfect valentines crafts for kids idea at the last minute?

Here it is.  Valentine’s Day is a time to express your gratitude to loved ones, usually in the form of cards, flowers and chocolate; however, if you’ve been searching for a unique gift for loved ones, or a keepsake for your own home, below are the instructions for one of the easiest, cutest, Valentines crafts for kids to do on canvas.

What you will need:
A blank canvas (we used 12*24- you will need room for handprints, a footprint and a small quote)
Red Paint
A fine paint brush
Child or children (I used my toddler and infant)
Foil & tape ( this is what I put the paint on)

Tablecloth (to protect your table from messy hands or spilled paint)

Step One: Lay down the table cloth and then squirt some red paint onto the foil. (I tapped the foil down so it didn’t lift when we pressed hands and feet into the paint)

Step Two: If two children are making this craft, I recommend having the older child do this first step. Have your child get red paint on one hand and rub it onto their other hand. After both hands are covered press their hands in the shape of a heart onto the canvas towards the upper right hand side. (I cleaned my son’s hands before moving on)

valentines crafts for toddlers

Step Three: Press the foot of your infant (or the same child if only one child is making this canvas.) Once the foot is covered in paint press it onto the canvas on the opposite side towards the bottom. (I then cleaned my son’s foot)

Step Four: This is where you take over- unless your child is older and has a steady hand. Write near the heart. “From the bottom of my/our heart to” (choose your wording depending on if you have one child or two making the canvas) Next to the footprint write: “to the tip of my/our toes”

Step Five: Below “to the tip of our toes” in bigger letters I wrote: “We Love You!” If it is one child this would say “I Love You”

Step Six: I wrote the names of the boys on the bottom of the canvas along with the month and year to help remember when they created this art when we look back on it in the future.

We love this valentines crafts for kids so much that we are keeping this canvas for ourselves and are hanging it on our wall in the living room. We have a spot where we change out the canvas art the boys create as the seasons change. This was a quick project but is very cute, so we may make a few more for family members. I love art projects that have their hand or footprints so we can see how they grow as the years pass, incorporating other designs and words into them makes them even more memorable. I hope you enjoy this canvas art and quality crafting time as much as we did.

signature melanie


Welcome to Time for Mom!

Time for Mom is a place for mom bloggers to link up and connect with other mom bloggers!  You do not have to link up a post about parenting only, your post can be about anything as long as you’re a mom!  We only ask that it is today’s post or a recent one, and that you don’t link up the same post each week.  Please remember to check out a few others in the hop!  It’s no fun to link and run!  We are here to build a community of mom bloggers and get to know each other!
Please be sure to take a moment to follow your host and co-hosts in some way!
Rachel @ Can’t Google Everything
Larisha @ We’re Parents
Brie @ {…a breezy life}
And if you didn’t get enough of us on our blogs, check out our Time for Mom Superstars Pinterest Board!  Each week we will pin some of our favorites from the link up to the board! Check it out and see who was pinned!


Follow Rachel B // Cant Google Everything’s board Time for Mom Superstars on Pinterest.


Every week each of the co-hosts picks a blogger to feature from the week before! Check out our picks from last week’s link up!

DIY Nailhead Bulletin Board

Color Week: Red

Plantains and Cheese Recipe

Thanks for linking up!  By linking up with us you are opting in to our weekly email reminder for this hop and giving us permission to use an image from your blog if chosen for our weekly featured posts.  We will always link back to your post when we use your image when we feature you!
Be sure to say “hi” if it’s your first time linking up!


Filed Under: Home, Parenting Tagged With: crafts, diy, valentines

Baby Tutus

August 7, 2012 by Larisha Campbell Leave a Comment

I absolutely had to share that I made the baby tutus.

I have seen tons of different Pinterest activity for ways to make tutus and put a couple of the ideas together to make these.  I made two different tutus – one I made was for my baby girl that will be here in November, the other for our niece.  I can’t wait to take pictures of her in it.  I bought the silver glitter tulle to use with this one because I just thought it was so adorable.  Little did I know, I had glitter EVERYWHERE!!  I even woke up the morning after and Andrew had glitter on his face…WHOOPS!

The second one I made, I gave to my sister as a gift for her new baby girl due in October.

It was super easy and so much fun.  I can’t wait to see the babies in them!!

Filed Under: Home Tagged With: crafts, diy


We're Parents is all about cooking and traveling our way through imperfect parenting. Learn More

SUBSCRIBE TO OUR WEEKLY NEWSLETTER & GET PARENT & ME COLORING SHEETS

Connect With Us

We're Parents is a unique mom and dad natural parenting blog focusing on topics such as breastfeeding, babywearing, and car seat safety. You'll also find Delicious recipes, inspired travel recommendations, and more as you journey with us through parenting. Learn More…

VIEW OUR PRIVACY POLICY

Even More Recent Posts

We’re Parents is a participant in the Amazon Services LLC Associates Program, an affiliate advertising program designed to provide a means for sites to earn advertising fees by advertising and linking to amazon.com

Copyright © 2022 · Foodie Pro Theme by Shay Bocks · Built on the Genesis Framework · Powered by WordPress