We're Parents

  • Home
  • About Us
    • About Us
    • Privacy Policy
    • Contact Us
    • Disclosures
    • Media Kit
  • Parenting
    • Pregnancy and Postpartum
    • Breastfeeding
    • Car Seat Safety
    • Mental Health
    • Babies
    • Toddlers
    • School Age
    • Older Kids
    • Holiday Crafts & More
    • Green Living
  • Recipes
    • Breakfast
    • Lunches
    • Dinner
    • side dishes
    • Crockpot
    • Desserts
    • Lactation Recipes
    • Snacks
    • The Seasoned Kids (Recipes by Kids)
  • Travel
    • Kid Friendly Outings
    • Restaurants
    • Travel Tips

35+ Best Pie Recipes

January 23, 2015 by Larisha Campbell 5 Comments

35 mouthwatering pie recipes

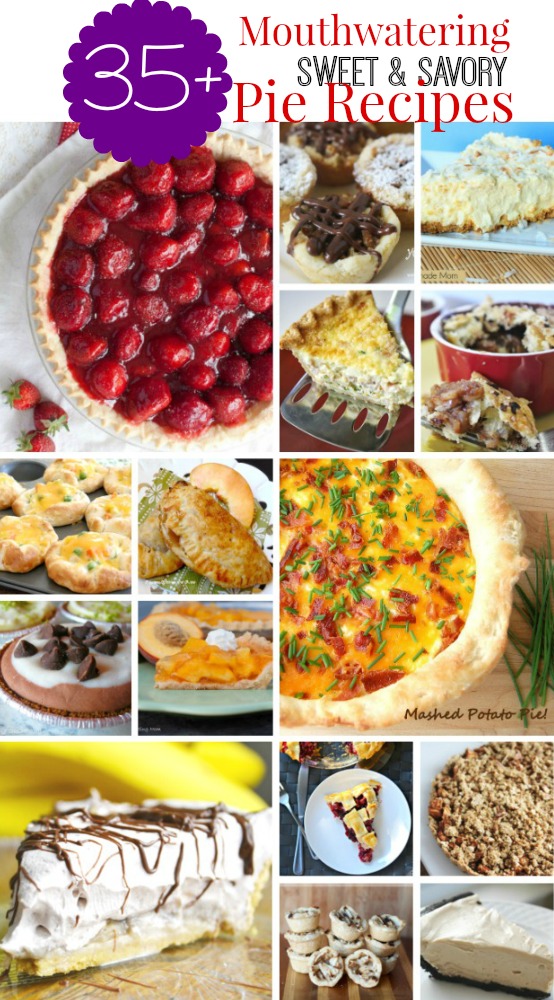
Growing up I wasn’t much a fan of pies, but I secretly love them now.  I have slowly gotten into testing out new pie recipes for them and while I typically don’t need an excuse to make anything dessert like, I was excited that today is National Pie Day.  I mean, I have to eat a pie today, just because it’s a National holiday right?  We collected some amazingly, mouthwatering pie recipes from some of our favorite bloggers and compiled them all right here.  There’s both sweet pie recipes and savory pie recipes making this list an amazing compilation for anyone looking for pie recipes! Enjoy!

Apple Pie Recipes 

  • Mini Nutella Apple Pies – We’re Parents!?
  • Dutch Apple Pie – Diary of a Housewife
  • Apple Pie from Scratch – NEPA Mom
  • Apple Pie with Butter Crumb Topping – The Country Cook
  • Apple Pie Cheesecake – We’re Parents!?
  • Oatmeal Cookie Crusted Apple Crumb Pie – Girl Gone Mom
  • Individual Apple Pies – Savoring The Good

Other Fruit Pie Recipes

  • Chocolate Cherry Hand Pies – Real: The Kitchen and Beyond
  • Choco-Nana Pie – Four Hats and Frugal
  • Banana Pie – Chef In Training
  • Triple Cranberry Pie – Four Hats and Frugal
  • Cran-Apple Slab Pie – Four Hats and Frugal
  • Fresh Peach Pie – Coupon Cutting Mom
  • Award Winning Peach Pie – Vegging at the Shore
  • Fresh Peach Hand Pies – Giggles, Gobbles, & Gulps
  • Key Lime Pie – The Naughty Mommy
  • Strawberry Rhubarb Pie with Goat Cheese – Real: The Kitchen and Beyond
  • Classic Strawberry Pie – The Farm Girl Gabs
  • Fresh Strawberry Pie – Coupon Cutting Mom
  • Chocolate Covered Strawberry Pie – It’s a Keeper
  • Creeping Crust Fruit Pie – Jo-Lynne Shane

Non-Fruit Dessert Pie Recipes

  • Simple S’mores Pudding Pie – Girl Gone Mom
  • No Bake Caramel Pie – It’s a Keeper
  • Toasted Coconut Cream Pie – Coupon Cutting Mom
  • Mini Chocolate Frozen Yogurt Pie – A Musing Foodie
  • Peanut Butter Yogurt Pie – Girl Gone Mom
  • Butterfinger Pie – It’s a Keeper

Fall Pie Recipes

  • Pumpkin Pie Squares – How Does Your Garden Grow?
  • Healthy Pumpkin Pie – The Pistachio Project
  • Organic Sweet Potato Pie – Mom-Blog
  • Pecan Pie Cups – How Does Your Garden Grow?
  • Pecan Pie – Captain Fussybuckets

Savory Dinner Pie Recipes

  • Mashed Potato Pie – Souffle Bombay
  • Ham, Cheese & Broccoli Pie  – Souffle Bombay
  • Chicken Pot Pie Puffs – It’s a Keeper

Filed Under: Desserts, Home, Recipes Tagged With: desserts, pie, pie recipes

Mini Nutella Apple Pies + Avalon Bay Air Fryer Review

January 13, 2015 by Larisha Campbell 9 Comments

*Disclosure: We received the product(s) discussed in this post free of charge. Thoughts and opinions are 100% ours. Affiliate links may be contained in this post. We receive a small commission for purchases and thank you for helping us continue to run our site. 

Before we started eating healthy, we ate a ridiculous amount of fried foods.  Now, that really only happens when we have the occasionally fast food stop, which again, is rare. Just because it doesn’t happen often, doesn’t mean that we don’t miss it.  Trust me, we do.  Before learning about Avalon Bay, I didn’t even know that Air Fryer’s existed, but now that I’m in the know, I had to share this with you.
Almost anything that you would typically put inside a fryer, you can put inside of the Avalon Bay Air Fryer.  It makes for crispy chicken nuggets and fries, without the added grease and fat that you get from frying in a oil.  But additionally, you can use it as an amazing little oven and that’s just what I did to make these incredible mini Nutella Apple Pies.

Makes 6 pies in ramekins

Ingredients:
Crust:
1 1/2 cups flour
1/4 teaspoon salt
1 teaspoon organic sugar
1 stick unsalted butter, cold, diced into pieces
4-5 tablespoons ice cold water

Filling:
4 Granny Smith apples, peeled, cored, and finely chopped
Juice and zest from 1 lemon
2 1/2 tbsp organic sugar
2 tbsp flour
1/4 tsp nutmeg
1 tsp cinnamon
1/4 tsp salt
1/4 cup Nutella
additional butter
1 egg, beaten
cinnamon and sugar spice mix, divided

Directions:
In a bowl, combine the first three ingredients well.  Then, using your hands or pastry blender, add the butter into pea sized pieces form (this shouldn’t take longer than 5 minutes).  Drizzle in 4 tablespoons of ice water and mix until dough comes together.  DO NOT OVERWORK YOUR DOUGH.  If needed add the last tablespoon of water.  Form dough into a flat disk and wrap in plastic wrap.  Place in the fridge for 30 minutes.

While that is chilling, in a mixing bowl, combine all the filling ingredients except for the cinnamon and sugar spice mix.  Stir together until well combined.  Set aside until ready. 

Sprinkle flour on a flat surface and roll out the pie dough until it’s about 1/2 inch thick.  Press the ramekin in the dough lightly and using a pairing knife, cut out circles. You should have enough dough for 12 circles.* Place one circle of dough into the bottom of each ramekin and press up the sides of the dish.  Evenly divide the mixture between the six ramekins.  Top the mixture with a few small dots of butter.  Top with the other dough circle and seal the sides.  Using a pairing knife, gently cut 3 slits in the top, brush with an egg wash, and sprinkle on the cinnamon and sugar spice mix. 

Turn the dial to 350 degrees F on the Air Fryer** and cook for 30 minutes or until tops are crispy and golden brown. 

Cook’s Notes:
*You may have to re-roll the dough to get the 12 circles. 
**If you do not have an Avalon Bay Air Fryer, go buy one!  In the meantime, you can cook these in a traditional oven at 350 degrees F for 35-45 minutes.


So what were my thoughts about the Avalon Bay Air Fryer?

Right off the bat, I was excited at how easy it was to use and operate.  Everything is already set up for you right out of the box, just wash, and plug in, and it’s ready to use! I love not having to wait for my oven to preheat to cook something.  As soon as you turn the dial to the desire temperature, the Air Fryer is ready to go.  It also cooked much faster than the same food I cooked in the traditional oven. I also loved that it turns off automatically when the timer is finished.  No worrying that the heat is still running.  Speaking of it, as a mom of a small chid, it was great that the machine itself didn’t get overly hot.  Lastly, one of the best pros is that the basket and tray are dishwasher safe!

Cons – I haven’t honestly had time to plan around with it for a lot of different foods, but I do have two complaints. One, I wish the basket was a little bit bigger.  I was only able to fit two ramekins inside at a time and I know that’s because I was using a dish and it’s better when you can just dump everything in a basket; however, I wish it was big enough to at least fit four.  On that same note, I’m not entirely sure I’d love the size of the air fryer like I do if it had to be made bigger.  Two, I really wish the cord was retractable.  I hate cords and just feel like this would really help.  Lastly, I was scared to use anything with even a little oil because I didn’t feel like the manual explain that very well.

Here’s a short video of it in use!
 

Make sure you’re following them on Facebook!

 photo Signature1copy_zps8199a4b3.gif

Want even more ideas to cook in the Avalon Bay Air Fryer?  Check out these 9 awesome recipes made in the new Avalon Bay Air Fryer from these food blogger friends of mine!

Appetizers
Sriracha & Honey Tossed Calamari by Colleen of Souffle Bombay
Philly Cheesesteak Eggrolls by Sarah of Savoring the Good
Air Fryer Breaded Raviolis by Linda of Giggles Gobbles & Gulps
Coconut Shrimp with Spicy Marmalade Dipping Sauce by Kellie of The Suburban Soapbox
 
Sides
Lemony Green Beans by Heather of Real: The Kitchen and Beyond
Air Fryer Baked Parsley Potatoes from Courtney of Courtney’s Sweets
 
Entrees
Air Fryer One Dish Crustless Tomato & Onion Quiche from Lauryn of The Vintage Mom
BUY IT: 
You can purchase the Air Fryer on Amazon for $99.95 or directly at the Avalon Bay website
Use code— oilfree —-if purchasing on their website and it will give a $15.00 discount!
WIN IT: 
TWO lucky readers are going to win their own! Just fill out the Giveaway form below. This Open to US residents only. 18+ years old. Void where prohibited. One entry per household/IP Address/Name. 

a Rafflecopter giveaway

 photo banner3disclosure_zpsc87da3bd.jpg

Filed Under: Desserts, Home, Recipes

Apple Pie Cheesecake Recipe

October 21, 2012 by Larisha Campbell 20 Comments

As I was looking back on some of the recipes I have blogged about, I was shocked to realize that I had only posted one dessert recipe.  I’ll go ahead and throw it out there, that I’m not much of a baker.  While I would love to be, it just doesn’t always work out exactly as planned.  But I will be trying to whip up some great creations for you all in the future.

If you have been following my posts for awhile now, you may know that I have somewhat of a cheesecake obsession.  Two of my most favorite recipes I have shared with my fans are my NY Cheesecake Pancakes and most recently my Pumpkin Cheesecake Pancakes.  But apple pie cheesecake? It’s the best of both worlds!

Ingredients: 
1 box refrigerated pie crusts, brought to room temp according to the box

Topping: 
1 egg white
1 tbsp water
1 teaspoon sugar
1/2 teaspoon ground cinnamon

Filling: 
2 packages cream cheese, softened
1/2 cup sugar
1 tsp vanilla
1 whole egg
2 egg whites
4-6 apples, peeled and thinly sliced (6 1/2 cups)
1 1/2 teaspoons lemon juice
3 tablespoons brown sugar
4 tsps cornstarch
1 1/2 tsp ground cinnamon

**If using a 9in pie plate increase apples to 8 cups

Directions:
Heat oven to 400 degrees.  Cover a baking sheet with foil and place in oven.  Place one of the pie crusts in the bottom of an 8 inch pie crust covering the sides and bottom of the dish.  Cut off an excess crust hanging over the side.

In one bowl, beat 1 egg white and water together.  Set aside.  In separate bowl, mix 1 tsp sugar and 1/2 tsp ground cinnamon together.  Set aside.

In a large bowl, add cream cheese, 1/2 cup sugar, and vanilla and beat on high with mixer until smooth.  Add   1 egg and 2 egg whites and beat in to cream cheese mixture.  Make sure to scrape sides to get everything combined. Pour into pie dish on top of crust.

Toss apples with lemon juice.  Add brown sugar, cornstarch and 1 1/2 tsp cinnamon and stir together until well combined.  Place apple mixture on top of cream cheese mixture.

Unroll second pie crust onto lightly floured surface and using a cookie cutter cut out shapes and arrange on top of apple to cover most of the filling.  **The original recipe calls for an apple cookie cutter; however, I don’t have one of those, so I used pumpkins to fit in with the season 🙂

Brush egg white mixture over shapes, then top by sprinkling on cinnamon and sugar mixture.

Cover pie with foil and place in oven on top of foil-lined cookie sheet. Bake for 25 minutes.  Remove foil and bake for an additional 25-30 minutes until crust is golden brown.  Let cool down on a wire rack, then put in fridge for 6 hours minimum.  Should be served cold.  Store leftovers in fridge.

****This was my first time making this or **gasp** any pie for the matter.  The taste was amazing and I will be making it again; however, I would change one thing in particular.  I would add half the cream cheese filling, half apples, remaining cream cheese, then top with apples. Simply because I would have preferred everything mixed together in layers. 

signature button

Filed Under: Desserts, Home, Recipes Tagged With: cheesecake, desserts, recipes

Homemade Oat Flour

July 26, 2012 by Larisha Campbell 2 Comments

Anyone that’s close to us, knows that we try to eat healthy.  While we are not extreme by any means, we just try to figure out ways that will help us eat healthier little by little.  Andrew loves to work out (I try to join him as much as possible) which in his case means that he wants to get extra protein in throughout the day.  We’ve bought protein bars before and tried many different kinds, however, to both of us, they taste chalky most of the time, which isn’t really appetizing (at least to us it’s not).
He recently found a recipe for Pumpkin Protein bars (Look for the post soon) but it called for oat flour.  We have a few types of flour here, but oat flour wasn’t one of them.  After doing a little research, I found that oat flour is literally just grounded oats. So while I won’t call this a recipe, hopefully you get a nice little cooking tip today 🙂
You need to use cooking oats, not the instant kind.  We used steel-cut oats.
Place the oats in a blender or food processor.  The measurement is exactly equal.  So if you want one cup of oat flour, use one cup of oats.

Blend until fine flour like powder.

Use in recipe.

That’s literally all there is too it!

It’s really great in these oatmeal protein pancakes!

signature button

Filed Under: Desserts, Home, Recipes Tagged With: recipes

Homemade Poptarts

July 26, 2012 by Larisha Campbell 2 Comments

The theme of my baby shower was Going to POP. We made all the food ourselves and one of my favorite things we made was Homemade Poptarts. This was one of the easiest things I’ve ever made and I will definitely be making them again in the future.
First, lay out one of the the uncooked 9in pie crusts.

Try to smooth out into as much of a rectangle as you can get. I used a pizza cutter to get a better shape.

Cut each pie crust into 24 squares. 4 rows, 6 columns. You can make them bigger than this, it’s just the POPable size we went with.

Place between 1/2 and 1 tablespoon filling in the center of half of the squares.

Place another square on top and press down the sides using a fork.

Bake according to box directions.  Usually 8-10 minutes. Some of the filling came out, but we didn’t mind.

Once they come out, place on cooling rack and let cool.  Once cool, drizzle icing and sprinkles on top.

0 from 0 votes
Print
Homemade Poptarts
Author: Larisha Campbell
Ingredients
  • 9 in Store Bought Rolled Pie Crust
  • 21 oz can Pie Filling any filling (we used apple and cherry)
  • Powdered Sugar Glaze 3/4 cup powdered sugar, 1 tablespoon water, and 1 teaspoon vanilla
  • Sprinkles
Instructions
  1. Roll pie crust into a rectangle. Use pizza cutter to make shape.
  2. Cut dough into 24 squares (4 rows, 6 columns). *Essentially this can be any size you want, but this is the perfect size for kids or parties.
  3. Lay one side on a cool cookie sheet and spoon between 1/2 and 1 tablespoon of pie filling on each square.
  4. Top with another square and use a fork to press the sides down to seal each side together.
  5. Bake at the temperature suggested on the pie crust box (usually 8-10 minutes) or until golden brown.
  6. Remove from oven and transfer to a cooling rack.
  7. While they are cooling, mix together 3/4 cup Powdered Sugar, 1 tablespoon water, and 1 teaspoon vanilla to make the glaze.
  8. Using a pastry bag with a very small tip or a ziploc bag with a small hole cut, drizzle the glaze over each of the poptarts.
  9. Top with sprinkles and serve.
Tips:
*Each 9in pie crust will make approximately 24-26 pops.
*Each can of pie filling is enough for 2- 9in pie crusts.
*The glaze on top can be made with either milk or water.  Water will allow you to not have to refrigerate leftovers (or use the next day). If you use milk you have to refrigerate. We used water and put them on a plate, wrapped in foil, and they tasted great the next day.
WHAT FLAVOR PIE FILLING WOULD YOU USE??
signature button

Filed Under: Breakfast, Desserts, Home, Recipes Tagged With: breakfast, desserts, recipes

  • « Previous Page
  • 1
  • …
  • 5
  • 6
  • 7


We're Parents is all about cooking and traveling our way through imperfect parenting. Learn More

SUBSCRIBE TO OUR WEEKLY NEWSLETTER & GET PARENT & ME COLORING SHEETS

Connect With Us

We're Parents is a unique mom and dad natural parenting blog focusing on topics such as breastfeeding, babywearing, and car seat safety. You'll also find Delicious recipes, inspired travel recommendations, and more as you journey with us through parenting. Learn More…

VIEW OUR PRIVACY POLICY

Even More Recent Posts

a black and white photo of a curly haired african american woman in a sweater holding a new born baby while standing up.

We’re Parents is a participant in the Amazon Services LLC Associates Program, an affiliate advertising program designed to provide a means for sites to earn advertising fees by advertising and linking to amazon.com

Copyright © 2026 · Foodie Pro Theme by Shay Bocks · Built on the Genesis Framework · Powered by WordPress

Rate This Recipe

Your vote:


A rating is required
A name is required
An email is required