We're Parents

  • Home
  • About Us
    • About Us
    • Privacy Policy
    • Contact Us
    • Disclosures
    • Media Kit
  • Parenting
    • Pregnancy and Postpartum
    • Breastfeeding
    • Car Seat Safety
    • Mental Health
    • Babies
    • Toddlers
    • School Age
    • Older Kids
    • Holiday Crafts & More
    • Green Living
  • Recipes
    • Breakfast
    • Lunches
    • Dinner
    • side dishes
    • Crockpot
    • Desserts
    • Lactation Recipes
    • Snacks
    • The Seasoned Kids (Recipes by Kids)
  • Travel
    • Kid Friendly Outings
    • Restaurants
    • Travel Tips

Homemade BBQ Sauce

May 19, 2024 by Larisha Campbell 9 Comments

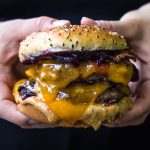
This homemade BBQ sauce recipe is quick and easy to make. You’ll never want to buy another bottle of Barbecue sauce when you realize how to make BBQ sauce is so easy.

homemade bbq sauce 

You may be wondering why you should make your own homemade BBQ sauce when it seems cheaper and easier to just buy at the store.
The truth is, your taste buds deserve it.
Now, while it CAN be more expensive, it doesn’t have to be.  And yes it is faster to buy at the store, but this recipe isn’t complicated and a child older than 2 can definitely help whisk all this together at the end.
The real focus though is that:
  • You never have to worry about running out – it’s always available to make at home
  • You know exactly what ingredients are going into it
  • It tastes SO MUCH BETTER than ANYTHING store bought
So if you’re ready to make your taste buds happy then you’re in the right place. Also, after we make, we store in glass containers in the fridge.

how to make bbq sauce

How can you make Homemade BBQ Sauce?

A homemade BBQ sauce recipe isn’t difficult.

The base is ketchup. Use a salt-free ketchup for even lower sodium. You mix in apple cider vinegar, brown sugar, honey, and maple syrup. The apple cider vinegar helps aid in the sweetness that is being heightened with the other sweeteners.

Then, to give that savory taste of the best BBQ sauce you’ve tried, you add in spices.  We add in garlic and onion powders, smoked paprika, black pepper, chili powder, and ground cinnamon.

Stir everything together and you’re done.  This easy BBQ sauce is so simple that you’ll wonder why you haven’t done it before.

easy bbq sauce recipe

How to Make BBQ Sauce?

4 from 2 votes
Print
Homemade BBQ Sauce
Prep Time
5 mins
Total Time
5 mins
 

This homemade BBQ sauce recipe is quick and easy to make. You'll never want to buy another bottle of Barbecue sauce when you realize how to make BBQ sauce is so easy.

Course: Condiments
Cuisine: American
Servings: 11
Calories: 69 kcal
Author: Larisha Campbell
Ingredients
  • 1 cup ketchup
  • 1/4 cup apple cider vinegar
  • 1/3 cup brown sugar, packed
  • 2 1/2 tbsp maple syrup
  • 1/2 tsp ground cinnamon
  • 1/2 tsp garlic powder
  • 1/2 tsp onion powder
  • 1/2 tsp smoke paprika
  • 1/2 tsp cracked black pepper
  • 1/2 tsp chili powder
Instructions
  1. Place all ingredients in a bowl.  

  2. Mix until well combined. 

  3. Store in an air tight container in the fridge up to 3 months.

Recipe Notes

For heated sauce: Place all ingredients in a skillet or pan. Mix together until well combined. Turn heat on low and cook until heated through. 

Nutrition Facts
Homemade BBQ Sauce
Amount Per Serving (2 tbsp)
Calories 69
% Daily Value*
Sodium 202mg9%
Potassium 85mg2%
Carbohydrates 17g6%
Sugar 15g17%
Vitamin A 195IU4%
Vitamin C 0.9mg1%
Calcium 12mg1%
Iron 0.2mg1%
* Percent Daily Values are based on a 2000 calorie diet.

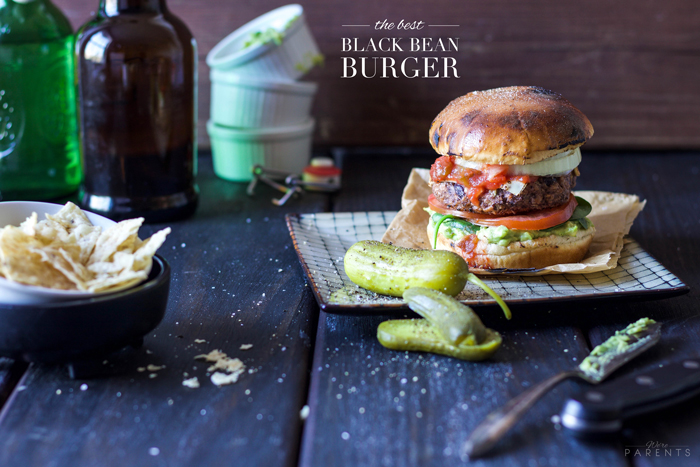
What can I use Homemade BBQ Sauce for?

Possibilities are endless for how to use this easy bbq sauce recipe! Some of our favorite ways include:

  • Pizza (instead of red sauce)
  • Sandwiches
  • Dip for nuggets or fries
  • Grill Season (put it on everything!)

This post was originally posted on 7/14/2012. Same great recipe, but our photography has greatly improved. Old images below for laughs!

homemade barbecue sauce recipehow to use bbq sauce
quick bbq sauce recipe
simple bbq sauce recipe

Filed Under: Dinner, Home, Recipes Tagged With: bbq, dinner, recipes, sauce

Chocolate Peanut Butter Banana Lactation Boosting Milkshake

May 17, 2024 by Larisha Campbell 59 Comments

If you’re looking for an amazing way to increase milk production, then this Chocolate Peanut Butter Banana Lactation Boosting Milkshake is the most delicious way!

Whether you are struggling with low supply or you are just looking for a really yummy way to boost your milk production, then this Chocolate Peanut Butter Banana Lactation Boosting Milkshake is going to be exactly what you need.  I personally used this when breastfeeding both of my daughters and it was such a great way to increase production.
When I was pregnant, I knew one thing–I was going to breastfeed.  That’s all I knew. I knew it was more natural and the most economical choice as well since I’m a stay at home mom. I set a goal for 6 weeks!
Why no one in my life told me how difficult it was going to be was beyond me.  We did great in the hospital, and then It seems like the moment we walked into our house, hell broke loose.
IT. WAS. HARD. Y’ALL!!!
We did have a successful breastfeeding journey. I nursed both of our girls for 3 and 4 years, respectively. And, while we’ve had our ups and down, there were a lot more ups than there were downs.
Luckily, I was super grateful for lactation recipes. They definitely made me feel more confident in succeeding.

Watch how to make this chocolate lactation smoothie: 

Do Lactation Recipes Work?

One of the things I hear most from people who reach out to me about breastfeeding is that they are scared they won’t produce enough milk.  And my answer is always, “it’s very rare that a mom actually have production issues, however, you can take precautions and be proactive in helping your supply.” I’ve been working to create some great, easy recipes to share so moms have great options when they need them.
So how can this recipe help with lactation?
Oats and Flax are known help boost milk production, while the peanut butter is a great protein to make sure you are getting the calories you need while satisfying your hunger since you are probably stuck on a couch nursing a baby.

**Note:  If you are truly concerned about your milk production, please reach out to an IBCLC and/or your local La Leche League. You can also read our post about Lactation Boosting Foods to increase your milk supply. 

Do I have to be lactating to enjoy this milkshake?

I get this question a lot when some moms see this post shared in a Facebook group or on Instagram.  They love the combo, but they either didn’t or are no longer nursing.  The good news ….No! You don’t.

If you look at the ingredient list, there is nothing in there that the average person couldn’t enjoy.  It just so happens that the combination of ingredients seem to help lactating mothers.

In fact, Andrew has drank this milkshake on more than a few occasions. I’ve had it not breastfeeding.  And it’s a great one to give to your little ones, since it’s all natural ingredients.  Even though there’s a little bit of chocolate, it’s natural cocoa powder and we don’t use any added sweeteners.

What oats are best for lactation?

We prefer old fashioned rolled oats over quick oats.  While both are whole grains and the same product, old fashioned oats have not been processed, thus are more in their true form.

You can definitely use quick oats if you have them on hand and do not have old fashioned oats, but we do prefer the later.

Also, it’s important to note that you should not use instant oats in this recipe.  They will soak up the milk too quickly and you will end up with something more like overnight oats (delicious, but not what you want for this recipe).

Helpful Tips for this Chocolate Peanut Butter Banana Lactation Boosting Milkshake: 

  • If you do not want a “grainy” lactation smoothie, then add the oats and flax seeds first and pulse to grind into a fine powder first.  Then, add in the remaining ingredients and blend thoroughly.
  • If you are nut free, you can sub with sunbutter, but the taste will be different.  We find sunbutter a little more powerful in flavor than peanut butter, so adjust the level of cocoa or even add a splash of maple syrup.
  • Other nut butters, besides peanut butter, may also be used.
  • I’ve made it with both fresh and frozen bananas.  Both are great.  You may need to add a bit more ice with a fresh banana to make it as thick.
  •  100% Cacao is slightly bitter since there are no sweeteners. If you are looking for a sweeter taste, add 1/2 to 1 full tablespoon maple syrup.

What are other lactation recipes that I should try?

Once you try this delicious lactation smoothie, we are sure that you are going to be looking for other delicious recipes to try!  Good news, is that we have a few that are too die for.  Some, maybe even better than this recipe (is that even possible!?) Here’s some ideas:

  • Lactation Energy Bites
  • Peanut Butter Apple Pie Lactation Smoothie
  • No Bake Lactation Bars
  • Strawberry Coconut Cashew Lactation Smoothie
  • Delicious Lactation Cookies

We hope that you love these recipes!

4.91 from 11 votes
Print
Chocolate Peanut Butter Banana Lactation Boosting Milkshake
Prep Time
5 mins
Total Time
5 mins
 

This Chocolate Peanut Butter Banana Lactation Boosting Milkshake is the most delicious easy lactation recipe that you need! Drink one everyday! 

Course: Breakfast, Dessert
Cuisine: Lactation
Keyword: lactation recipes
Servings: 1 milkshake
Calories: 546 kcal
Author: Larisha Campbell
Ingredients
  • 1/4 cup old fashioned oats
  • 1 large banana, frozen preferred, cut into chunks
  • 3/4 cup oat or soy milk
  • 2 tbsp natural peanut butter
  • 2 tablespoon 100% cacao powder
  • 1 tbsp ground flax seed (up to 2 tbsp if you are really looking to boost milk production)
  • 2 cups ice
Optional Toppings
  • Whipped Cream
  • Sliced Bananas
  • Chocolate Drizzle
Instructions
  1. For a high speed blender: Add all ingredients in and blend until smooth.

  2. For a standard blender: In a blender, add the oats and give it a quick pulse. Add remaining ingredients, except ice, and blend until well combined. Add 2 cups of ice until well blended. 

  3. Enjoy with a thick straw or a spoon!

  4. *Feel free to skip the ice if you just want a smoothie.

Recipe Notes

**Nutritional facts are just estimates. Please utilize your own brand nutritional values to double check against our estimates. 

Nutrition Facts
Chocolate Peanut Butter Banana Lactation Boosting Milkshake
Amount Per Serving (1 milkshake)
Calories 546 Calories from Fat 216
% Daily Value*
Fat 24g37%
Saturated Fat 5g31%
Polyunsaturated Fat 7g
Monounsaturated Fat 10g
Sodium 121mg5%
Potassium 1036mg30%
Carbohydrates 77g26%
Fiber 14g58%
Sugar 34g38%
Protein 17g34%
Vitamin A 456IU9%
Vitamin C 12mg15%
Calcium 337mg34%
Iron 5mg28%
* Percent Daily Values are based on a 2000 calorie diet.


**The pictures below were the original pictures for this Chocolate Peanut Butter Banana Lactation Boosting Milkshake which you may have seen floating around Pinterest.  It’s the same recipe, we’ve just gotten a lot better at photography!
Originally publish May 2014. Updated in 2024.

Filed Under: Breastfeeding, Home, Lactation Recipes, Parenting, Recipes Tagged With: breastfeeding, lactation, lactation recipe, lactation smoothie, postpartum, recipes

Peanut Butter and Jelly Burger (Vegan Option)

May 3, 2019 by Larisha Campbell Leave a Comment

Don’t question the combination! You must try this Peanut Butter and Jelly Burger! The unlikely pairing will have you wondering why you never tried this peanut butter and jelly recipe before! 

peanut butter and jelly burger

Disclosure: This post may contain affiliate links.

I know what you’re thinking.  Peanut Butter and Jelly Burger? I’ve officially lost my daggone mind.  Who in the world pairs a burger and peanut butter and jelly sandwich together. You may be thinking I’ve gone off my rocker as my great-grandma would say. But just hear me out, okay?

First, you may be partly correct about loosing my mind. Being a stay-at-home, homeschooling mom who runs a business is already partly insane. But this peanut butter and jelly burger recipe is not one of those mind-loosing moments.

peanut butter and jelly burger recipe

A few years ago, we did a Chew Philly Food Tour in Manayunk, PA. One of the stops was at a restaurant called Lucky’s Last Chance and the tasting there was of an award-winning peanut butter and jelly burger.

Andrew, being the very picky one in the relationship, said there was no way he was trying it when we got there. I was sort of weirded out, but I’m pretty open to at least trying new things.  

Fast forward, and we actually all did try it and loved it.

pbj burger recipe

Peanut Butter and Jelly Burger Recipe

We loved it so much that we decided to recreate it. The burger recipe at Lucky’s was made with a creamy peanut butter, white American cheese, bacon, and served with grape jelly on the side. They describe the peanut butter and jelly burger as an unexpectedly delicious childhood favorite with an adult twist and they couldn’t be more accurate.

This delicious burger recipe combine a seeded bun with peanut butter and jelly, burgers, cheese, and bacon. We really love to use pepper flavored bacon or any type of maple flavored bacon.  Really thick cuts of bacon work great with this recipe. 

peanut butter jelly burger

I’m having guests over, one who is plant based/vegan, how can I make this recipe for them?

Obviously grape jelly and peanut butter are usually vegan friendly.  It’s pretty easy to find a vegan hamburger bun, so you’re on the way to starting to have a meal that everyone can enjoy.  For the patty, you can try purchasing a plant based meat patty like Beyond Meat or even Aldi’s plant based version.  Our favorite dairy free cheese is Violife or Chao.  There are also vegan bacon brands like Litelife.   Once you make these few simple swaps. you can have a meal for everyone. 

What sides should I serve with a Peanut Butter and Jelly Burger?

There are endless possibilities of what you should serve with burgers.  Here are some of our favorite things: 

  • The Best Homemade French Fries
  • Spicy Corn on the Cob
  • Zesty Pasta Salad 
  • Roasted Asparagus with Mushrooms
  • Broccoli Tater Tots

peanut butter and jelly recipes

Pin this Peanut Butter and Jelly Burger Recipe for later:

how to make a peanut butter and jelly burger

4.3 from 24 votes
Print
Peanut Butter and Jelly Burger
Prep Time
5 mins
Cook Time
6 mins
Total Time
11 mins
 

Don't question the combination! You must try this Peanut Butter and Jelly Burger! The unlikely pairing will have you wondering why you never tried this peanut butter and jelly recipe before! 

Course: Main Course
Cuisine: American
Servings: 4 burgers
Calories: 717 kcal
Author: Larisha Campbell
Ingredients
  • 1.5 lbs 80/20 ground beef (can you vegan patties or vegan meat to make burgers)
  • salt and pepper to taste
  • 4 slices American cheese (use vegan cheese for vegan option)
  • 4 tbsp grape jelly
  • 4 tbsp creamy peanut butter
  • 4 pieces cooked bacon (use vegan bacon)
  • 4 hamburger buns
Instructions
  1. Divide the meat into 4 equal portions. Shape the beef into 4 patties, slightly larger than your buns. 

  2. Season each patty with salt and pepper to taste. 

  3. Cook burgers on a grill over medium heat for 2-4 minutes on each side or until desired doneness. 

  4. Place cheese on top on burgers to melt, then remove from grill. 

  5. Spread 1 tbsp of jelly on one side of the bun and 1 tbsp peanut butter on the other side of the bun. 

  6. Repeat with remaining buns.

  7. Add burgers to buns and put one slice of bacon, broken in half, on top of each. 

  8. Serve immediately. 

Recipe Notes
  • Recipe makes 4 single patty burgers. To make burgers shown in pictures, double the patties, everything else remains the same. 
  • Nutritional facts are just estimates. Please utilize your own brand nutritional values to double check against our estimates. 
Nutrition Facts
Peanut Butter and Jelly Burger
Amount Per Serving (1 burger)
Calories 717 Calories from Fat 378
% Daily Value*
Fat 42g65%
Saturated Fat 15g94%
Cholesterol 137mg46%
Sodium 764mg33%
Potassium 703mg20%
Carbohydrates 39g13%
Fiber 2g8%
Sugar 14g16%
Protein 43g86%
Vitamin A 200IU4%
Vitamin C 2.3mg3%
Calcium 330mg33%
Iron 5.6mg31%
* Percent Daily Values are based on a 2000 calorie diet.


This post was originally pulished on 4/5/18.  Updated on 5/3/19.

Filed Under: Dinner, Home, Recipes Tagged With: burgers, dinner, recipes

30 Drool-worthy Dessert Truffle Recipes

May 2, 2019 by Larisha Campbell 1 Comment

We’re sharing 30+ delicious dessert truffle recipes that the entire family will love! Perfectly sweet, bite sized treats are great for parties, holidays, gifts, and more!

If you have never had a truffle, you may not know that you are completely missing out on a delicious treat.  These little dessert creations are perfect for any sweet tooth craving, parties, and even gifts! 

What are Dessert Truffles?

Traditionally, a dessert truffle is actually a chocolate truffle.  It’s originally made with a chocolate ganache center and then it’s coasted in more chocolate or cocoa powder, sometimes even nuts. Yes, you read that right — chocolate on chocolate on chocolate.  Sounds heavenly, right?  I think so too.

Usually, that are circular in shape.  Not to be confused with truffles that are actually edible fungi and very expensive. 

While traditionally they are dark or milk chocolate, many people have gone on to create dessert truffles that are made from white chocolate, have caramel or liqueur centers, and more. The possibilities are truly endless. 

Are truffles just cake balls?

No. While they are both circular in shape and sometimes coating in a chocolate coating, the inside of truffles are not made from a balled up cake center.  They are both delicious treats, but they are not the same thing. 

How do you store chocolate truffles?

Unless noted, chocolate truffles and other dessert flavored truffles are usually stored in an air tight container and not refrigerated. Putting in an air tight container is important because chocolate can take on smells of things around it and you don’t want your sweet treats tasting like tonight’s taco dinner! 

How long do chocolate truffles last?

Well, that completely depends on the type of person you are! Truffles are usually good for 1 to 2 weeks if store properly. However, that’s only if they can actually last that long in your house!

Chocolate Truffles

10+ of our recipes are chocolate truffles. We are including so many chocolate dessert truffles because that is what they are traditionally made from.

Image for 101: ganache | Sheri Silver - living a well-tended life... at any age

101: ganache | Sheri Silver - living a well-tended life... at any age

Photo Credit: sherisilver.com

Classic ganache filled chocolate truffles.

Image for Oreo Bites - Souffle Bombay

Oreo Bites - Souffle Bombay

Photo Credit: soufflebombay.com

Super easy, 3 ingredient chocolate cookie truffle recipe

Image for Bittersweet Chocolate Champagne Truffles

Bittersweet Chocolate Champagne Truffles

Photo Credit: www.bakepedia.com

Chocolate and Champagne truffles, perfect for romantic desserts.

Image for Coffee and Cardamom Truffles

Coffee and Cardamom Truffles

Photo Credit: theviewfromgreatisland.com

Easy Coffee and Cardamom Truffles ~ this easy homemade candy is a decadent combination of dark chocolate, cardamom, and coffee, reminiscent of the flavors of Turkish coffee!

Image for Chocolate Truffle Recipe Stuffed with Peanut Butter

Chocolate Truffle Recipe Stuffed with Peanut Butter

Photo Credit: www.foodfaithfitness.com

This healthy chocolate truffle recipe is quick and easy, and has a surprise ingredient to keep them healthy! It has a yummy banana chip coating, and a peanut butter filling.

Image for Brigadeiros - Chocolate Truffle Candies from Brazil, Negrinhos

Brigadeiros - Chocolate Truffle Candies from Brazil, Negrinhos

Photo Credit: toriavey.com

A Brazilian take on truffles. Brigadeiros are truffle-like confections made from cocoa or chocolate powder and condensed milk.

Image for Salted Chocolate Stout Truffles

Salted Chocolate Stout Truffles

Photo Credit: thebeeroness.com

These chocolate truffles have beer in them so great for Father's Day for dads that like beer.

Image for Coconut Cream Truffles

Coconut Cream Truffles

Photo Credit: www.crazyforcrust.com

Deliciously sweet coconut truffles rolled in chocolate and topped with more coconut.

Image for Eggnog Truffles

Eggnog Truffles

Photo Credit: www.tasteandtellblog.com

White chocolate truffles are infused with the flavors of eggnog. Perfect for Christmas gifts!

Image for M & M's Crispy Are Back!

M & M's Crispy Are Back!

Photo Credit: sherisilver.com

White Chocolate filled with M&Ms and rolled in sprinkles

Image for Chocolate Truffle Recipe with Coconut {Healthy}

Chocolate Truffle Recipe with Coconut {Healthy}

Photo Credit: www.foodfaithfitness.com

This quick and easy, chocolate truffle recipe tastes like an Almond Joy but is made with avocado, and is naturally sweetened!

Image for Chocolate Avocado Truffles

Chocolate Avocado Truffles

Photo Credit: www.crazyforcrust.com

Healthier spin on a traditional chocolate truffle by making the filling with avocado.

Fruit Flavored Truffle Recipes

Chocolate and Fruit flavors, like raspberry, merry so well together. Here's a few fruity flavored truffle recipes.

Image for Raspberry Chocolate Truffles & Drunken Cherries {Party Series 6}

Raspberry Chocolate Truffles & Drunken Cherries {Party Series 6}

Photo Credit: www.thekitchenismyplayground.com

Delicious chocolate treats with a raspberry liqueur filling.

Image for Raspberry Surprise Chocolate Truffles

Raspberry Surprise Chocolate Truffles

Photo Credit: www.tasteandtellblog.com

Raspberry truffles again but with a surprise! Check it out.

Image for Blueberry Cookie Dough Almond Flour Truffles with White Chocolate

Blueberry Cookie Dough Almond Flour Truffles with White Chocolate

Photo Credit: foodal.com

Just 6 ingredients needed for this explosion of white chocolate and blueberry!

Nut Butter Truffle Recipes

These delicious truffle recipes swap out the chocolate center for nut butter flavored truffles. Still an awesome treat!

Image for Paleo Almond Butter Truffles

Paleo Almond Butter Truffles

Photo Credit: agirlworthsaving.net

Just 4 ingredients to make these almond butter filled treats.

Image for White Chocolate Peanut Butter Truffles

White Chocolate Peanut Butter Truffles

Photo Credit: www.52kitchenadventures.com

White Chocolate plus peanut butter is a match made in heaven for so many sweet and savory loving fans.

Image for Chocolate-Covered Peanut Butter Balls ("Buckeyes")

Chocolate-Covered Peanut Butter Balls ("Buckeyes")

Photo Credit: twohealthykitchens.com

These peanut butter balls are swapped out for milk chocolate instead of white. Try both!

Image for Peanut Butter Rice Crispy Treat Truffles

Peanut Butter Rice Crispy Treat Truffles

Photo Credit: www.chocolatemoosey.com

Sort of cookie dough like, this opt for rice crispy treat centers! Perfect crunch!

Cookie Dough Truffle Recipes

These delicious truffle recipes forgo the chocolate ganache center and opt for yummy cookie dough instead.

Image for Chocolate Chip Cookie Dough Truffles (or Pops!)

Chocolate Chip Cookie Dough Truffles (or Pops!)

Photo Credit: www.thekitchenismyplayground.com

Like eating cookie dough better than the actual baked cookies? Then these Chocolate Chip Cookie Dough Truffles are for you!
Read more at https://www.thekitchenismyplayground.com/2011/06/chocolate-chip-cookie-dough-truffles-or.html#iePl8UgMmjJXTBwc.99

Image for Chocolate Chip Banana Cookie Dough Truffles

Chocolate Chip Banana Cookie Dough Truffles

Photo Credit: www.healthysweeteats.com

Cookie dough lovers will love these truffles; they're sweetened with banana and there's no worrying about raw egg!

Image for Samoas Truffles

Samoas Truffles

Photo Credit: www.52kitchenadventures.com

Girl Scout lovers unite! These samoas cookie filled truffle are delicious.

Vegan Truffle Recipes

Just because you are plant based doesn't mean that you can't enjoy delicious chocolate filled desserts. All of these recipes do not contain dairy, egg or non-plant based foods.

Image for Rum Cardamom Fig Chocolate Truffles (Vegan)

Rum Cardamom Fig Chocolate Truffles (Vegan)

Photo Credit: www.theroastedroot.net

Perfectly sweetened chocolate truffles with liqueur filling.

Image for Vegan Dark Chocolate & Orange Truffles

Vegan Dark Chocolate & Orange Truffles

Photo Credit: zestfulkitchen.com

Give a gift that’s really from the heart, VEGAN DARK CHOCOLATE TRUFFLES.

Image for Vegan Plum Truffles

Vegan Plum Truffles

Photo Credit: zestfulkitchen.com

This recipe uses dried plums as the base instead of heavy cream, butter and sugar. It is a great swap while maintaining a lot of flavor.

Image for Healthy Coconut Date Truffles – Sugar-Free, Gluten-Free, Raw, Vegan Energy Balls!

Healthy Coconut Date Truffles – Sugar-Free, Gluten-Free, Raw, Vegan Energy Balls!

Photo Credit: www.melaniecooks.com

Healthy truffles? No kidding! Cocoa + coconut, naturally sweetened with dates – it’s like a miracle! They taste AMAZING!

Image for No Bake Pumpkin Truffles {Dairy Free!}

No Bake Pumpkin Truffles {Dairy Free!}

Photo Credit: www.snackinginsneakers.com

Perfect fall treat! Delicious pumpkin filled truffles.

Image for Vegan Chocolate Truffles (GF)

Vegan Chocolate Truffles (GF)

Photo Credit: www.rhiansrecipes.com

These Vegan Chocolate Truffles are the most delicious treat – they’re melt-in-your-mouth silky, super creamy and perfectly sweet.

Image for Vegan White Chocolate Truffles

Vegan White Chocolate Truffles

Photo Credit: www.rhiansrecipes.com

These Vegan White Chocolate Truffles are velvety, creamy and perfectly sweet! They make the best pretty and elegant treat!

This post was originally published on 5/2/2015 and updated on 5/2/2019.

Filed Under: Desserts, Home, Recipes Tagged With: desserts, recipes

Decadent Caramel Apple Sauce (Vegan Option)

April 5, 2019 by Larisha Campbell 2 Comments

Somewhere between caramel apple dip and indulgent fruit sauces you have this decadent caramel apple sauce recipe. Once you make it you’ll want to pour it over cheesecakes, stuff into doughnuts, drizzle over cupcake frosting, spread on pancakes, and more. 

caramel apple sauce recipe

Growing up in West Virginia there weren’t many things to do. Every year though there was a small carnival that came to our tiny town. It was there that I discovered my love for caramel apples.  It was one of the few times that we were allowed to get two treats when we went somewhere – caramel apples and cotton candy. Of course, there came a stipulation — you had to eat the actual apple if they were going to buy one. I used to try to figure out how to eat the entire middle of the apple and leave the caramel and nuts until the end. Unfortunately, I was never great at that!

how to make caramel apple sauce

I’ve never outgrown my love of caramel apples. However, as I’ve grown older, I have figured out that my true love is not necessarily with the apples, but with the caramel sauce. Andrew and our girls share this love with me too. I’ll never grown out of my fondness for caramel apples or caramel, but this caramel apple sauce recipe is my current love obsession.

What is caramel apple sauce?

Caramel Apple Sauce is a simple caramel sauce recipe that has been cooked with actual apples and apple pie spice. After cooking down, the apples are mashed into the liquid sauce. You can either leave the tiny bits inside or it can be strained to remove any chunks. The end result is this decadent caramel apple sauce that will leave your mouth watering for more.

caramel sauce with apples

What are the ingredients in caramel apple sauce?

While this is a truly decadent caramel apple sauce, it’s an easy caramel sauce. The ingredients include:

  • apples
  • apple cider
  • unsalted butter
  • apple pie spice
  • brown sugar
  • water
  • lemons.

It’s proof that you don’t need a ton of fancy ingredients to have a truly remarkable recipe.

decadent caramel apple sauce

Can I make this a vegan caramel apple sauce?

The only ingredients in this recipe that make it not vegan are the butter.  You can simply swap that ingredients with a vegan approved butter (we like Earth Balance Soy free) and proceed with the recipe as called for.

How can you use caramel apple sauce?

Try this amazing caramel apple sauce recipe these these Caramel Apple Cheesecake Baked Apples!

caramel cheesecake baked apples

Or spread on this delicious Caramel Apple Cheesecake!

caramel apple cheesecake

How do you make caramel apple sauce?

5 from 1 vote
Print
Caramel Apple Sauce
Prep Time
5 mins
Cook Time
20 mins
Total Time
25 mins
 

Somewhere between caramel apple dip and indulgent fruit sauces you have this decadent caramel apple sauce recipe. Once you make it you'll want to pour it over cheesecakes, stuff into doughnuts, drizzle over cupcake frosting, spread on pancakes, and more. 

Course: Dessert
Cuisine: American
Keyword: dessert
Servings: 12
Calories: 78 kcal
Author: Larisha Campbell
Ingredients
  • 2 fuji apples (or other sweet variety), peeled and diced small
  • 1 lemon
  • 3/4 cup water, divided
  • 1/2 cup apple cider
  • 4 tbsp unsalted butter (use vegan or dairy free if needed)
  • 1/2 cup brown sugar
  • 1 tbsp cinnamon
  • 1/2 tbsp apple pie spice
  • 1/8 tsp nutmeg
Instructions
  1. In a bowl, combine the brown sugar, cinnamon, apple pie spice, and nutmeg.  Set aside. 

  2. In a bowl, combine the diced apples and juice from one lemon. 

  3. In a medium saucepan, add 1/2 cup of water over medium heat. 

  4. Once water begins to boil, add apple and lemon mixture. Occasionally stirring. 

  5. After about 10 minutes, the water should be almost evaporated and the apples beginning to break down.  Add another 1/4 cup water. 

  6. After that 1/4 cup water almost evaporates, add the cider. Stir to combine. 

  7. Let cook for two minutes, then add the butter.

  8. After butter has melted, add the brown sugar mixture. 

  9. Let cook, stirring often, until brown sugar has completely melted and caramel apple sauce is well combined. 

Recipe Notes

If any chunks remain, you can use a masher to make them smaller. 

**Nutritional facts are just estimates. Please utilize your own brand nutritional values to double check against our estimates. 

Nutrition Facts
Caramel Apple Sauce
Amount Per Serving (2 tbsp)
Calories 78 Calories from Fat 27
% Daily Value*
Fat 3g5%
Saturated Fat 2g13%
Cholesterol 10mg3%
Sodium 4mg0%
Potassium 34mg1%
Carbohydrates 11g4%
Sugar 10g11%
Vitamin A 120IU2%
Vitamin C 4.9mg6%
Calcium 19mg2%
Iron 0.2mg1%
* Percent Daily Values are based on a 2000 calorie diet.

Pin this Caramel Apple Sauce Recipe for later how to make caramel apple sauce recipe

This post was originally published on 3/9/2018. Updated on 4/5/19.

Filed Under: Desserts, Home, Recipes Tagged With: caramel, desserts, recipes

Chocolate Covered Caramel Cheesecake Bites

March 21, 2019 by Larisha Campbell 14 Comments

These Chocolate Covered Caramel Cheesecake Bites are the perfect entertaining dessert. These bites size cheesecake bites will make you the star of the day!

chocolate covered caramel cheesecake bites

I remember get togethers at my aunt’s house growing up where a family friend would always bring these amazing pepperoni rolls and cherry cheesecakes. Both were always gone in a flash. Decadent cream cheese filling with a crunchy sweet crust and topped with a rich cherry filling topping that would burst in your mouth. As a kid, there was nothing better than that. They were to die for and that’s where I know my love of cheesecake started.

For me, cheesecake is one of the things that I believe could cure world tensions. Everyone just needs to sit down and eat some amazingly delicious cheesecake together and work it all out. Am I right?

While, I personally would enjoy just sitting down with the pan of cheesecake and a fork, I know many people think it’s really indulgent and just want to have a small piece. It’s kind of awkward to cut though so we have recently been making these in a square pan and cutting into bite size pieces to take to get togethers.

What ingredients do I need to make these chocolate covered caramel cheesecake bites?

There are four parts to these chocolate covered caramel cheesecake bites.  I know that may sound like a lot, but I promise it comes together really easily. You will need to make the crust, cheesecake filling, caramel, and chocolate sauce.  For everything together for these chocolate covered caramel cheesecake bites, you will need:

  • graham crackers
  • unsalted butter
  • brown sugar
  • sugar
  • vanilla extract
  • cream cheese
  • eggs
  • brown sugar
  • heavy cream
  • vanilla
  • salt
  • chocolate chips
  • coconut oil

Even though there are four total parts to this recipe, you still only need 13 ingredients.  Not bad for a recipe that’s going to be one of your favorite dessert recipes for gatherings.

How do you make chocolate covered caramel cheesecake bites?

This amazing dessert recipe is actually fairly easy to make. To start, you’re going to want to preheat the oven to 325 degrees. Place foils on the bottom of a 9×13 cake pan.

In a food processor, crush the graham crackers to crumbs.  If you do not have a food processor you can also achieve this by adding the crackers to a gallon size ziploc bag and use a rolling pin or flat size of a meat tenderizer until you get crumbs. Add the crumbs into a bowl with the brown sugar and melted butter.  Stir this mixture together and them press onto the bottom of the pan evenly using the back of a spoon or your hands. Bake for 10 minutes, remove and let cool.

While your crust is baking, you can start the cheesecake filling.  Grab a large bowl and beat all the cream cheese together until really nice and creamy.  Add in the sugar and vanilla and blend well. Then, one at a time add the eggs and beat on low until just blended. Don’t over mix.  Pour this over the cooled crust.

Place in oven for an hour to hour and fifteen minutes.  The center should almost be set but have a slight jiggle.  Turn off the oven and allow the cheesecake to remain inside, door closed, for 30-45 minutes.  Let cool to touch, then refrigerate overnight to let set up all the way.  If you are short on time, you can freeze for 2 hours.

Caramel and cheesecake toppings

Then, you are going to want to make your caramel sauce the day you are ready to make the cheesecake bites. In a small pot, over medium heat, add brown sugar, heavy cream, butter, and vanilla.  Let cook, stirring frequently for 10-15 minutes. It will be thickened.  Let cool for 30 minutes.  Then pour over the cheesecake and place in freezer for an hour until solid.
Lastly, the chocolate covered part.  Using a double broiler, melt the chocolate chips and coconut oil together until melted. Bring the cheesecake out of freezer and remove from pan. Pull off foil from the sides.  Cut the cheesecake into bite size pieces.
If the cheesecake begins to soften too much during this phase, then place back in the freezer.  Dip or drizzle chocolate across cheesecake pieces.  Place on a wax paper lined baking sheet.  Repeat with all remaining ingredients.  Place in the freezer for 30 minutes, then move to fridge until ready to serve.  Store any leftovers in fridge or freezer.

making cheesecake bites

Can kids help make these chocolate covered caramel cheesecake bites?

We used to do a series on here called Mini Chef Mondays where we would show our oldest baking something with us and learning her way around the kitchen.  Some of the things that she could do for this recipe that you kids could also help with is:

  • Turn on and use the food processor or crushing with a rolling pin if using a ziploc bag
  • Using a mixer (with help if younger)
  • Pouring the cheesecake mixture into the crust
  • Dipping the cheesecake bites into the chocolate
  • and more

making cheesecake bites

What are other delicious cheesecake recipes we should try?

If you are looking at this recipe because you love cheesecake then we would encourage you to try some of our other amazing cheesecake recipes like:

  • No Bake Cheesecake Bites
  • Caramel Apple Cheesecake Baked Apples
  • Pumpkin Cheesecake Pancakes
  • Caramel Apple Cheesecake
  • Snickerdoodle Cheesecake Bars
  • White Chocolate Raspberry Cheesecake
  • Baileys Chocolate Cheesecake
0 from 0 votes
Print
Chocolate Covered Caramel Cheesecake Bites
Prep Time
20 mins
Cook Time
1 hr
Resting
8 hrs
Total Time
1 hr 20 mins
 

These Chocolate Covered Caramel Cheesecake Bites are the perfect entertaining dessert. These bites size cheesecake bites will make you the star of the day!

Course: Dessert
Cuisine: American
Keyword: cheesecake recipes, dessert, recipes
Servings: 60 bites
Calories: 89 kcal
Author: Larisha Campbell
Ingredients
For crust
  • 3 cups crushed graham crackers ~18 whole crackers
  • 1 stick + 2 tbsp unsalted butter melted
  • 1/4 cup brown sugar
For cheesecake filling
  • 1/2 cup sugar
  • 1 1/2 tsp vanilla extract
  • 4- 8 oz packages of Cream Cheese softened
  • 4 eggs
For caramel
  • 1 cup brown sugar
  • 5 tbsp unsalted butter
  • 1/2 cup heavy cream
  • 1 tbsp vanilla
  • pinch of salt
Additional
  • 1 bag chocolate chips
  • 1 tbsp coconut oil
Instructions
For crust
  1. Heat oven to 325 Degrees F
  2. In a food processor crush graham crackers to crumbs. With a spoon, add in brown sugar and melted butter.
  3. Add foil to cover a 9x13 cake pan.
  4. Press crumb mixture onto bottom of pan evenly with the bottom of a spoon.
  5. Bake crust for 10 mins. Remove and let cool.
For cheesecake filling
  1. In a large mixing bowl, beat cream cheese, sugar and vanilla on medium until well blended.
  2. One at a time, add eggs, and beat on a low setting until blended (don't overdo the blending here).
  3. Pour over crust.
  4. Bake for 1 hour to 1 hour 15 mins or until center is almost set (should have a slightly jiggle).
  5. Turn off oven and allow cheesecake to remain inside oven for 30-45 mins.
  6. Let cool to touch and then refrigerate overnight or freeze at least 2 hours.
For caramel
  1. In a small pot over medium heat, add brown sugar, heavy cream, butter, and vanilla.
  2. Let cook, stirring frequently for 10-15 minutes until thickened.
  3. Let cool for 30 minutes.
  4. Pour mixture over cheesecake and put into freezer for an hour or until solid.
Additional
  1. In a microwave safe bowl or double broiler, melt chocolate chips and coconut oil together until well melted.
  2. Bring cheesecake out of freezer and gently remove from pan and pull off foil from around the sides.
  3. Cut into bit size pieces.
  4. *Tip: Move quickly (but safely) when cutting. If cheesecake begins to soften too much, place back in freezer.
  5. Dip or drizzle chocolate across cheesecake. And place on wax paper lined baking sheet. Place in freezer for 30 minutes, then you can move to fridge until ready to serve.
  6. Store any leftovers in fridge or freezer.
Recipe Notes

**Nutritional facts are just estimates. Please utilize your own brand nutritional values to double check against our estimates. 

Nutrition Facts
Chocolate Covered Caramel Cheesecake Bites
Amount Per Serving (1 bite)
Calories 89 Calories from Fat 27
% Daily Value*
Fat 3g5%
Saturated Fat 2g13%
Cholesterol 16mg5%
Sodium 39mg2%
Potassium 19mg1%
Carbohydrates 12g4%
Sugar 10g11%
Vitamin A 85IU2%
Calcium 16mg2%
Iron 0.3mg2%
* Percent Daily Values are based on a 2000 calorie diet.

 I hosted Mini Chef Mondays with these other amazing bloggers.

Be sure to check out each of their Mini Chef posts as well!

  1. Avocado Deviled Eggs // Courtney’s Sweets
  2. Strawberry Pound Cake Parfaits for Easter // Finding Zest
  3. Chocolate Covered Caramel Cheesecake Bites // We’re Parents
  4. White Chocolate Covered Grapes // Frugal Novice
  5. Bunny Rabbit Pancake // Giggles, Gobbles and Gulps
  6. No-Bake Carrot Cake Bites // Vegging at the Shore
  7. Strawberry Pineapple Kale Smoothie // The Shirley Journey
  8. Cooking with Kids: Keeping it Safe // O’Boy! Organic
  9. Peaches and Cream Pie // My Mini Adventurer

Pin these Chocolate Covered Caramel Cheesecake Bites for later: 

This post was originally published on 3/21/2016.  Updated on 3/21/2019.

Filed Under: Desserts, Home, Kids In The Kitchen, Recipes Tagged With: cheesecake, dessert, mini chef mondays, recipes

Honey Glazed Carrots Recipe (Vegan Option)

March 5, 2019 by Larisha Campbell Leave a Comment

This Honey Glazed Carrots Recipe will have even the pickiest of veggie eaters enjoying the sweet taste of glazed baby carrots. Pair this simple side dish with almost any main course for a quick and simple dinner. 

These glazed baby carrots changed my whole outlook on carrots.  Originally, I had a variation of them at a friends house. Even though I was reluctant to try them, I still did and I’m so thankful for that. It’s one of the most simple side dish recipes that you can find, taking just about 10-12 minutes to make from start to finish.  These honey glazed baby carrots are the perfect side dish for almost any meal you could plan.

There’s also a variation of these honey glazed baby carrots in case you or someone you are serving is vegan or plant based. In order to make vegan glazed carrots, we make a quick swap and it takes the same amount of time.

What ingredients do you need for Honey Glazed Carrots Recipe?

In order to make this simple and delicious honey glazed carrots recipe, you’re going to need just 7 ingredients.  What is great about that is that 3 of them are spices that you likely already have on hand and make this simple side dish even easier. These  brown sugar glazed carrots are literally perfect for the pickiest of eaters, including those little ones.

The ingredients that you need for these honey glazed carrots are:

  • baby carrots
  • cinnamon
  • coconut oil
  • brown sugar
  • honey
  • salt
  • pepper

I know many people don’t think of salt and pepper going with something that has cinnamon and honey in it, but trust me this glazed baby carrots recipes will be one of your favorite recipes.

I am vegan. How do I make these into vegan glazed carrots?

Since writing this recipe, we are now vegan/plant based. Because of that, I now more fully understand the need of people adhering to this type of lifestyle and their dietary needs.  Luckily, this honey glazed baby carrots recipe, is insanely easy to swap to make into vegan glazed carrots. In fact, I even have two options for you depending on your preferences.

The only swap that you need to make to this brown sugar glazed carrot recipe in order to make vegan is to swap out the honey. You can make the swap by using either agave or maple syrup.  If using agave, you don’t need to make any other changes, follow the directions as written.  If you are using maple syrup, because it is less sticky, you should cook for an extra 2-3 minutes so the flavors can develop a bit longer.

I’m allergic to coconut. How can I make this a Top 8 Allergy Friendly recipe?

If you need to swap out the coconut oil because of an allergy for this honey glazed carrots recipe, all you need to do is replace it, in the same quantity, with a similar cooking oil.  If you are looking for a coconut oil substitute for these glazed baby carrots, I suggest grapeseed or sunflower oil.  However, any oil, or even butter (dairy free if needed) will work. It will change the taste slightly, so we do recommended replacing something that is mild, even slightly sweet, that won’t be very strong.

How to Make Glazed Carrots

Honey glazed baby carrots are such an easy side dish recipe to make. If you are short on time, you will definitely love trying to make this recipe. Simply melt coconut oil into a pan on medium high heat. Once you’ve done that, add in your carrots. Cook the carrots for 5 minutes. Then, add in salt and pepper to taste, along with cinnamon, honey, and brown sugar. Continue cooking until the carrots are fork tender. Then done! It’s seriously that simple.

Watch us make these honey glazed carrots with a delicious Honey Citrus Salmon in under 30 minutes!

What main dish pairs well with honey glazed carrots?

These honey glazed baby carrots are the perfect side dish for a wide variety of dinners. While the carrots themselves take just a few minutes to make, they pair well with quick or elaborate dinner ideas that you could make. Whether you are throwing dinner in the instant pot or creating an intricate meal, this easy baby carrots recipe is the perfect dish for you.

  • Vegan Chickpea, Cashew & Broccoli with Garlic Sauce 
  • Honey Citrus Salmon
  • Broccoli and Cheese Stuffed Chicken 
  • Chimichurri Steak
  • Easy Toasted Ravioli (Vegetarian)
  • Honey Garlic Dijon Pork Tenderloin 
  • Garlic Butter Shrimp
  • Baked Pork Chops
  • Instant Pot Short Ribs
  • Roasted Walnut and Bourbon Pork Tenderloin
  • Low Carb Baked Chicken

0 from 0 votes
Print
Honey Glazed Carrots Recipe
Prep Time
2 mins
Cook Time
10 mins
Total Time
12 mins
 

This Honey Glazed Carrots Recipe will have even the pickiest of veggie eaters enjoying the sweet taste of glazed baby carrots. Pair this simple side dish with almost any main course for a quick and simple dinner. 

Course: Side Dish
Cuisine: American
Keyword: side dish, vegetable dish
Servings: 8 people
Calories: 62 kcal
Author: Larisha Campbell
Ingredients
  • 1 tbsp coconut oil (swap if tree nut allergy - see notes)
  • 1 lb baby carrots
  • 2 tbsp brown sugar
  • 2 tbsp honey (swap with agave or maple syrup if veagn *See post notes)
  • 1 tsp cinnamon
  • salt and peper, to taste
Instructions
  1. Melt coconut oil over medium heat in a large skillet. 

  2. Once melted, add in baby carrots. Stir to coat with the coconut oil. Let cook for 3 minutes. 

  3. Add in remaining ingredients and stir well. 

  4. Reduce heat to medium low and cook carrots for an additional 7-9 minutes or until carrots are easily pierced with a fork. 

  5. Remove from heat and serve. 

Recipe Notes

**Nutritional facts are just estimates. Please utilize your own brand nutritional values to double check against our estimates. 

Nutrition Facts
Honey Glazed Carrots Recipe
Amount Per Serving (0.25 cup)
Calories 62 Calories from Fat 9
% Daily Value*
Fat 1g2%
Saturated Fat 1g6%
Sodium 45mg2%
Potassium 134mg4%
Carbohydrates 12g4%
Fiber 1g4%
Sugar 9g10%
Vitamin A 7820IU156%
Vitamin C 1.5mg2%
Calcium 24mg2%
Iron 0.5mg3%
* Percent Daily Values are based on a 2000 calorie diet.

Pin this Honey Glazed Baby Carrots Recipe for later!

*This post was originally published on 8/13/2018. Text updated to add a vegan version. 

Filed Under: Home, Recipes Tagged With: recipes, side dish

Lactation Energy Bites

February 20, 2019 by Larisha Campbell 56 Comments

Lactation Energy Bites are the go to recipe for breastfeeding moms.  They are no bake cookie balls that are easy to make, just 6 ingredients, super flavorful and beneficial. These no bake lactation bites can be made Top 8 Allergy Friendly and vegan if needed. 

  lactation energy bites
My own breastfeeding journey, had plenty of ups and downs.  There’s lots of things that may have you questioning your supply. Before you continue reading, if you are a new mom or here because you think you have low supply, I encourage you to read 50+ Breastfeeding Myths Busted.

Watch how to make lactation energy bites:

Almost a year and a half into my first breastfeeding dyad, I heard about lactation cookies.  It seemed like ever since I first heard about them, I learned about so many other different types of lactation products– like bread, smoothies, and even energy bites.  I wish I would have known about these when we were early on in our nursing relationship and I was constantly looking for something to pop in my mouth.  I first learned about these from the Breast is Best Facebook page.  They are my go to recipe for myself and other new moms!

lactation energy bites recipe

Funny story about the first time I made lactation energy bites

The funniest story happened the first time I ever made these no bake lactation bites . Andrew came home and I was still working on dinner.  He was hungry and opened the fridge and saw the bites and popped one in his mouth.  He then asked what they were and I simply said “Lactation Energy Bites”.  His face was priceless and he ran to the trash can.  “Why didn’t you tell me your milk was in them?”, he shouted! I couldn’t stop laughing as I tried to tell him there wasn’t breast milk in them. Lactation energy bites are supposed to HELP with milk production. It was hysterical.

easy lactation bites recipe

What ingredients do you need for a lactation energy bites recipe?

These no bake lactation bites are seriously one of the easiest recipes you will ever make in your entire life.  You just need six total ingredients for this super easy lactation bites recipe. The ingredients that you need to make this recipe are:

  • old fashioned oats
  • chocolate chips
  • creamy peanut butter
  • ground flaxseed
  • raw honey
  • vanilla

Those are the only ingredients you need to make this delicious lactation energy bites recipe!

How can I make these lactation energy bites recipe Top 8 Allergy friendly?

Sometimes moms have their own food allergies, and other times, breastfeeding causes moms to have to do some sort of elimination diet.  Luckily, we can help with those allergies too!  In order to make these lactation energy bites Top 8 Allergy free, you are going to want to make a few changes.

First, ensure that the old fashioned oats that you are using are gluten free.  While oats themselves are gluten free, sometimes companies list cross contamination with gluten on their labels.  Make sure that you have a safe oat brand.

Next, pick a chocolate chip like Enjoy life in your recipe. Enjoy life chips are soy and dairy free (and all other Top 8+ allergens).

Lastly, swap the creamy peanut butter for sunbutter. It acts the same and it will taste different than our original recipe was written, but it will ensure that these lactation energy bites recipe is Top 8 Allergen friendly.

Of course, if you only have one of these allergies, you can always make the swap that you need.

Can I make these lactation energy bites recipe vegan?

Of course, you can make these vegan no bake lactation bites!  In order to do that you’ll again want to pick a chocolate chip like Enjoy Life in the recipe to ensure there’s no dairy in your chocolate.  Next, you can switch out the honey for the same amount of agave. With those two simple swaps, you will make these vegan lactation bites!

How do you make these lactation energy bites?

Once you have the ingredients that you are going to use to make these lactation energy bites, you need to grab a large bowl. Simply add all the ingredients into the bowl and combine really well.

Next, form into balls and place on a parchment paper lined baking sheet.

Finally, put them into the fridge to set up (about 2-3 hours) and then grab and go! That’s it! Told you, easy peasy!

easy lactation recipes

Can you freeze these lactation energy bites?

You absolutely can freeze these no bake lactation bites. In order to do so, make the recipe according to the instructions. Once you have the balls made, place them on a wax lined baking sheet instead of parchment paper.  Place in the freezer for 2 hours.  Once the time is up, you can place the balls into an air tighter container or ziploc bag. Leave in the fridge for as long as you need them (up to 3 months).  Remove desired amount from freezer and allow to thaw before consuming.

Do you have to be lactating to eat these no bake lactation bites?

I get these question often and the answer is 100% no. In fact, my children and even Andrew (now that he knows my breastmilk isn’t in them) enjoys them every time that I make them.  There’s no ingredients in these that isn’t safe for anyone.  It’s just that the ingredients combined together, just happen to be great for lactating mothers.

One important note though, children under 1 shouldn’t consumer honey for risk of botulism.  If you have a child under one that you would like to give these to, please follow the directions above for making these vegan.

What are other lactation recipes that are good for milk production?

You may be looking for other lactation boosting recipes in addition to these lactation energy bites.  Our favorite recipes are:

  • Chocolate Peanut Butter Banana Lactation Milkshake
  • Strawberry Coconut Cashew Lactation Smoothie
  • No Bake Lactation Protein Bars
  • Peanut Butter Apple Pie Lactation Smoothie

You may also be interested in these other lactation boosting recipes!

4.7 from 10 votes
Print
Lactation Energy Bites
Prep Time
10 mins
Total Time
10 mins
 

Lactation Energy Bites are the go to recipe for breastfeeding moms.  They are no bake cookie balls that are easy to make, minimal ingredients, but still flavorful and beneficial.

Course: Snack
Cuisine: American
Keyword: lactation bites, lactation recipes
Servings: 36 1in bites
Calories: 121 kcal
Author: Larisha Campbell
Ingredients
  • 2 cups rolled oatmeal
  • 1 cup chocolate chips (use dairy free if needed)
  • 1 cup creamy peanut butter (see notes about food allergies)
  • 3/4 cup ground flaxseed
  • 2/3 cup raw honey (can swap for agave)
  • 2 tsp vanilla
Instructions
  1. In a large bowl, add all ingredients.
  2. Stir until very well combined
  3. Using a small cookie dough scoop or your hands, roll into 1" balls.

  4. Place on baking sheet.
  5. Place in fridge and let sit for 2-3 hours.
  6. Store in air tight container in the fridge.
  7. Eat as desired.
Recipe Notes

*Crunchy peanut butter will not hold these together well.

*Add an additional 1/4-1/2 cup of flaxseed if you really need an extra boost of milk production.

*Please see notes in post if you need to make these Top 8 Allergy Friendly or vegan.

Nutrition Facts
Lactation Energy Bites
Amount Per Serving (1 bite)
Calories 121 Calories from Fat 54
% Daily Value*
Fat 6g9%
Saturated Fat 1g6%
Sodium 37mg2%
Potassium 93mg3%
Carbohydrates 14g5%
Fiber 1g4%
Sugar 9g10%
Protein 3g6%
Vitamin A 10IU0%
Vitamin C 0.1mg0%
Calcium 20mg2%
Iron 0.6mg3%
* Percent Daily Values are based on a 2000 calorie diet.

Pin these Lactation Energy Bites for later:

how to make lactation energy bites

You might also like our Chocolate PB Banana Lactation Smoothie

lactation milkshake recipe

or our Peanut Butter Apple Pie Lactation Smoothie.

lactation boosting smoothie

This lactation energy bites recipe was only published on 3/18/2014. Then updated on 2/23/2018 and again on 2/20/2019.

We’ve updated the pictures in this post. Original pictures below.

no bake lactation energy bites

no bake lactation energy cookies

how to make lactation energy bites


Filed Under: Breastfeeding, Home, Lactation Recipes, Pregnancy and Postpartum, Recipes Tagged With: breastfeeding, lactation, recipes

Festive Caramel Apple Cinnamon Roll Wreath

December 11, 2018 by Larisha Campbell Leave a Comment

This Caramel Apple Cinnamon Roll Wreath is the perfect brunch or breakfast meal for the holidays! The perfect brunch show stopper! You will wow everyone with this easy cinnamon roll centerpiece. 

Affiliate Links contained in the post help us earn a commission. 

Warm, soft dough, layered with a caramel apple sauce is the most amazingly special cinnamon roll recipe we’ve made to date.  The kids gobbled up this cinnamon roll wreath (naturally) and begged for more.

When you top the caramel apple cinnamon roll wreath with a homemade caramel apple icing, you’re in for an out of this world experience.  We topped our caramel apple cinnamon roll wreath with cranberries, dried blueberries, nuts and powdered sugar too.

The inspiration for this new holiday tradition

Every year, on Christmas morning, my mom would pop open a can of cinnamon rolls and pop them into the oven. We all knew that she would get the middle one and then the rest were up for grabs.  I remember begging to lick the icing container of any last remnants that remained inside. It was pure bliss as a child.

Now, that my girls are older, I love making them cinnamon rolls too.  It’s actually an amazingly fun thing to make with them. We have them on special occasions or just because, but it’s always awhile in between. Their giddy laughter warms my heart when I tell them what we are making. They jump up and down, dance, and run around with excitement. They too love to lick the bowl of icing when I’m done pouring it on. Can you blame them?

For the holidays though, I wanted to do something extra special.  We decided we were going to make a wreath out of our cinnamon roll dough. We may have done a few more practices runs at this one….strictly for testing purposes only. *wink wink* 

This is now one of our family traditions and the girls absolutely love it. So do we.

What ingredients do you need to make a caramel apple cinnamon roll wreath?

A cinnamon roll wreath can be made very similarly to a regular cinnamon roll recipe; however, the difference in this recipe comes in when you add the caramel apple part. For the cinnamon roll wreath, the ingredients that you need are:

  • flour
  • sugar
  • salt
  • instant yeast
  • unsalted butter
  • water
  • whole milk
  • eggs

Those ingredients will make the dough of this caramel apple cinnamon roll wreath. The next part is the caramel apple filling and for that, the ingredients that you will need are:

  • apple cider
  • brown sugar
  • maple syrup
  • heavy cream
  • unsalted butter
  • vanilla
  • salt
  • nutmeg
  • apple pie spice

If you want to make a cinnamon roll wreath with the caramel apple filling, but just a traditional cinnamon roll wreath, you would just need cinnamon and brown sugar.  We’ll explain below.

Lastly, there’s a delicious caramel apple icing that we add to the top of this. For the icing, you’ll need:

  • apple cider
  • cream cheese
  • powdered sugar
  • apple pie spice

How do you make a caramel apple cinnamon roll wreath?

In a bowl, you’ll start to make the dough. Add in the flour, sugar, salt, and yeast. You’ll add water and milk to a bowl of warmed, melted butter and pour that into the flour mixture.  Next, add in the eggs.  Then, knead with your hands until the dough is no longer sticky. Let it rise for just 15 minutes.

While the bread is rising, make the filling by combining the apple cider, brown sugar, maple syrup, heavy cream, unsalted butter, vanilla, salt, nutmeg, and some of the apple pie spice into a sauce pot. Let that cook over medium heat for 10 minutes, barely touching it. You are essentially making caramel sauce at this point and it’s best not to touch it. Remove, let cool.

Roll your risen dough out into a rectangle.  It should be about 30X20 in shape. Spread the cooled caramel apple sauce across the dough. Spread the remaining pie spice across the top. Roll up the dough into a log.

Essentially at this point you could turn them into cinnamon rolls by just cutting into even slices.

To make the cinnamon roll wreath, you’re going to make sure the seam side is down and slice lengthwise. Then, place the two pieces side by side with the filling side up. Starting at the top, fold one piece of dough over the other and braid the two strands until you reach the end. Pinching the ends together. Place on a greased baking sheet and form a circle. Cover and place in a warm preheated, but turned off oven. After 35 minutes, turn the oven on and cook for roughly 35 minutes.

Make the caramel apple icing while your cinnamon roll wreath cooks. Pour on top when you remove and let cool for a few.  Serves 16.

Can I make these into caramel apple cinnamon rolls instead of the a cinnamon roll wreath?

Absolutely! Whether you don’t feel like taking the extra steps or maybe a little intimidated by making a cinnamon roll wreath (seriously don’t be), there may be reason for you wanting just regular caramel apple cinnamon rolls instead.

You will make the recipe as directed until you end up with a rolled up log.  Instead of slicing the cinnamon roll log down the center, you will just cut into slices. You should be able to get 18 rolls out of the log that you roll.

Then you will proceed with the recipe as directed, but only bake the cinnamon rolls for 25-28 minutes. It’s super easy!

What other recipes could I serve for a holiday or Christmas brunch?

Obviously this recipe, makes for an absolutely amazing holiday brunch or breakfast centerpiece. It’s gorgeous, tastes amazing, and will completely wow people. However, you need more than this to serve! Other brunch or breakfast holiday recipe ideas are:

  • Pumpkin Cheesecake Pancakes
  • Twice Baked Sweet Potatoes with Sausage and Apples (Can be Vegetarian or Vegan too)
  • Cranberry Orange Nut Bread
  • Sweet Potato and Egg Muffins
  • Ham & Cheese Bites
  • Bacon Egg and Cheese Pretzel Bites
  • Banana Bread Pancakes with Caramelized Walnut Syrup

0 from 0 votes
Print
Festive Caramel Apple Cinnamon Roll Wreath
Prep Time
1 hr 5 mins
Cook Time
40 mins
Total Time
1 hr 45 mins
 
This Caramel Apple Cinnamon Roll Wreath is the perfect brunch or breakfast meal for the holidays! The perfect brunch show stopper! You will wow everyone with this easy cinnamon roll centerpiece. 
Course: Breakfast
Cuisine: American
Keyword: breakfast recipes, brunch, cinnamon rolls, holiday breakfast, holiday brunch, recipes
Servings: 16 slices
Calories: 400 kcal
Author: Larisha Campbell
Ingredients
For Cinnamon Roll Wreath
  • 5 1/2 cups all-purpose flour
  • 1/4 cup + 1 Tablespoon granulated sugar
  • 1 1/2 teaspoon salt
  • 2 packages instant yeast
  • 4 Tablespoons unsalted butter
  • 1 cup water
  • 1/2 cup whole milk
  • 2 large eggs
For caramel apple filling
  • 1/2 cup apple cider
  • 1 cup brown sugar
  • 2 tbsp maple syrup
  • 1 cup heavy cream
  • 1 stick unsalted butter
  • 1/2 tsp vanilla
  • 1/4 tsp salt
  • pinch nutmeg
  • 3/4 tsp apple pie spice + 1/4 tsp apple pie spice divided
For caramel apple icing
  • 2 cups apple cider reduced to 1/2 cup
  • 6 oz cream cheese softened
  • 1 cup powdered sugar
  • 1/4 tsp apple pie spice
Optional Toppings
  • Chopped pecan
  • chopped almonds
  • cranberries
  • dried blueberries
  • powdered sugar
Instructions
  1. Preheat the oven to 200 degrees.
  2. Grease a 14x16 pan with coconut oil and set aside,
  3. In a large bowl, add flour, sugar, salt, and yeast.
  4. Whisk to combine well.
  5. Set aside.
  6. In a small microwavable bowl, melt butter (about 30 seconds).
  7. Add in water and milk to butter bowl and heat for an additional 30 seconds.
  8. Carefully mix together so heated through.
  9. Pour the butter mixture into the flour mixture.
  10. Add the eggs and knead with hand until the dough is no longer sticky (do not overknead)
  11. Place in a bowl and cover with a tea towel for 20 minutes to rise. Make filling while dough rises. 

Make the Filling
  1. Add all the filling ingredients, reserving the additional 1/4 tsp apple pie spice for later, to a medium saucepan.

  2. Heat over medium for 10 minutes, only stirring 2-3 times max. This will bubble up a bit but that's fine.
  3. Remove from heat and let cool slightly.
Finish the Cinnamon Roll Wreath
  1. After dough has risen for 20 minutes, roll it out into the shape of a rectangle. This should be roughly 30x20 in size. Ensure that you don't have more dough in the middle than you do at the ends or your wreath will not be even.
  2. Spread the cooled caramel apple filling evenly across the rolled out dough. Work quickly so the filling doesn't harden.
  3. Evenly spread the remaining 1/4 tsp apple pie spice on top of the filling.
  4. Working from the longest side, tightly roll dough up. It's important that you get it as tight as possible.
  5. With the seam side down, cut the cinnamon roll in half length wise.
  6. Carefully place the two pieces side by side and place the right side over the left side.
  7. Continue to braid the two strands until you reach the end.
  8. Then carefully move the roll onto your greased baking sheet and form a circle, shaped like a wreath. 

  9. Cover lightly with aluminum foil.
  10. Turn the oven OFF and place the covered wreath into the oven for 35 minutes to let rise. 

  11. After the 35 minutes is up, turn the oven back ON to 375 degrees and remove the foil.
  12. Bake the caramel apple cinnamon roll wreath for 35-40 minutes or until the top is golden brown and the center is cooked all the way through. Note: if your oven brown faster and you notice golden brown around 25 minutes, place the foil back on top.
Caramel Apple Icing
  1. Add 2 cups of apple cider to a medium saucepan over medium high heat. Reduce down to 1/2 cup liquid. Remove from heat and let cool.
  2. In a medium bowl, beat together cream cheese and powdered sugar.
  3. Add in apple pie spice and reduced cider and blend until combined well.
  4. Place in fridge until ready for cinnamon roll wreath.
  5. Remove cinnamon roll wreath. If some of the filling has pooled into the middle, use a spoon and drizzle across the top of the wreath. Let cool.
  6. Top with caramel apple icing and optional toppings.
  7. Serves & Enjoy!

Recipe Notes

**Nutritional facts are just estimates. Please utilize your own brand nutritional values to double check against our estimates.  Nutritional labels to not include optional toppings, but does include icing.

Nutrition Facts
Festive Caramel Apple Cinnamon Roll Wreath
Amount Per Serving (1 slice)
Calories 400 Calories from Fat 117
% Daily Value*
Fat 13g20%
Saturated Fat 7g44%
Cholesterol 60mg20%
Sodium 313mg14%
Potassium 150mg4%
Carbohydrates 64g21%
Fiber 1g4%
Sugar 29g32%
Protein 6g12%
Vitamin A 490IU10%
Vitamin C 0.4mg0%
Calcium 56mg6%
Iron 2.3mg13%
* Percent Daily Values are based on a 2000 calorie diet.

This was truly one of our most favorite things that we have made on our site before and we hope that you truly enjoy it as much as we have. Happy Holidays from our family to yours!

Some items that may help you make this recipe:

PIN THIS CARAMEL APPLE CINNAMON ROLL WREATH FOR LATER: 

This post was originally published on 12/20/2017 and has since been updated.

Filed Under: Breakfast, Desserts, Home, Recipes Tagged With: breakfast, holidays, recipes

20+ Tried and True 30 Minute Meals

October 17, 2018 by Larisha Campbell 4 Comments

These easy 30 minute meals have been tried and tested! No more guess work if you can actually make 30 minute meals, we’ve got more than 20 here for you!

As parents, there’s no time for 30 minute meals that actually take forever.  You know the ones. You find one of those super delicious-looking, cheap, healthy 30 minute meals on line, save it to Pinterest and then when you actually go to make it, the meal ends up taking over an hour. Why? Because the directions say you should already have everything pre-chopped, pre-cooked, and pre-made.

That’s not realistic for anyone. Most people, not all, but most, are not buying pre-chopped everything.

Luckily, I’m taking the guess work out of whether recipes are really 30 minute meals. 

Over the past 6 months, I have been doing a LIVE video series on our Facebook page called Will It Work Wednesdays. Every Wednesday, we take another bloggers recipe that says it’s a 30 minute meal and then test it out. Our goal with these are to see if they are really 30 minutes or less meals. All types of parents need these quick 30 minute meals in their meal plans for days that life gets really crazy (which is almost everyday right?). 

The great news is that we’ve tested over 20 recipes now and they have all worked out to be 30 minute meals. Some closer than others, some way under.  But all of them are 30 minute meals recipes. So today, we are compiling them all together in one easy to read post for you. Included in the post is the links to the recipe and the video so you too can make these 30 minutes or less meals.

Recipes are sorted by categories and if they fall into more than one category, they will be included in both.

30 minute meals with Ground Beef, Chicken, Turkey, or Pork

Ground meat makes for some delicious meals.  One of the reasons it’s easy to have 30 minute meals with ground beef or another ground meat is because it easily thaws. It’s super versatile in the types of meals you can make.

  • Homemade Sloppy Joes

This homemade sloppy joe recipe was made with ground chicken, but it can be swapped out for any ground meat. It was made with homemade french fries.  Watch us make it on Facebook or Youtube.

  • Easy One Pan Asian Turkey Lettuce Cups

Packed with tons of flavor all in one dish, these Asian Turkey Lettuce Cups were delicious.  We paired this with a homemade chicken fried rice and left out the chicken the recipe included. Watch us make it on Facebook or Youtube. 

  • 30 Minute Korean Beef

This 30 minute Korean Beef meal using ground beef was so simple but packed a ton of flavor.  We’ve tried it again using ground chicken, and it was still good, but it really packs in flavor using beef. We served this with cooked rice. Watch us make it on Facebook or Youtube. 

  • Egg Roll Stir Fry 

If you like egg rolls, you have to try this easy Egg Roll Stir Fry.  And if you don’t like egg rolls, you still have to try it.  I’m really picky about egg rolls and I loved this recipe. Watch us make it on Facebook or Youtube. 

30 minute meals – Chicken

Chicken is a staple in most homes.  It’s super adaptable and for most people, kids love it. If you can remember to thaw it out on time, chicken can make for some really great 30 minute meals.

  • Cilantro Lime Chicken 

This easy Cilantro Lime Chicken was one of the faster recipes that we made. I did forget to put the rice on in the right amount of time so it was over in the sense if watching the video, but it’s actually done in under 20 minutes. We served it with coconut rice (just replace the amount of water called for with coconut milk from a can.  Watch us make it on Facebook or Youtube.

  • Summer Strawberry Apple Salad with Grilled Chicken

This was delicious for a summer meal; however, this Grilled Chicken Salad would be delicious if you meal prep or need a meal on the go.  It was so good.  We paired it with a homemade strawberry walnut dressing. Delicious! Watch us make it on Facebook or Youtube. 

  • Skillet Pizza Chicken

It has pizza in the name of it, so you already know that our kids devoured this Skillet Pizza Chicken. There’s no other words needed. Go make it! Watch us make it on Facebook or Youtube. 

  • Creamy Chicken Fajita Pasta 

Fajitas meet Pasta.  Nothing can possibly go wrong with this combination.  This creamy chicken fajita pasta is a great addition to any meal plan. Watch us make it on Facebook or Youtube. 

30 minute Vegetarian Meals

Whether you yourself are vegetarian or you are looking for some Meatless Monday ideas, we’ve got you covered.

  • Easy Weeknight Toasted Ravioli 

Truth moment: I actually attempted this recipe LIVE twice.  The first time I was less than 10 minutes from finishing and my oldest got sick. The second time I made this Easy Toasted Ravioli, it went off without a hitch and it’s now one of our favorite recipes. We paired it with an easy green bean salad. Watch us make it on Facebook or Youtube. 

  • Vegetarian Greek Quinoa Salad

If you love greek food, then this Vegetarian Greek Quinoa Salad is a no brainer.  This is perfect for meals on the go if you are looking for some mason jar meal ideas. Watch us make it on Facebook or Youtube. (coming soon)

30 minute Vegan Meals

Some of our best meals we’ve created for this series came from vegan meals. Whether you are vegan or again, needing some Meatless 30 Minute meal ideas, these quick and easy 30 minute vegan meals are perfect!

  • Black Bean Burgers

If you have a big meat eater on the fence about having anything meatless, you MUST try this quick Black Bean Burger. It’s delicious served with homemade french fries, tater tots, onion rings. Watch us make it on Facebook or Youtube. (coming soon)

  • Mediterranean Rice

This quick Mediterranean rice recipe packs in delicious color. It was light and airy and perfect for a quick meal. We served it alongside hummus and chips. Watch us make it on Facebook or Youtube. (coming soon)

  • Black Eyed Peas w/ Quinoa

One of our favorite vegan meals so far has been this Vegan Black Eyes Peas recipe served with quinoa and topped with a pineapple salsa. So yum! Watch us make it on Facebook or Youtube. (coming soon)

30 minute pasta meals

  • Italian Ham Pasta Salad

This recipe for Italian Ham Pasta Salad makes a HUGE portion.  You could easily take this to a potluck or if you meal prep the same dish over the week it would be perfect for that! Watch us make it on Facebook or Youtube. 

  • Incredible Garlic Shrimp 

We didn’t name this shrimp incredible, but it definitely lived up to it’s name. Try tossing this Incredible Garlic Shrimp recipe into some pasta and instant complete meal. Watch us make it on Facebook or Youtube. 

30 minute Meals with Pork

  • Korean Pork Chops

These Korean pork chops were so flavorful and so juicy! We served them with lemon butter green beans. Rice would also be a perfect match! Watch us make it on Facebook or Youtube. 

  • Italian Ham Pasta Salad

This recipe for Italian Ham Pasta Salad makes a HUGE portion.  You could easily take this to a potluck or if you meal prep the same dish over the week it would be perfect for that! Watch us make it on Facebook or Youtube. 

  • Egg Roll Stir Fry 

If you like egg rolls, you have to try this easy Egg Roll Stir Fry.  And if you don’t like egg rolls, you still have to try it.  I’m really picky about egg rolls and I loved this recipe. Watch us make it on Facebook or Youtube. 

30 minute meals With Shrimp or Fish

  • Hawaiian Shrimp Rice Bowl 

This was such a simple meal, but everyone loved this Hawaiian Shrimp Rice Bowl. Perfect flavor combo and everyone wanted more.Watch us make it on Facebook or Youtube. 

  • Honey Citrus Salmon

This is one of our all time favorite meals. This Honey Citrus Salmon recipe is so fast to make! We paired it with honey glazed baby carrots. Watch us make it on Facebook or Youtube. 

  • Coconut Curry Shrimp

If you are wanting to feel an island vibe then you must make this coconut curry shrimp recipe! We paired it with coconut lime rice (swap out water for canned coconut milk – then when done squeeze in 1/2 to 1 whole lime juice). Watch us make it on Facebook or Youtube. 

  • Cilantro Lime Salmon

Similar to the Honey Citrus Salmon we made, this Cilantro Lime Salmon was so incredibly quick to make. We paired it with a simple rice recipe or you could use the coconut lime rice from above. Watch us make it on Facebook or Youtube. 

  • Incredible Garlic Shrimp 

We didn’t name this shrimp incredible, but it definitely lived up to it’s name. Try tossing this Incredible Garlic Shrimp recipe into some pasta and instant complete meal. Watch us make it on Facebook or Youtube. 

30 minute meals With Steak

One of the best recipe we’ve made so far was this Chimichurri Steak recipe. You could also make with chicken. We paired it with a simple cucumber and tomato salad. A delicious 30 minute meal for summer.

Watch us make it on Facebook or Youtube. 

Time to go make an easy meal yourself!

Whether you are looking for cheap 30 minute meals or healthy 30 minute meals, we’ve tried to include a list of great options! I hope this list of easy 30 minute meals is a benefit to you.  If you think you know someone else who could benefit from this list, I’d love if you’d share it with them! We don’t have picky eaters here, but if you do, most of these 30 minute meals are kid friendly too! We’ll continue to add recipes as we test them out! Now bookmark this so you know where to come for tried and true 30 minutes or less meals!

Filed Under: Dinner, Home, Recipes Tagged With: 30 minute meals, dinner, recipes

  • 1
  • 2
  • 3
  • …
  • 20
  • Next Page »


We're Parents is all about cooking and traveling our way through imperfect parenting. Learn More

SUBSCRIBE TO OUR WEEKLY NEWSLETTER & GET PARENT & ME COLORING SHEETS

Connect With Us

We're Parents is a unique mom and dad natural parenting blog focusing on topics such as breastfeeding, babywearing, and car seat safety. You'll also find Delicious recipes, inspired travel recommendations, and more as you journey with us through parenting. Learn More…

VIEW OUR PRIVACY POLICY

Even More Recent Posts

a black and white photo of a curly haired african american woman in a sweater holding a new born baby while standing up.

We’re Parents is a participant in the Amazon Services LLC Associates Program, an affiliate advertising program designed to provide a means for sites to earn advertising fees by advertising and linking to amazon.com

Copyright © 2026 · Foodie Pro Theme by Shay Bocks · Built on the Genesis Framework · Powered by WordPress

Rate This Recipe

Your vote:


A rating is required
A name is required
An email is required