We're Parents

  • Home
  • About Us
    • About Us
    • Privacy Policy
    • Contact Us
    • Disclosures
    • Media Kit
  • Parenting
    • Pregnancy and Postpartum
    • Breastfeeding
    • Car Seat Safety
    • Mental Health
    • Babies
    • Toddlers
    • School Age
    • Older Kids
    • Holiday Crafts & More
    • Green Living
  • Recipes
    • Breakfast
    • Lunches
    • Dinner
    • side dishes
    • Crockpot
    • Desserts
    • Lactation Recipes
    • Snacks
    • The Seasoned Kids (Recipes by Kids)
  • Travel
    • Kid Friendly Outings
    • Restaurants
    • Travel Tips

BBQ Roasted Chickpeas Recipe

June 5, 2018 by Larisha Campbell Leave a Comment

This BBQ Roasted Chickpeas recipe is the easiest toasted chickpea recipe that you need for the summer! Dive in and replace your chips with a healthier alternative! 

My mom despised beans growing up. At least that’s how it was presented to me. Somehow though, occasionally, we would have chili. And for some ungodly reason canned Lima beans. Otherwise, no beans.

I didn’t even know what a garbanzo bean was until mid-20s. Luckily, I’ve expanded my pantry and now even my kids love a whole host of different variety of beans.

Because of this, I didn’t know really what to do with beans besides soups and stews for much of my life. Then, someone told me to roast chickpeas. Now, I like chickpeas cooked, and inside soups, but roasting them blew my mind. It was such a great alternative to chips (and much healthier!)

How to Roast Chickpeas

Roasting chickpeas is simple. You rinse and drain a can of chickpeas.  Then, you drizzle them with olive oil and place into a preheated 450 degree oven. Next, you cook from for 15-20 minutes, until they are nice and crunchy, a deep golden color all around.  Finally, you toss them in your desired rub, like our bbq seasoning below to make BBQ Roasted Chickpeas.  These oven roasted chickpeas will leave you coming back again and again for more.  They are best served the day made. Roasted chickpeas snack is even a hit with the kids!

0 from 0 votes
Print
BBQ Roasted Chickpeas Recipe
Prep Time
2 mins
Cook Time
20 mins
Total Time
22 mins
 

This BBQ Roasted Chickpeas recipe is the easiest toasted chickpea recipe that you need for the summer! Dive in and replace your chips with a healthier alternative! 

Course: Side Dish, Snack
Cuisine: American
Keyword: side dish, snack, vegan
Servings: 4
Calories: 36 kcal
Author: Larisha Campbell
Ingredients
  • 1 15oz can chickpeas, drained and rinsed
  • 1 tbsp olive oil
  • 1/4 tsp black pepper
  • 1/4 tsp garlic powder
  • 1/4 tsp onion powder
  • 1/4 tsp cinnamon
  • 1/4 tsp chili powder
  • 1/2 tsp smoked paprika
  • 1/4 tsp ground cumin
  • 1/2 tsp brown sugar
  • pinch cayenne
Instructions
  1. Preheat oven to 450 degrees

  2. Pat dry chickpeas and place on baking sheet.

  3. Toss with olive oil

  4. Place in oven to cook for 15-20 minutes or until golden brown and crunchy. 

  5. While in oven, combine remaining ingredients in a small bowl. 

  6. Remove chickpeas from oven once finished cooking, and toss with the dry seasoning ingredients. 

  7. Serve immediately or store in air tight container. Best enjoyed day made. Eat within 3 days. 

Recipe Notes

**Nutritional facts are just estimates. Please utilize your own brand nutritional values to double check against our estimates. 

Nutrition Facts
BBQ Roasted Chickpeas Recipe
Amount Per Serving (0.5 cup)
Calories 36 Calories from Fat 27
% Daily Value*
Fat 3g5%
Sodium 4mg0%
Carbohydrates 1g0%
Vitamin A 175IU4%
Iron 0.1mg1%
* Percent Daily Values are based on a 2000 calorie diet.

Whether you are looking for a healthy snack idea or a side dish for a BBQ, then these BBQ Roasted Chickpeas are just the thing you need!

Pin these BBQ Roasted Chickpeas for later!

Filed Under: Home, Recipes Tagged With: recipes, side dish, snack

Learning to Stir + Cranberry Coconut Energy Bites

October 14, 2016 by Larisha Campbell Leave a Comment

homemade-cranberry-coconut-energy-bites

The Seasoned Kids

Lesson 2: Learning to Stir

As we continue to show our kids cooking in the kitchen, we hear two questions very often:

  1. How do you start getting your kids involved with you?
  2. How do you get your kids to eat so well?

To us, these two questions go hand in hand. You get your kids eating well by offering them a variety of dishes, flavors, and colors from the very beginning and allowing them to explore food on their own in the kitchen. For most parents, stirring things together is the first step in the kitchen they are comfortable teaching their little ones.

kids-in-the-kitchen-stirring

How to Start

Kids love stirring anything that you let them.  It’s such a simple way to get them involved and let them feel like they are making a real contribution with the meal.  A great first thing to teach kids to stir is chocolate milk. From there you can move on to things like pasta salad, overnight oats, or a brownie mix.

learning-to-stir

Tips for teaching your kids to stir

  • Use a learning tower to get them stable at the counter
    • Standing on a stool or sitting on the counter, doesn’t stabilize kids as much as a tower will
  • Use oversized bowls in the beginning
    • Kids don’t know how fast or slow to go in the beginning, using an oversized bowl will help contain some of the inevitable mess
  • Speaking of mess, be patient!
    • There will be a bigger mess than if it was just you and it will take longer to stir, but the time spent with your kids with worth it!
  • No hot ingredients in the beginning
    • Stick with foods that are cold or room temperature at first. Build up stirring on the stove as your child grows
  • Let them taste test!
    • Remember you are in the kitchen to teach them a love of food, to try new foods, and grow their palate.  Let them taste their creations!

If you have a baby or very young toddler, like us, don’t be surprised if they just want to taste test (see bloopers below)!

Recipe Time!

cranberry-coconut-energy-bites

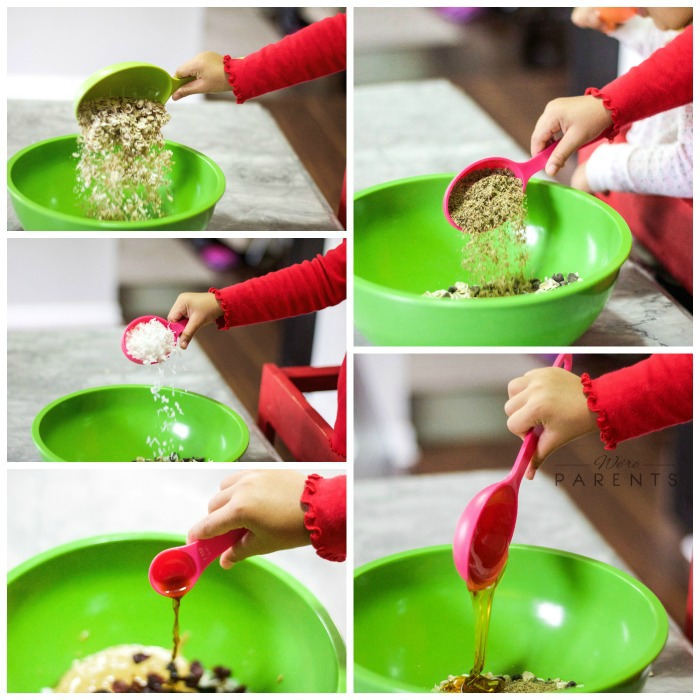
We’re excited to share this Cranberry Coconut Energy Bites recipes with you today. We helped measure out the ingredients (check out these awesome measuring spoons for kids!) and the kids poured and stirred together.  Afterwards, we did show Skibbles how to roll them and by the end of the bowl, you couldn’t tell which ones I had made and which ones she had.  Such a great sensory activity for them!

how-to-make-energy-bites learning-to-stir-ingredients

easy-how-to-make-energy-bites

0 from 0 votes
Print
Cranberry Coconut Energy Bites
Author: Larisha Campbell
Ingredients
  • 1 cup oatmeal
  • 1/2 cup chocolate chips
  • 1/2 cup creamy Peanut Butter
  • 1/2 cup shredded coconut
  • 1/4 dried cranberries
  • 1/4 cup flax
  • 1/4 cup agave (or maple syrup)
  • 1 tsp vanilla
Instructions
  1. Pour all ingredients into a bowl.
  2. Stir until very well combined.
  3. Roll mixture into one inch balls.
  4. Place on a baking sheet and refrigerate for 4 hours.
  5. Store in an air tight container in refrigerator for up to 2 weeks.

This post is a part of our “The Seasoned Kids”, kid’s cooking series. Learn more about The Seasoned Kids here.

Previous Lessons!

Week 1: Teaching Importance of Washing Fruits and Vegetables + Berry Parfait Recipe

logo-preview

Funny Blooper Time! 

Each week, we’ll share at least one funny blooper that happened during our shoot!  This week, while we were trying to shoot, we turned around and found our toddler on the ladder. She thought it was hysterical. Photographer in the making!

the-seasoned-kids-bloopers

On top of that, trying to teach her the learning to stir lesson was hilarious, she just kept trying to eat it.


A video posted by Larisha & Andrew (@wereparents) on Oct 14, 2016 at 4:43am PDT

Filed Under: Breakfast, Home, Recipes Tagged With: breakfast, recipes, snack, the seasoned kids

Bacon Egg and Cheese Pretzel Bites

April 4, 2016 by Larisha Campbell 7 Comments

bacon egg and cheese pretzel bites

Growing up, the only thing I really knew about the Amish was that they had long beards, wore funny hats, and drove around in a horse and buggy. When we moved to New Jersey, I learned that we only lived less than 2 hours from Lancaster, PA. As I’ve gotten older, I’ve grown fond of the Amish culture and goods they produce. Amazing quality pretty much sums up everything.

I learned shortly after moving to New Jersey that there was an Amish farmers market 15 minutes away. The first time walking in was quite overwhelming. There were so many amazing things to see.  I continue to frequent there often – quite honestly for the doughnuts. Ohhhh the doughnuts.

But for Skibbles, our toddler, it’s for the pretzels. As soon as we pull into the parking lot she screams “we at the pretzel place”. I always save getting the pretzel to the end so she has something to look forward too. And being quite honest, you can’t blame the girl. They are better than any other pretzel ever.  Soft and chewy, perfect amount of salt and butter, and some are even stuffed. Say What!?

mini chef mondays soft pretzel recipe

The first time I realized they had stuffed pretzels, I had to try one. There’s pepperoni and cheese, ham, egg, and cheese, and bacon, egg, and cheese.  OMGGGGG.  They are amazing. But they are also $3 per pretzel log. With us now on a pretty strict budget, it’s not something we can do often. So I decided we needed to make them ourselves. I told Skibbles that we were going to make them and she was so excited. We went with mini pretzel bites instead of a big log so they were easier for her little hands and more probably so I didn’t feel bad for eating 12 pretzel bites! HA!

MMMMM. Heaven. Bacon egg and cheese pretzel. #amishA photo posted by Larisha (@wereparents) on Mar 26, 2015 at 7:58am PDT

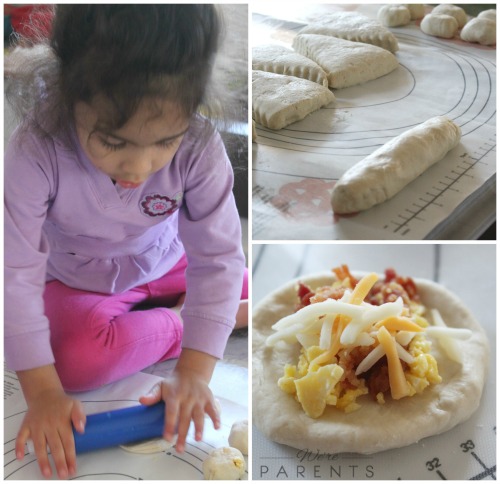
I’ll admit that this is one of the more difficult recipes we’ve done for Mini Chef Mondays, however if you have an older child, it wouldn’t be. There’s still a ton of stuff that Skibbles was able to do herself. Mixing the dough together, separating the pieces out, sprinkling salt, and brushing on the butter were all super easy for her to do.  Stuffing them was more difficult, but we made it work! The part she loved the most was eating them though and who can blame her. bacon egg and cheese pretzel bites mini chef mondays

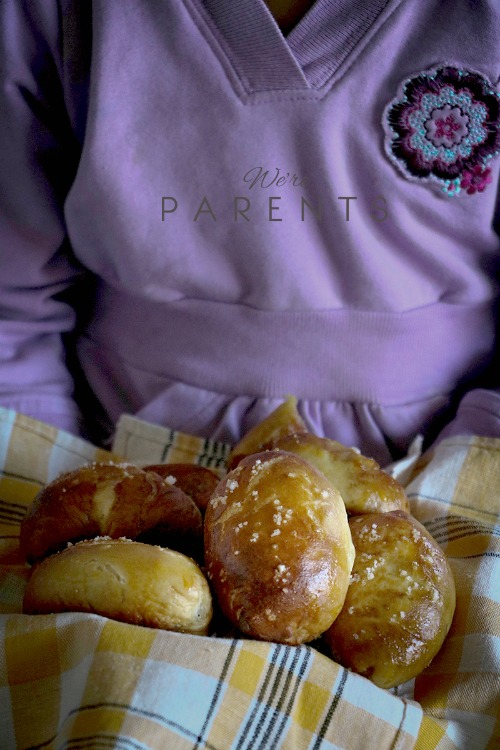
The end result was phenomenal.  So close to the original.

making pretzel bites mini chef mondays finished bacon egg and cheese pretzel recipe

0 from 0 votes
Print
Bacon Egg and Cheese Pretzel Bites

These Bacon Egg & Cheese Soft Pretzel Bites are stuffed to perfection!  They are a great recipe to get kids in the kitchen to help with! Great after school snack idea or breakfast on the go! 

Author: Larisha Campbell
Ingredients
  • 1 1/2 cup warm water + 1 tsp divided
  • 2 tbsp brown sugar
  • 1 tsp salt
  • 2 1/4 tsp yeast
  • 4 1/2 cups flour divided
  • 6 tbsp melted butter divided
  • 1 lb bacon cooked and crumbled
  • 7 large eggs scrambled
  • 2 cups cheese we used 1/2 mozzarella and 1/2 cheddar
  • 10 cups water
  • 1/2 cup baking soda
  • 1 egg yolk beaten
  • pretzel salt or coarse salt
Instructions
  1. In a bowl, add warm water, brown sugar, and salt. Stir to combine.
  2. Sprinkle yeast over top of water mixture and let sit for 5 minutes.
  3. In another large bowl, add 4 cups flour, 3 tbsp melted butter, and yeast mixture.
  4. Using a wooden spoon, stir to combine.
  5. Using the remaining 1/2 cup flour, lightly flour a workspace, roll out dough and knead in remaining flour.
  6. Knead for 5 minutes.
  7. *Note: If using a stand mixer, add all the flour together at once and knead in mixer for 5 minutes.
  8. Place dough in a lightly oiled bowl and tightly cover with plastic wrap.
  9. Refrigerate overnight (minimum of 8 hours).
  10. Remove from fridge and place chilled dough on a lightly oiled surface.
  11. Cut dough into 8 equal pieces.
  12. Take one piece and roll out into a 6 inch log.
  13. Cut log into 6 even pieces.
  14. Repeat with remaining 7 pieces to end with a total of 48 small pieces.
  15. Roll out a piece into a circle about 4 inches wide and layer with egg, bacon, and cheese (about 1 tsp of each).
  16. Seal the edges of each well.
  17. Repeat with remaining 47 pieces.
  18. In a large pot, boil 10 cups of water.
  19. Once boiling, add baking soda.
  20. Preheat oven to 450 degrees.
  21. Line baking sheet with parchment paper.
  22. Gently add bites to boiling water, careful not to overcrowd.
  23. Let boil for 30 seconds and carefully remove to parchment lined baking sheet.
  24. Mix egg yolk with 1 tsp water.
  25. Brush yolk mixture on top of pretzels.
  26. Sprinkle with coarse salt (lightly as the bacon will add a layer of salt).
  27. Bake for 10-12 minutes until a deep golden brown color.
  28. Remove from oven and brush with melted butter.
  29. Wait until cooled to eat.
  30. If any remain (unlikely), you can keep in fridge for 3 days or freeze and thaw as needed.

Products to make this recipe easier to make:

  • Bench Scraper to evenly cut 
  • Pastry Mat with measurements
    mini chef pretzel bites

mini chef monday bloggers

I am hosting Mini Chef Mondays along with 10 fabulous bloggers! Read how Mini Chef Mondays started, plus how to link up!
Join our facebook group to find even more recipes and share recipes too!

Get featured and follow us too!
  • Pinterest: Each post/recipe linked up will be added to our Mini Chef Mondays board
  • Instagram: Use our hashtag #MiniChefMondays so we can repost your mini chef
  • Twitter: We retweet every post with #MiniChefMondays

Be sure to check out each of their Mini Chef posts as well!

  1. Frozen Yogurt Fruit Bark Recipe // Courtney’s Sweets
  2. Ham & Egg Cups // Momma Lew
  3. Yogurt Dipped Frozen Banana on a Stick // Baby Loving Mama
  4. Bacon Egg and Cheese Pretzel Bites // We’re Parents
  5. Peanut Butter Stuffed Chocolate Covered Pretzels // Frugal Novice
  6. Tips for Planting a Kids Vegetable Garden // Eating Richly Even When You’re Broke
  7. Pastelillos de Carne (Puerto Rican Meat Turnovers) // Giggles, Gobbles and Gulps
  8. 18 Mother-Child Bonding Activities // Step Stool Chef
  9. Broccoli Mac and Cheese Bites // Vegging at the Shore
  10. Slow Cooker Philly Cheesesteaks // O’Boy! Organic
  11. Chocolate Milk Mini Fudge Pops // Can’t Google Everything

An InLinkz Link-up


Filed Under: Breakfast, Home, Kids In The Kitchen, Recipes Tagged With: breakfast, brunch, mini chef mondays, pretzels, recipes, snack

Amish Inspired Soft Pretzel Recipe

April 15, 2015 by Larisha Campbell 2 Comments

soft pretzels recipe

If you’ve been following our Instagram page for any length of time now, you know we are a bit obsessed with the Amish market that is near our house. While I personally love the doughnuts, Skibbles is obsessed with the soft pretzels.  And I mean who can really blame her?  They really are delicious! And when they are stuffed with things like pizza sauce and pepperoni, or bacon, egg, and cheese, they go from great to outstanding.  But, like with everything, I knew that I could not only make a healthier alternative at home so I knew what was exactly going into them, but the cost of making them is much better for us.

I’ve had making soft pretzels on my to do list for quite some time now, but recently learned that April is National Soft Pretzel Month, so what better excuse did I have than to just go for it and make them! I was actually very surprised at how easy they were to make and had great success on my first attempt.

soft pretzel recipe

Andrew and Skibbles both ate two soft pretzels as soon as they were done.  Skibbles actually asked for a third and I had to tell her no more which of course turned into an epic meltdown, but hopefully she’ll forgive me for that one if I keep making her mom of them.

My next step is making stuffed soft pretzels and other flavors, so stick around and I’ll update as I try new things with this recipe!

0 from 0 votes
Print
Amish Inspired Soft Pretzels
Author: Larisha Campbell
Ingredients
  • 1 1/2 cups hot water
  • 1 tablespoon yeast
  • 1/4 cup brown sugar packed
  • 2 cups bread flour
  • 2 cups All Purpose Flour
  • 1/2 cup baking soda
  • 1 egg
  • melted butter optional
  • salt optional
  • cinnamon optional
  • sugar optional
  • glaze optional (recipe below)
Instructions
  1. Generously grease a baking sheet with unsalted butter. Set aside.
  2. In a large bowl, add hot water and sprinkle yeast over the top. Let dissolve for 2 minutes.
  3. Add brown sugar and flour and mix well. Try to combine as quickly as possible. Do not knead the dough.
  4. Cover bowl with a kitchen towel and let rise for 30 minutes (at least until doubled in size).
  5. Remove dough from bowl onto a lightly floured surface.
  6. Cut into thick pieces and roll into long ropes. Shape into pretzel shapes.
  7. Preheat over to 450 degrees.
  8. In a small bowl, beat egg.
  9. In a deep sauce pot, add water at least half way and bring to a boil. Add baking soda and stir to combine.
  10. Add pretzels to boiling water, 2 at a time, and boil for one minute. Carefully remove boiled pretzels to greased baking sheet.
  11. Brush the tops of the pretzels with egg wash. sprinkle with course salt if desired.
  12. Bake for 5-6 minutes or until golden brown.
  13. Brush with butter if desired.
  14. For cinnamon/sugar pretzels - mix 1 tbsp sugar and 1/2 tbsp cinnamon together and sprinkle on the top after the egg wash.
  15. For glaze - mix 3/4 cup powdered sugar and 2 tbsp milk together and drizzle or dip after pretzels are finished.


signature button

Filed Under: Home, Recipes Tagged With: recipe, snack


We're Parents is all about cooking and traveling our way through imperfect parenting. Learn More

SUBSCRIBE TO OUR WEEKLY NEWSLETTER & GET PARENT & ME COLORING SHEETS

Connect With Us

We're Parents is a unique mom and dad natural parenting blog focusing on topics such as breastfeeding, babywearing, and car seat safety. You'll also find Delicious recipes, inspired travel recommendations, and more as you journey with us through parenting. Learn More…

VIEW OUR PRIVACY POLICY

Even More Recent Posts

a black and white photo of a curly haired african american woman in a sweater holding a new born baby while standing up.

We’re Parents is a participant in the Amazon Services LLC Associates Program, an affiliate advertising program designed to provide a means for sites to earn advertising fees by advertising and linking to amazon.com

Copyright © 2026 · Foodie Pro Theme by Shay Bocks · Built on the Genesis Framework · Powered by WordPress

Rate This Recipe

Your vote:


A rating is required
A name is required
An email is required