We're Parents

  • Home
  • About Us
    • About Us
    • Privacy Policy
    • Contact Us
    • Disclosures
    • Media Kit
  • Parenting
    • Pregnancy and Postpartum
    • Breastfeeding
    • Car Seat Safety
    • Mental Health
    • Babies
    • Toddlers
    • School Age
    • Older Kids
    • Holiday Crafts & More
    • Green Living
  • Recipes
    • Breakfast
    • Lunches
    • Dinner
    • side dishes
    • Crockpot
    • Desserts
    • Lactation Recipes
    • Snacks
    • The Seasoned Kids (Recipes by Kids)
  • Travel
    • Kid Friendly Outings
    • Restaurants
    • Travel Tips

Chocolate Covered Caramel Cheesecake Bites

March 21, 2019 by Larisha Campbell 14 Comments

These Chocolate Covered Caramel Cheesecake Bites are the perfect entertaining dessert. These bites size cheesecake bites will make you the star of the day!

chocolate covered caramel cheesecake bites

I remember get togethers at my aunt’s house growing up where a family friend would always bring these amazing pepperoni rolls and cherry cheesecakes. Both were always gone in a flash. Decadent cream cheese filling with a crunchy sweet crust and topped with a rich cherry filling topping that would burst in your mouth. As a kid, there was nothing better than that. They were to die for and that’s where I know my love of cheesecake started.

For me, cheesecake is one of the things that I believe could cure world tensions. Everyone just needs to sit down and eat some amazingly delicious cheesecake together and work it all out. Am I right?

While, I personally would enjoy just sitting down with the pan of cheesecake and a fork, I know many people think it’s really indulgent and just want to have a small piece. It’s kind of awkward to cut though so we have recently been making these in a square pan and cutting into bite size pieces to take to get togethers.

What ingredients do I need to make these chocolate covered caramel cheesecake bites?

There are four parts to these chocolate covered caramel cheesecake bites.  I know that may sound like a lot, but I promise it comes together really easily. You will need to make the crust, cheesecake filling, caramel, and chocolate sauce.  For everything together for these chocolate covered caramel cheesecake bites, you will need:

  • graham crackers
  • unsalted butter
  • brown sugar
  • sugar
  • vanilla extract
  • cream cheese
  • eggs
  • brown sugar
  • heavy cream
  • vanilla
  • salt
  • chocolate chips
  • coconut oil

Even though there are four total parts to this recipe, you still only need 13 ingredients.  Not bad for a recipe that’s going to be one of your favorite dessert recipes for gatherings.

How do you make chocolate covered caramel cheesecake bites?

This amazing dessert recipe is actually fairly easy to make. To start, you’re going to want to preheat the oven to 325 degrees. Place foils on the bottom of a 9×13 cake pan.

In a food processor, crush the graham crackers to crumbs.  If you do not have a food processor you can also achieve this by adding the crackers to a gallon size ziploc bag and use a rolling pin or flat size of a meat tenderizer until you get crumbs. Add the crumbs into a bowl with the brown sugar and melted butter.  Stir this mixture together and them press onto the bottom of the pan evenly using the back of a spoon or your hands. Bake for 10 minutes, remove and let cool.

While your crust is baking, you can start the cheesecake filling.  Grab a large bowl and beat all the cream cheese together until really nice and creamy.  Add in the sugar and vanilla and blend well. Then, one at a time add the eggs and beat on low until just blended. Don’t over mix.  Pour this over the cooled crust.

Place in oven for an hour to hour and fifteen minutes.  The center should almost be set but have a slight jiggle.  Turn off the oven and allow the cheesecake to remain inside, door closed, for 30-45 minutes.  Let cool to touch, then refrigerate overnight to let set up all the way.  If you are short on time, you can freeze for 2 hours.

Caramel and cheesecake toppings

Then, you are going to want to make your caramel sauce the day you are ready to make the cheesecake bites. In a small pot, over medium heat, add brown sugar, heavy cream, butter, and vanilla.  Let cook, stirring frequently for 10-15 minutes. It will be thickened.  Let cool for 30 minutes.  Then pour over the cheesecake and place in freezer for an hour until solid.
Lastly, the chocolate covered part.  Using a double broiler, melt the chocolate chips and coconut oil together until melted. Bring the cheesecake out of freezer and remove from pan. Pull off foil from the sides.  Cut the cheesecake into bite size pieces.
If the cheesecake begins to soften too much during this phase, then place back in the freezer.  Dip or drizzle chocolate across cheesecake pieces.  Place on a wax paper lined baking sheet.  Repeat with all remaining ingredients.  Place in the freezer for 30 minutes, then move to fridge until ready to serve.  Store any leftovers in fridge or freezer.

making cheesecake bites

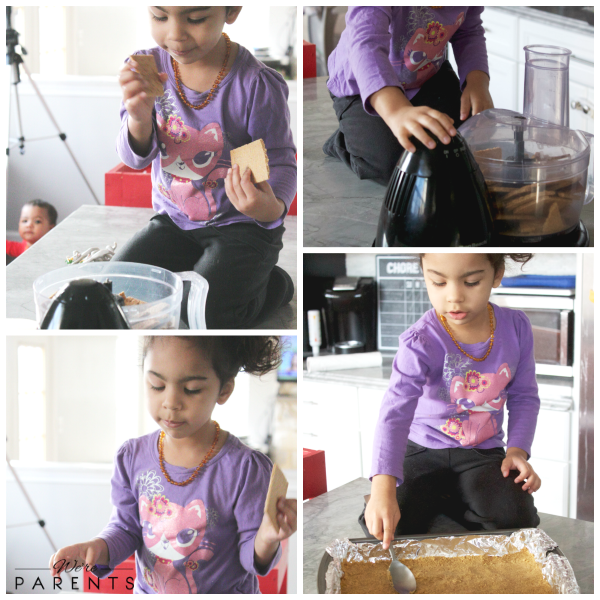
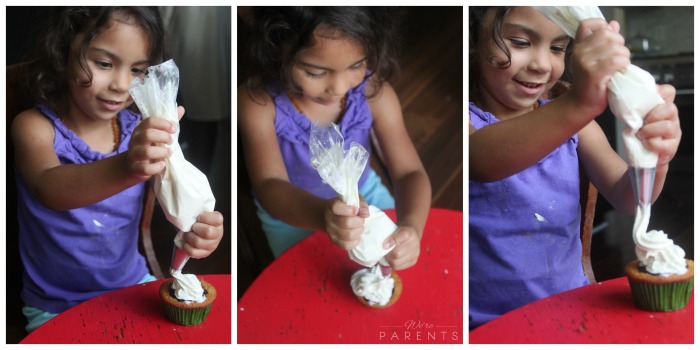
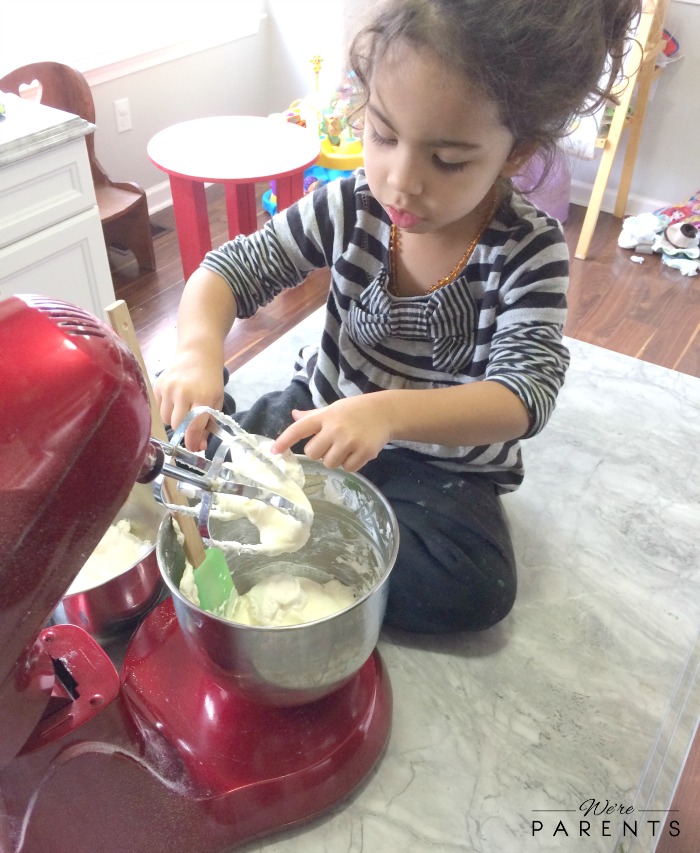
Can kids help make these chocolate covered caramel cheesecake bites?

We used to do a series on here called Mini Chef Mondays where we would show our oldest baking something with us and learning her way around the kitchen.  Some of the things that she could do for this recipe that you kids could also help with is:

  • Turn on and use the food processor or crushing with a rolling pin if using a ziploc bag
  • Using a mixer (with help if younger)
  • Pouring the cheesecake mixture into the crust
  • Dipping the cheesecake bites into the chocolate
  • and more

making cheesecake bites

What are other delicious cheesecake recipes we should try?

If you are looking at this recipe because you love cheesecake then we would encourage you to try some of our other amazing cheesecake recipes like:

  • No Bake Cheesecake Bites
  • Caramel Apple Cheesecake Baked Apples
  • Pumpkin Cheesecake Pancakes
  • Caramel Apple Cheesecake
  • Snickerdoodle Cheesecake Bars
  • White Chocolate Raspberry Cheesecake
  • Baileys Chocolate Cheesecake
0 from 0 votes
Print
Chocolate Covered Caramel Cheesecake Bites
Prep Time
20 mins
Cook Time
1 hr
Resting
8 hrs
Total Time
1 hr 20 mins
 

These Chocolate Covered Caramel Cheesecake Bites are the perfect entertaining dessert. These bites size cheesecake bites will make you the star of the day!

Course: Dessert
Cuisine: American
Keyword: cheesecake recipes, dessert, recipes
Servings: 60 bites
Calories: 89 kcal
Author: Larisha Campbell
Ingredients
For crust
  • 3 cups crushed graham crackers ~18 whole crackers
  • 1 stick + 2 tbsp unsalted butter melted
  • 1/4 cup brown sugar
For cheesecake filling
  • 1/2 cup sugar
  • 1 1/2 tsp vanilla extract
  • 4- 8 oz packages of Cream Cheese softened
  • 4 eggs
For caramel
  • 1 cup brown sugar
  • 5 tbsp unsalted butter
  • 1/2 cup heavy cream
  • 1 tbsp vanilla
  • pinch of salt
Additional
  • 1 bag chocolate chips
  • 1 tbsp coconut oil
Instructions
For crust
  1. Heat oven to 325 Degrees F
  2. In a food processor crush graham crackers to crumbs. With a spoon, add in brown sugar and melted butter.
  3. Add foil to cover a 9x13 cake pan.
  4. Press crumb mixture onto bottom of pan evenly with the bottom of a spoon.
  5. Bake crust for 10 mins. Remove and let cool.
For cheesecake filling
  1. In a large mixing bowl, beat cream cheese, sugar and vanilla on medium until well blended.
  2. One at a time, add eggs, and beat on a low setting until blended (don't overdo the blending here).
  3. Pour over crust.
  4. Bake for 1 hour to 1 hour 15 mins or until center is almost set (should have a slightly jiggle).
  5. Turn off oven and allow cheesecake to remain inside oven for 30-45 mins.
  6. Let cool to touch and then refrigerate overnight or freeze at least 2 hours.
For caramel
  1. In a small pot over medium heat, add brown sugar, heavy cream, butter, and vanilla.
  2. Let cook, stirring frequently for 10-15 minutes until thickened.
  3. Let cool for 30 minutes.
  4. Pour mixture over cheesecake and put into freezer for an hour or until solid.
Additional
  1. In a microwave safe bowl or double broiler, melt chocolate chips and coconut oil together until well melted.
  2. Bring cheesecake out of freezer and gently remove from pan and pull off foil from around the sides.
  3. Cut into bit size pieces.
  4. *Tip: Move quickly (but safely) when cutting. If cheesecake begins to soften too much, place back in freezer.
  5. Dip or drizzle chocolate across cheesecake. And place on wax paper lined baking sheet. Place in freezer for 30 minutes, then you can move to fridge until ready to serve.
  6. Store any leftovers in fridge or freezer.
Recipe Notes

**Nutritional facts are just estimates. Please utilize your own brand nutritional values to double check against our estimates. 

Nutrition Facts
Chocolate Covered Caramel Cheesecake Bites
Amount Per Serving (1 bite)
Calories 89 Calories from Fat 27
% Daily Value*
Fat 3g5%
Saturated Fat 2g13%
Cholesterol 16mg5%
Sodium 39mg2%
Potassium 19mg1%
Carbohydrates 12g4%
Sugar 10g11%
Vitamin A 85IU2%
Calcium 16mg2%
Iron 0.3mg2%
* Percent Daily Values are based on a 2000 calorie diet.

 I hosted Mini Chef Mondays with these other amazing bloggers.

Be sure to check out each of their Mini Chef posts as well!

  1. Avocado Deviled Eggs // Courtney’s Sweets
  2. Strawberry Pound Cake Parfaits for Easter // Finding Zest
  3. Chocolate Covered Caramel Cheesecake Bites // We’re Parents
  4. White Chocolate Covered Grapes // Frugal Novice
  5. Bunny Rabbit Pancake // Giggles, Gobbles and Gulps
  6. No-Bake Carrot Cake Bites // Vegging at the Shore
  7. Strawberry Pineapple Kale Smoothie // The Shirley Journey
  8. Cooking with Kids: Keeping it Safe // O’Boy! Organic
  9. Peaches and Cream Pie // My Mini Adventurer

Pin these Chocolate Covered Caramel Cheesecake Bites for later: 

This post was originally published on 3/21/2016.  Updated on 3/21/2019.

Filed Under: Desserts, Home, Kids In The Kitchen, Recipes Tagged With: cheesecake, dessert, mini chef mondays, recipes

The Best Sweet Potato Pie Recipe

September 26, 2018 by Andrew Leave a Comment

This is the Best Sweet Potato Pie Recipe you will find for your fall get together! Surprise everyone with this amazingly delicious homemade sweet potato pie. 

best sweet potato pie recipe

Holidays Are A Special Time

When you think about holidays, what comes to mind? For me, it’s a ton of things. I actually start to get a giddy and smirk in a way that if you seen me from afar you would think I lost it! Fantasizing about how giving everyone becomes — and I don’t mean just presents.

I mean more simple things. Like more people holding the mall door open after walking through. It’s such a simple gesture, but if your from the Jersey/Philly/New York/Bmore/DC regions — Folks walk around like “The Walking Dead” most of the year. So, when this time of the year hits, I don’t take it for granted.

The cities and town also become more beautiful. With amazing decorations and music that gets even the grinch doing the “whip and nay nay”. But, what I truly look forward to the most is family and tradition.

For me nothing compares to that quality time.

I love “people watching” in my old household. Seeing mom and dad holding hands, feeding each other. Remember you use to get all grossed out, but now you think its cute (well, I’m still grossed out). My older brother still taking advantage of me. Like tapping on one shoulder and when I look, stealing my last bite from over the other shoulder (just wait till he needs to find his key to go home later). My little sister somehow after all these years still has my parents giving her whatever she wants (so jealous).

Yet and still loving every moment.

homemade sweet potato pie recipe

Passing down family traditions

What are your family traditions for the holidays? You can see some of our holidays traditions that we do every year, but I want to focus on one in this post.

It’s one that I started years before Larisha and I even got together.  That’s right, I started a tradition in the family myself. A food tradition. And this family tradition I have already started passing down to my little girls. But I want to include you too! Our big girl has been helping me make this sweet potato pie recipe since she was 2!

kids in the kitchen mini chef mondaysWhether or not you’ve ever had Sweet Potato Pie before, you really need to make it happen this year.  It’s really quite incredible and easy to make. It’s the best sweet potato pie recipe ever! I mean even my mama calls to make sure I’m making it so you know it’s gotta be good!

sweet potato pie recipe

Ingredients for Sweet Potato Pie

To make homemade sweet potato pie isn’t complicated.  It’s one of the more simple dessert recipes to make for Thanksgiving or other fall holidays. The full recipe is below, but the ingredients you need to make sweet potato pie are:

  • Sweet Potatoes
  • Unsalted Butter
  • Brown Sugar
  • Whole Milk
  • Eggs
  • Nutmeg
  • Cinnamon
  • Vanilla
  • Store bought graham cracker crust or to make your own crust you’ll need unsalted butter, brown sugar, and graham crackers

How to Make Sweet Potato Pie

If you’ve never made a homemade sweet potato pie recipe before, you may be a little intimidated. I’m here to tell you that you don’t have to be.  It’s as easy as pie (HA! – Dad joke!)

You start by boiling potatoes until soft. If you are making a homemade crust for the sweet potato pie recipe,  you’ll want to do that while potatoes are cooking. Then, mash the potatoes.  Add in butter. After that, add in the brown sugar, milk, eggs, nutmeg, cinnamon, and vanilla. Mix all that together until it’s nice and smooth. Pour into crust and let bake at 350 degrees for 65-75 minutes.  A toothpick should come out clean when inserted. Cool and serve. It’s great topped with homemade whipped topping or ice cream!

How to make sweet potato pie

Other Sweet Potato Recipes to Try

We think this is the best sweet potato pie recipe and a must have for the fall. However, with fall goes great pricing on sweet potatoes.  You should try these other sweet potato recipes sometime during the fall as well!

  • Twice Baked Sweet Potatoes with Sausage and Apples (*Vegan)
  • Roasted Sweet Potatoes and Beets
  • Sweet Potato and Egg Muffins
  • Easy Air Fryer Sweet Potatoes
  • Sweet Potato Stew
  • Steak and Sweet Potato Hash

The Best Sweet Potato Pie Recipe

5 from 1 vote
Print
The Best Sweet Potato Pie Recipe
Prep Time
1 hr
Cook Time
1 hr 5 mins
Total Time
2 hrs 5 mins
 

This is the Best Sweet Potato Pie Recipe you will find for your fall get together! Surprise everyone with this amazingly delicious homemade sweet potato pie. 

Course: Dessert
Cuisine: American
Keyword: dessert, pie, sweet potato recipes, thanksgiving recipes
Servings: 8 slices
Calories: 440 kcal
Author: Andrew
Ingredients
  • 1 lb sweet potatoes
  • 1/2 cup unsalted butter, softened
  • 1 cup packed brown sugar
  • 1/2 cup whole milk
  • 2 eggs
  • 1/2 teaspoon nutmeg
  • 1/2 teaspoon cinnamon
  • 1 teaspoon vanilla
For crust (buy a 9in graham cracker crust or make recipe below)
  • 6 tablespoons unsalted butter, melted
  • 2 tbsp brown sugar
  • 1 1/2 cups graham crackers crumbs, about 9 whole crackers
Toppings
  • Homemade Whipped Topping, optional
Instructions
  1. Boil Potatoes for 50 mins making sure water is always covering the potatoes or until soft. *If making crust, see directions below and make while potatoes are boiling.

  2. Immediately drain and run cool water over potatoes and skin the potatoes.
  3. Preheat oven to 350 degrees.
  4. In a large bowl, mash the potatoes.
  5. Add in butter and mix well.
  6. Add in brown sugar, milk, eggs, nutmeg, cinnamon, and vanilla.
  7. Mix until smooth.
  8. Pour into pie crust.
  9. Bake for 65-75 minutes or until toothpick in center comes out clean.
  10. Let cool and serve.
  11. Top with Homemade Whipped Topping if desired. 

For the crust
  1. Mix the melted butter, brown sugar, and crumbs into a pie dish. Press down evenly with the back of a spoon until all the mixtures is evenly spread on bottom and up the sides of the dish. Cook at 350 degrees for 7 minutes, then let cool completely before adding filling.
Recipe Notes

**Nutritional facts are just estimates. Please utilize your own brand nutritional values to double check against our estimates. 

Nutrition Facts
The Best Sweet Potato Pie Recipe
Amount Per Serving (1 slice)
Calories 440 Calories from Fat 207
% Daily Value*
Fat 23g35%
Saturated Fat 13g81%
Cholesterol 95mg32%
Sodium 175mg8%
Potassium 292mg8%
Carbohydrates 55g18%
Fiber 2g8%
Sugar 36g40%
Protein 4g8%
Vitamin A 8745IU175%
Vitamin C 1.3mg2%
Calcium 85mg9%
Iron 1.4mg8%
* Percent Daily Values are based on a 2000 calorie diet.

Pin this Best Sweet Potato Pie Recipe for later: 

This post was originally posted on 11/23/2015 as part of Mini Chef Mondays. Scroll down to see our original images. And see some other amazing recipes from our friends apart of our Mini Chef group.

  1. Peppermint Chocolate Chip Milkshake with Whipped Cream // Courtney’s Sweets
  2. One Hour Bread Recipe // Momma Lew
  3. Homemade Berry Granola // Baby Loving Mama
  4. The Best Sweet Potato Pie Recipe // We’re Parents
  5. Cranberry, Orange, & White Chocolate Bars // Frugal Novice
  6. Easy French Pastries Kids Can Make // Eating Richly
  7. Thanksgiving Fruit and Cheese Turkey Centerpiece // Giggles, Gobbles and Gulps
  8. Easy Peasy Cheesy Puffs // Step Stool Chef
  9. Twinestrone Soup // Vegging at the Shore
  10. Banana Smoothies // Mom’s Messy Miracles
  11. Harvest Kale Salad // O’Boy! Organic
  12. Zwetschgenwähe: Swiss Plum Pie // Can’t Google Everything


the best sweet potato pie recipe

sweet potato pie recipe

Filed Under: Desserts, Home, Kids In The Kitchen, Recipes Tagged With: desserts, mini chef mondays, recipes

Chocolate Peanut Butter Banana Ice Cream Recipe

February 26, 2018 by Larisha Campbell 3 Comments

This easy Chocolate Peanut Butter Banana Ice Cream is nicecream at the next level. Learn how to make decadently rich banana ice cream with just 3 ingredients!

If you found this recipe looking for a lactation smoothie, we’re sorry. You can find the lactation smoothie here. (We are aware of the issue, just waiting for a fix soon). 

chocolate peanut butter ice cream

A few weeks back we made a Caramel Banana Ice Cream.  It was heaven.  H-E-A-V-E-N!

Problem – Ice cream actually takes a pretty long time to make.

While I prefer making as much as I can from scratch so I can control our ingredients, I really don’t like things that take a lot of time.  I mean, really, do any of us? There’s the whole instant gratification part of us, but also there’s the whole, I have a bajillion other things to be doing.  Waiting almost 24 hours for ice cream, isn’t really what I want to be doing.  And lastly, trying to explain to a toddler that we are making ice cream but it won’t be ready until tomorrow, is just setting yourself up for a huge meltdown.  And ain’t nobody got time for that.

I need something for those hot summer days that we come inside and can instantly have something within a few minutes to cool us off.  While we typically have ice pops on hand, sometimes we forget to make more before we run out. I mean I am human! HAHA.

chocolate peanut butter nice cream
What is Nicecream?

Nicecream is vegan ice cream made by blending up frozen bananas. Once you have the banana base, you can work on adding in toppings, sauces, and other ingredients to spin it into your favorite ice cream made from bananas.

Our favorite banana nice cream recipe is split between the one you are reading here and our Banana Swirl nice cream with strawberry sauce swirled into the nice cream recipe. Both of these healthy ice cream recipes are sure to please anyone!

What’s the best Nice Cream Recipe?

We almost always have frozen bananas in the freezer so it’s a quick and easy one to throw together. You can flavor the bananas with almost anything or just eat the whipped bananas by themselves. Chocolate and Peanut Butter together are the perfect combination so we are big fans in thinking this Chocolate Peanut Butter Banana Ice Cream recipe is the best nice cream recipe around .

chocolate nice cream recipe

Throw the three ingredients into a blender (we use this Ninja Kitchen Professional system) and bam, instant ice cream in under 5 minutes.  You can serve right away or throw in the freezer for later if you want.  Both our girls loved this recipe and so did Andrew and I. We hope you enjoy it too!

how to make nice cream

How to Make Chocolate Peanut Butter Banana Ice Cream

5 from 2 votes
Print
Chocolate Peanut Butter Banana Ice Cream
Prep Time
20 mins
Cook Time
5 mins
Total Time
25 mins
 

THIS EASY CHOCOLATE PEANUT BUTTER BANANA ICE CREAM IS NICECREAM AT THE NEXT LEVEL. LEARN HOW TO MAKE DECADENTLY RICH BANANA ICE CREAM WITH JUST 3 INGREDIENTS!

Course: Dessert
Cuisine: American
Servings: 4
Calories: 158 kcal
Author: Larisha Campbell
Ingredients
  • 4 Frozen Bananas
  • 2 tbsp Creamy Peanut Butter
  • 2 tbsp 100% Cacao Powder
Instructions
  1. Set Bananas out for 15 minutes to slightly thaw.

  2. Add ingredients to high powdered blender or food processor and blend for 5 minutes, scraping down as needed, until a thick, creamy consistency is achieved. 

  3. Serve immediately or store in air tight container in freezer. 

Recipe Notes

If you are having trouble blending completely, you can wait a few minutes for bananas to thaw a bit more or add a splash of milk (dairy or dairy free) until it will blend well.

Nutrition Facts
Chocolate Peanut Butter Banana Ice Cream
Amount Per Serving (1 g)
Calories 158 Calories from Fat 36
% Daily Value*
Fat 4g6%
Saturated Fat 1g6%
Sodium 38mg2%
Potassium 515mg15%
Carbohydrates 30g10%
Fiber 4g17%
Sugar 15g17%
Protein 3g6%
Vitamin A 75IU2%
Vitamin C 10.2mg12%
Calcium 13mg1%
Iron 0.8mg4%
* Percent Daily Values are based on a 2000 calorie diet.

mini chef mondays chocolate peanut butter banana ice cream

Pin this Chocolate Peanut Butter Banana Nicecream Recipe for later!

vegan ice cream recipe

This post was originally posted on 6/20/2016. Same great recipe, but our photography has greatly improved. 

chocolate peanut butter banana ice cream recipe

Chocolate Peanut Butter Banana Ice Cream

This post is part of a kids cooking series we did called Mini Chef Mondays– a series of posts that kids can make primarily on their own. Check out some other fun kid-friendly recipes from some of our friends! 

  1. Sundae Fundays Mini Chef Mondays // Courtney’s Sweets
  2. 6 Reasons to Take Your Kids to a Pick Your Own Farm // Momma Lew
  3. Patriotic Potato Chip Candy // Finding Zest
  4. Chocolate Peanut Butter Banana Ice Cream Recipe // We’re Parents
  5. The Best Finger Foods For Baby // Eating Richly Even When You’re Broke
  6. Cooking with Kids: 5 Must Make Summer Treats // Giggles, Gobbles and Gulps
  7. Vegetarian Crockpot Baked Beans // Vegging at the Shore
  8. Real Fruit Healthy Slushies // O’Boy! Organic
  9. Homemade Tuscan Style Pizza // My Mini Adventurer

Filed Under: Desserts, Home, Kids In The Kitchen, Recipes Tagged With: desserts, ice cream, mini chef mondays, recipes

Caramel Apple Cider Milkshake

September 12, 2016 by Larisha Campbell Leave a Comment

caramel-apple-cider-milkshake

Growing up, fall wasn’t that exciting for me. It meant that it was getting cold and time to go back to school. The only thing exciting about fall was it meant that the Apple Butter Festival was around the corner. Apple Cider was my favorite drink (still is) and I always looked forward to that part of the year. Fast forward to adulthood with kids, and summer is exhausting and hot. I now look forward to the cooler air, where we can get outside and actually enjoy time without sweating profusely.

Just because it’s getting cooler though, don’t mean you can’t enjoy frozen treats. It’s the best of both worlds! You get amazingly delicious flavor combinations in season mixed with frozen deliciousness. Thus, we created this Caramel Apple Cider Milkshake. It’s all sorts of awesome and you need it in your life immediately.

Watch us make it!

We blended caramel crunch ice cream from Target with apple cider, topped with whipped cream and homemade caramel sauce and voila! Caramel Apple Cider Milkshake. Because why not!? It’s amazing.

caramel-apple-cider-milkshake

Now excuse me while I go consumer all the leftover apple cider.

0 from 0 votes
Print
Caramel Apple Cider Milkshake
Author: Larisha Campbell
Ingredients
  • 3 scoops of caramel ice cream
  • 1/4 cup apple cider
  • Whipped Topping
  • Caramel Sauce
  • Cinnamon
Instructions
  1. Blend together ice cream and apple cider.
  2. Pour into a chilled glass.
  3. Top with whipped topping, caramel sauce, and cinnamon.
  4. Serve immediately.

_caramel-apple-cider-milkshake-recipe

I am hosting Mini Chef Mondays along with 8 fabulous bloggers, find out more about the Mini Chef Mondays Team!

Mini Chef Mondays Team
Join our facebook group to find even more recipes and share recipes too!

Join the Mini Chef Mondays newsletter to get the latest recipes delivered to your email each week! Don’t worry, we will only use your email for Mini Chef Mondays recipes, pinky promise!

Get featured and follow us too!
  • Pinterest: Each post/recipe linked up will be added to our Mini Chef Mondays board
  • Instagram: Use our hashtag #MiniChefMondays so we can repost your mini chef
  • Twitter: We retweet every post with #MiniChefMondays

Be sure to check out each of their Mini Chef posts as well!

  • Date Caramel Dip for Apples // Courtney’s Sweets
  • Creamy Corn Chowder // Momma Lew
  • Caramel Apple Pumpkin Pie // Finding Zest
  • Caramel Apple Cider Milkshake // We’re Parents
  • Ground Beef Dinner in a Pumpkin // Eating Richly
  • Apple Crescents // Giggles, Gobbles and Gulps
  • Easy Pumpkin Apple Crisp // Vegging at the Shore
  • Apple Pie Chips // My Mini Adventurer
  • Butternut Squash French Toast // O’Boy! Organic
  • Apple Pie Chips // My Mini Adventurer

An InLinkz Link-up


Filed Under: Desserts, Home, Kids In The Kitchen, Recipes Tagged With: apple, caramel, fall, milkshake, mini chef mondays

Caramel Apple Cheesecake Dip

September 5, 2016 by Larisha Campbell Leave a Comment

Caramel Apple Cheesecake Dip

It’s our first Mini Chef Mondays for September, which means it’s technically fall.  Am I right?

September 1st equals fall.

I know I will have a few of you that absolutely hate me for saying that, but just stick with me. I promise I have something that you are going to love.

I didn’t want to upset you too much, so I’m not starting the month of with pumpkin flavored goodies or Halloween related treats. However, we are diving into two of my favorite things.

Caramel Apples and Cheesecake.

Caramel Apples are the epitome of my childhood.  Loved them! I still do honestly. I remember growing up that I would beg for one every time that we went to a carnival, fair, boardwalk….you get the picture. Now, I don’t have to wait for any special occasion. The Amish market near our house carries them weekly and they aren’t just normal Caramel and Apple.  They are dipped in chocolate, rolled around in candies or marshmallow, drizzle with peanut butter sauce, and more.  They are amazing. But they are fussy. All that work just to have 7.5 bits of apple actually dipped in the topping, then it’s just a healthy apple.  HA!

Cheesecake is also fussy.  But we love it so much.  We’ve made cheesecake funnel cakes, cheesecake pancakes, shoot, we’ve even made peanut butter cheesecake overnight oats.  But, as much as we love all of those (and recommend you try all of them), we’d be lying to say it’s super easy.  Cheesecake is a labor of love.

how to make cheesecake dip

Thus, we bring you the less fussy version of the best of both worlds.

Caramel Apple Cheesecake Dip. 

It’s the perfect version of a fall dip that everyone will fall in love with. And, trust me, no one will believe how fast and easy this recipe is to make.

0 from 0 votes
Print
Caramel Apple Cheesecake Dip
Author: Larisha Campbell
Ingredients
Caramel Sauce
  • 5 tbsp unsalted Butter
  • 1 cup Brown sugar
  • 1/2 cup Heavy Cream
  • 1 tbsp Vanilla
  • Pinch of salt
Dip
  • 2 8 oz packages of cream cheese softened
  • 1/4 cup each chopped chocolate and peanuts
Instructions
To Make Caramel Sauce
  1. Combine butter, brown sugar, and heavy cream.
  2. Bring to a rolling bowl, stirring very frequently, for 10 minutes.
  3. Turn off heat and add in the vanilla and salt.
  4. Let cool slightly. Begin to prep the dip.
To make the dip
  1. Beat the cream cheese on medium for 5 minutes.
  2. Add in the caramel sauce.
  3. Mix until very well combined.
  4. Pour into serving bowl, top with chopped chocolate and peanuts.
  5. Refrigerate for at least 2 hours before serving. Can make up to 3 days in advance. Keep covered and refrigerated until ready to serve.
  6. Serve alongside desired dippers. We use apples, chocolate graham crackers, and pretzel rods.

caramel apple cheesecake dip recipe

I am hosting Mini Chef Mondays along with 8 fabulous bloggers! Read how Mini Chef Mondays started.

Mini Chef Mondays Team
Join our facebook group to find even more recipes and share recipes too!

Join the Mini Chef Mondays newsletter to get the latest recipes delivered to your email each week! Don’t worry, we will only use your email for Mini Chef Mondays recipes, pinky promise!

Get featured and follow us too!
  • Pinterest: Each post/recipe linked up will be added to our Mini Chef Mondays board
  • Instagram: Use our hashtag #MiniChefMondays so we can repost your mini chef
  • Twitter: We retweet every post with #MiniChefMondays

Be sure to check out each of their Mini Chef posts as well!

  • Chocolate Covered Apple Donuts // Courtney’s Sweets
  • Fall Harvest Cake
    // Momma Lew
  • Pumpkin Spice Sauteed Apples // Finding Zest
  • Caramel Apple Cheesecake Dip // We’re Parents
  • Homemade Applesauce Recipe for Kids // Eating Richly
  • Maple Cinnamon French Toast in a Mug // Giggles, Gobbles and Gulps
  • Foil Packet Apricot Salmon // Vegging at the Shore
  • Homemade Apple Cider // O’Boy! Organic
  • Butterbeer Bark // My Mini Adventurer

An InLinkz Link-up


Filed Under: Desserts, Home, Kids In The Kitchen, Recipes Tagged With: caramel, cheesecake, dip, fall, mini chef mondays

S’mores Waffles

August 29, 2016 by Larisha Campbell Leave a Comment

S'mores-Waffles

The first day of school is a really big deal.  Whether you homeschool or send your child out of the home for school, the first day is always super important.  Not only to us as parents, but most importantly to the children themselves. When we thought we were going to start Pre-K homeschool last year, I wanted to start our first day off amazing. What better way to do that than with a super amazing, fun, and delicious breakfast.

While Pre-K homeschool didn’t work out for us last year (Skibbles just wasn’t ready), we think she will be this year. We have started prepping our homeschool room and I’ve started planning out our first few weeks of materials. But what I was most excited about was when I thought of this genius first day of school breakfast. S’mores Waffles! I don’t know many kids that wouldn’t enjoy this for their first day breakfast, or any day breakfast if we are being truthful here.

I promise you read that right. We made S’mores Waffles.

We cooked golden delicious Belgian style waffles, cut them almost all the way apart, then stuffed with chocolate chips and mini marshmallows. Snack style you can eat them just like that. Or, top with crushed chocolate graham crackers and maple syrup. WHATTT!? S’mores Waffles are the bomb.com y’all. These need to be on your must make list.

Watch us make them ! Just click play 🙂

We use this waffle maker in our video.

Both girls went crazy over them, but admittedly, so did Andrew and I. This was definitely a fun back to school Mini Chef Mondays recipe to prepare for you all.

Now, I’m faced with the truth that we are giving Pre-K homeschool another go around.  This time more focused with a ready to learn pre-schooler this year.  The mama in me just wants to go hide in a corner and cry.  Why is she about to turn 4 guys? FOUR!?  I feel like I just had her. But she’s growing into this fiercely fun, crazy, independent, and intelligent child, and I couldn’t be more proud of that.

Okay, let me stop being such a mom. Here’s the recipe your dying to have!

S'mores-Waffles-recipe

0 from 0 votes
Print
S’mores Waffles
Author: Larisha Campbell
Ingredients
  • 6 eggs
  • 1/3 cup coconut oil melted
  • 1 cup whole milk
  • 1 tbsp brown sugar
  • 1 tbsp sugar
  • 2 tbsp all-purpose flour
  • 1/4 tsp salt
  • 1 tbsp baking powder
  • mini marshmallows
  • chocolate chips
  • chocolate graham crackers crumbled (optional)
  • maple syrup
Instructions
  1. In a large bowl, whisk together the eggs, coconut oil, milk, and both sugars.
  2. In a separate small bowl, combine, flour, salt, and baking powder.
  3. Slowly combine, dry ingredients into wet ingredients.
  4. Cook batter according to your waffle maker.
  5. Once down, carefully slice waffles almost all the way through.
  6. Stuff with desired amount of mini marshmallows and chocolate chips.
  7. Put back into waffle maker to melt, about 15-20 seconds.
  8. Eat as is for a snack or top with crumbled chocolate graham crackers and maple syrup for breakfast.

Homemade-S'mores-Waffles-recipe

Homemade-S'mores-Waffles-recipe1109

I am hosting Mini Chef Mondays along with 8 fabulous bloggers! Read how Mini Chef Mondays started.

Mini Chef Mondays Team
Join our facebook group to find even more recipes and share recipes too!

Join the Mini Chef Mondays newsletter to get the latest recipes delivered to your email each week! Don’t worry, we will only use your email for Mini Chef Mondays recipes, pinky promise!

Get featured and follow us too!
  • Pinterest: Each post/recipe linked up will be added to our Mini Chef Mondays board
  • Instagram: Use our hashtag #MiniChefMondays so we can repost your mini chef
  • Twitter: We retweet every post with #MiniChefMondays

Be sure to check out each of their Mini Chef posts as well!

  • Steamed Hard Boiled Eggs // Courtney’s Sweets
  • Homemade Dunkaroos // Momma Lew
  • Homemade Fruit Cup for School Lunch // Finding Zest
  • Smores Waffles // We’re Parents
  • Canned Tuna Sushi for Kids // Eating Richly
  • Frozen Banana Yogurt Pops // Giggles, Gobbles and Gulps
  • Vegetarian Quinoa Chili // Vegging at the Shore
  • Top 5 Back to School Lunch Must Haves // O’Boy! Organic
  • Cucumber Ants on a Log // My Mini Adventurer

An InLinkz Link-up


Filed Under: Breakfast, Home, Kids In The Kitchen, Recipes Tagged With: breakfast, chocolate, mini chef mondays, recipes, smores, waffles

Blueberry Lime Cupcakes

July 18, 2016 by Larisha Campbell Leave a Comment

Blueberry-Lime-Cupcakes

Skibbles loves to bake.  It’s one of her favorite things to do and I always make a learning experience out of it.  Whether we are talking about colors of our ingredients, learning fractions from the measuring cups, or counting things out, there’s always something to learn.  One of her favorite things to make is any type of cupcake or cake. Can you blame her? I decided this week we were going to make Blueberry Lime Cupcakes. A delicious yellow lime cupcake made from scratch, stuffed with a blueberry sauce and then topped with a lime and cream cheese frosting. WHAT!? YESSSSSS!!!

Blueberry-Lime-Cupcakes-recipe

Skibbles has embraced the Mini Chef title full force.  She’s absolutely adorable whenever she thinks the video is rolling. Since we do videos on our social media channels, she’s got her tag lines down the second she thinks we are recording. “Hey guys, I’m Mini Chef Skibbles. What we making today? We making _____ (insert what we’re making)”. It’s one of my greatest joys since bringing her into the world. She also constantly asks for her picture to be taken when she’s doing something involving food.

kids making cupcakes

Andrew and I were actually having a conversation about how awesome it would be if she ended up as a chef or baker because of all the adorable and fun photos we have of her cooking and/or baking in the kitchen. Who know what she will be when she grows up, but at the very least she’s going to know her way around the kitchen much better than I did at any age and for that, I’m happy.  She has been trying to get her sister involved more when we do things in the kitchen and I’ve happily been letting her. I absolutely just adore watching them bond together and food seals that bond even more.

making stuffed cupcakes

Blueberry-Lime-Cupcake

I also started letting her practice piping icing on the cupcakes this time.  She did amazing for her first time. Albeit, it was more of just some blobs on top, it was adorably sweet to watch how excited doing this made her.

learning how to pipe icing

These blueberry lime cupcakes were amazing and we hope you love them as much as we do!

0 from 0 votes
Print
Blueberry Lime Cupcakes
Author: Larisha Campbell
Ingredients
For the cupcakes
  • 1 1/2 cups flour
  • 1 tsp baking soda
  • 1/2 tsp baking powder
  • 1/4 tsp salt
  • 1/2 cup unsalted butter 1 stick, softened
  • 3/4 cup brown sugar packed
  • 2 tbsp honey
  • 1/2 tbsp vanilla
  • 1 egg
  • 1/4 cup whole milk
  • 1/2 cup vanilla Greek yogurt
  • 2 tsp lime zest
For the frosting
  • 8 oz 1 package cream cheese, softened
  • 1/2 cup 1 stick unsalted butter, softened
  • 1 cup powdered sugar
  • 1 tsp lime juice
  • 1 1/2 tsp lime zest
  • Extra lime zest for top
For the Blueberry sauce
  • 1 pint frozen blueberries
  • 1/8 cup sugar
  • 1 tbsp lime juice
Instructions
  1. Preheat oven to 350 degrees.
  2. In a small bowl, combine flour, baking soda, baking powder, and salt. Set aside.
  3. In a large bowl, cream together butter and brown sugar.
  4. Add in honey, vanilla, and eat and beat together again.
  5. Add in milk and vanilla Greek yogurt and beat together again.
  6. Slowly add in flour mixture until well combined.
  7. Fold in the lime zest.
  8. In a greased or paper cup lined muffin tin fill each cup 3/4 of the way full.
  9. Bake for 15-20 minutes or until toothpick inserted comes out clean.
  10. While making, make the blueberry sauce. Take off heat to slightly cool.
  11. When cupcakes are done, remove from oven and let cool for 5 minutes.
  12. Remove the center of each cupcake with a small teaspoon (we used 1/4 tsp) carefully making sure not to go all the way down to the bottom.
  13. Fill each center with blueberry sauce.
For the frosting
  1. Beat butter and cream cheese together for 5 minutes.
  2. Add in powdered sugar and beat until combined.
  3. Mix in lime juice and lime zest until well combined.
  4. Spread frosting over cupcakes using a piping bag with desired tip.
  5. Shave extra zest on top of cupcakes if desired.

I am hosting Mini Chef Mondays along with 8 fabulous bloggers! Read how Mini Chef Mondays started, plus how to link up!

Join our facebook group to find even more recipes and share recipes too!

Join the Mini Chef Mondays newsletter to get the latest recipes delivered to your email each week! Don’t worry, we will only use your email for Mini Chef Mondays recipes, pinky promise!

Get featured and follow us too!
  • Pinterest: Each post/recipe linked up will be added to our Mini Chef Mondays board
  • Instagram: Use our hashtag #MiniChefMondays so we can repost your mini chef
  • Twitter: We retweet every post with #MiniChefMondays

Be sure to check out each of their Mini Chef posts as well!

  1. Yogurt Parfait with Fresh Fruit // Courtney’s Sweets
  2. Quick and Easy Fudge Recipe // Momma Lew
  3. Berry Kiwi Cooler // Finding Zest
  4. Blueberry Lime Cupcakes // We’re Parents
  5. Cake Batter Ice Cream Recipe // Eating Richly
  6. Dipped Sprinkled Ice Cream Cones // Giggles, Gobbles and Gulps
  7. Lavender Blueberry Ice Pops // Vegging at the Shore
  8. Real Fruit Healthy Slushies // O’Boy! Organic
  9. Fresh Peach Sorbet // My Mini Adventurer

An InLinkz Link-up


Filed Under: Desserts, Home, Kids In The Kitchen, Recipes Tagged With: desserts, mini chef mondays, recipes

Oyster Cookies

July 11, 2016 by Larisha Campbell Leave a Comment

oyster-cookies recipe

We recently had a Finding Dory party to celebrate baby’s first birthday. It was an exciting party themed all around the brand new movie. All the food was fish/underwater themed.  All our guests were excited over how well everything came out. One of Skibs favorite things was helping prepare all the food. Okay, maybe it was actually playing with the balloons and bubbles and toys, but she did help out here and there. She loved these oyster cookies so much that we made them again after the party was over. They are so quick and simple to make.

homemade-oyster-cookies

The ingredients are super simple – Nilla wafers, sixlets candy, and fruit dip.  We make a homemade fruit dip that will knock your socks off! (Recipe below)

making oyster cookies

I was actually surprised at how quickly these went at the party.  I went to grab one and there were two left and my friend was grabbing one too.  We had made so many of them and bam, gone.  That tells me just how amazing they were and it wasn’t just me being biased about these oyster cookies.

homemade-oyster-cookies-recipe

The sixlets candy has a shiny coating to really make it look like a pearl and pop.  It was just so perfect. So whether you are just looking for a simple snack for the summer or are hosting your next underwater party or Finding Dory party soon, we encourage you to get the kids in the kitchen to make these too!

0 from 0 votes
Print
Oyster Cookies
Author: Larisha Campbell
Ingredients
  • Box of Nilla Wafers
  • Fruit Dip Recipe omit orange zest
  • Sixlets Candy
Instructions
  1. Mix together fruit dip recipe.
  2. Put fruit dip into a pastry bag.
  3. Place a small amount of dip onto flat side of one cookie.
  4. Place another cookie on top so it appears open like an oyster shell.
  5. Place a sixlet candy in the center of the open cookies.
  6. Eat!

oyster-cookies-recipe

I am hosting Mini Chef Mondays along with 8 fabulous bloggers! Read how Mini Chef Mondays started, plus how to link up!
Join our facebook group to find even more recipes and share recipes too!

Join the Mini Chef Mondays newsletter to get the latest recipes delivered to your email each week! Don’t worry, we will only use your email for Mini Chef Mondays recipes, pinky promise!

Get featured and follow us too!
  • Pinterest: Each post/recipe linked up will be added to our Mini Chef Mondays board
  • Instagram: Use our hashtag #MiniChefMondays so we can repost your mini chef
  • Twitter: We retweet every post with #MiniChefMondays

Be sure to check out each of their Mini Chef posts as well!

  1. Easy Healthy Snack Sliced Apples // Courtney’s Sweets
  2. Cherry Vanilla Ice Pops // Momma Lew
  3. Oatmeal Peanut Butter Protein Bites // Finding Zest
  4. Oyster Cookies // We’re Parents
  5. Alphabet Kids Snacks A is for Ant // Eating Richly
  6. Cinnamon Sugar Waffle Sticks // Giggles, Gobbles and Gulps
  7. Lavender White Chocolate Scones // Vegging at the Shore
  8. Real Fruit Healthy Slushies // O’Boy! Organic
  9. Kid Sized Chocolate Nutella Milkshakes // My Mini Adventurer

An InLinkz Link-up


Filed Under: Desserts, Home, Kids In The Kitchen, Recipes Tagged With: desserts, mini chef mondays

Watermelon Limeade Slushie

July 4, 2016 by Andrew Leave a Comment

Watermelon-Slushie

WATCH LARISHA AND SKIBBLES MAKE THIS WATERMELON LIMEADE SLUSHIE LIVE ON PERISCOPE!

Are you the type of person constantly trying to use up everything in your fridge so you have zero waste? Having to come up with something different and get imaginative with new ideas.

Well, I definitely am.

Typically Larisha and I, being the adults in the family, tend to try to consume all the food we can from certain meals we make, or fruit we buy, but sometimes there’s just so much food and we just get creative and make something out of what we have. Think Chopped, Home Edition.

So the other day I came inside and it was pretty hot in general — outside the house, inside the house, etc. Just miserable. I opened the fridge to get something to drink and it was empty besides a pitcher of water.  I saw pieces of watermelon and pulled the container out to eat a few pieces but thought to myself that I would really like something to drink.  Skibs had been asking for ice cream all day and so I decided to make something that would satisfy my thirst and her craving. Trying to win the nice dad award.

I figured I could possibly create something with the watermelon. I was thinking of a milkshake, but realized that I didn’t have the ingredients that I needed, so I thought what would be the next best thing.

Slushie!

Watermelon-Limeade-Slushie

I looked around the fridge and found a few things and was ready to go.  We were going to make a Watermelon Limeade Slushie. I asked Skibs if she wanted to help me make a slushie and with her confused face said “Swaushie? Ok. Let’s go.  I Mini Chef Skibbles”.  And off we went! It was the perfect treat and everyone enjoyed.  We hope you do too!

watermelon limeade slushie recipe mini chef

0 from 0 votes
Print
Watermelon Limeade Slushie
Author: Andrew
Ingredients
  • 4 cups fresh cubed watermelon
  • Fresh juice from two limes ~1/3 cup
  • 1/4 cup cane sugar
  • 1/8 tsp salt
  • 4 cups ice divided
Instructions
  1. In a blender, add the first four ingredients and blend.
  2. Add two cups of ice and blend again.
  3. If not slushie enough, continue adding ice until your desired consistency is reached.

Watermelon-Limeade-Slushie-recipe

I am hosting Mini Chef Mondays along with 8 fabulous bloggers! Read how Mini Chef Mondays started, plus how to link up!

Mini Chef Mondays Team
Join our facebook group to find even more recipes and share recipes too!

Join the Mini Chef Mondays newsletter to get the latest recipes delivered to your email each week! Don’t worry, we will only use your email for Mini Chef Mondays recipes, pinky promise!

Get featured and follow us too!
  • Pinterest: Each post/recipe linked up will be added to our Mini Chef Mondays board
  • Instagram: Use our hashtag #MiniChefMondays so we can repost your mini chef
  • Twitter: We retweet every post with #MiniChefMondays

Be sure to check out each of their Mini Chef posts as well!

  1. Best Fruit Salad Recipe for Kids // Courtney’s Sweets
  2. 5 Kid Friendly Watermelon Recipes // Momma Lew
  3. Yogurt Fruit Breakfast Pizza // Finding Zest
  4. Watermelon Limeade Slushie // We’re Parents
  5. 4th of July Snacks that Kids Can Make Themselves // Eating Richly
  6. Jersey Style Pork Roll, Egg and Cheese Sandwich // Giggles, Gobbles and Gulps
  7. Make Your Own Oatmeal // Vegging at the Shore
  8. Real Fruit Healthy Slushies // O’Boy! Organic
  9. Fresh Watermelon Juice // My Mini Adventurer

An InLinkz Link-up


Filed Under: Desserts, Home, Kids In The Kitchen, Recipes Tagged With: drinks, mini chef mondays, recipes

Blueberry Kiwi Lemonade Ice Pops

June 27, 2016 by Larisha Campbell 1 Comment

Blueberry-Kiwi-Lemonade-Ice-Popsicles

It’s officially summer!  YAY!

Except that I really don’t like the heat.  It makes me cranky and the temperature fluctuation going indoors and outdoors typically leaves me breaking out in hives.  But enough about my weirdness.  I’ve noticed that Skibbles also gets irritable if she’s too hot.

Obviously, as a mom, I want to do my best to keep them happy, which in the summer time means plenty of snacks that are cooling and refreshing.  But also, I need them to be healthy. Most store-bought summer treats are loaded with refined sugars and dyes, and so my goal this summer is to come up with a combination of various healthy alternatives.

Homemade-Blueberry-Kiwi-Lemonade-Ice-Popsicles

I enabled my Mini Chef to help make these delicious Blueberry Kiwi Lemonade ice pops are after a hot summer day, we all devoured them.  With just 4 ingredients (one being water), they are super healthy and very cost efficient as well.  It’s a win-win for everyone.

Skibbles loved helping me make these and there really wasn’t much that she couldn’t do on her own. We work great as a team though and she always asks to do it together, so I happily oblige.

mini chef mondays ice pops

Just a little random fact: July is National Blueberry Month – so be on the lookout for these nutrient dense beauties on sale soon!

Blueberry-Kiwi-Lemonade-Ice-Popsicles-recipe

Here’s our super quick and simple Blueberry Kiwi Lemonade Ice Pops Recipe

0 from 0 votes
Print
Blueberry Kiwi Lemonade Ice Pops
Author: Larisha Campbell
Ingredients
  • 4 lemons
  • 3 kiwis
  • 1/2 pint of blueberries
  • 1 1/2 cups cold water
Instructions
  1. Peel and slice the kiwis. Cut each slice in half.
  2. Juice the 4 lemons. You should have about 1/2 a cup of fresh lemon juice.
  3. In your popsicle molds, layer the blueberries and kiwi slices until you reach the top of your mold.
  4. In a small bowl, mix together the fresh lemon juice and water.
  5. Stir to combine.
  6. Pour juice into each ice pop mold up to the top.
  7. Tap on counter to remove any air bubble and top with additional juice if necessary.
  8. Insert ice pop sticks.
  9. Place in freezer at least for hours until frozen solid or overnight.
  10. Serve!

Blueberry-Kiwi-Lemonade-Ice-Pops

Watch us make it! Enjoy!

Mini Chef Mondays Team

I am hosting Mini Chef Mondays along with 8 fabulous bloggers! Read how Mini Chef Mondays started, plus how to link up!

Join our facebook group to find even more recipes and share recipes too!

Join the Mini Chef Mondays newsletter to get the latest recipes delivered to your email each week! Don’t worry, we will only use your email for Mini Chef Mondays recipes, pinky promise!

Get featured and follow us too!
  • Pinterest: Each post/recipe linked up will be added to our Mini Chef Mondays board
  • Instagram: Use our hashtag #MiniChefMondays so we can repost your mini chef
  • Twitter: We retweet every post with #MiniChefMondays

Be sure to check out each of their Mini Chef posts as well!

  1. Semi Homemade Yogurt Recipe // Courtney’s Sweets
  2. Fish Cake Tutorial // Momma Lew
  3. Very Berry Fruit Salsa // Finding Zest
  4. Blueberry Kiwi Lemonade Ice Pops // We’re Parents
  5. Carved Orange Warthog with Toddler Fruit Salad // Eating Richly
  6. Red, White and Blue Lemonade Mocktail // Giggles, Gobbles and Gulps
  7. Blueberry Challah French Toast // Vegging at the Shore
  8. Strawberry Cheesecake Rollups // My Mini Adventurer

An InLinkz Link-up


Filed Under: Desserts, Home, Kids In The Kitchen, Recipes Tagged With: ice pops, mini chef mondays, recipes, summer recipes

  • 1
  • 2
  • 3
  • 4
  • Next Page »


We're Parents is all about cooking and traveling our way through imperfect parenting. Learn More

SUBSCRIBE TO OUR WEEKLY NEWSLETTER & GET PARENT & ME COLORING SHEETS

Connect With Us

AvatarWe're Parents is a unique mom and dad natural parenting blog focusing on topics such as breastfeeding, babywearing, and car seat safety. You'll also find Delicious recipes, inspired travel recommendations, and more as you journey with us through parenting. Learn More…

VIEW OUR PRIVACY POLICY

Even More Recent Posts

We’re Parents is a participant in the Amazon Services LLC Associates Program, an affiliate advertising program designed to provide a means for sites to earn advertising fees by advertising and linking to amazon.com

Copyright © 2021 · Foodie Pro Theme by Shay Bocks · Built on the Genesis Framework · Powered by WordPress

We're Parents uses cookies to ensure that you have the best user experience on this website. By clicking okay, you agree to our privacy policy terms & settings. Find out more.