We're Parents

  • Home
  • About Us
    • About Us
    • Privacy Policy
    • Contact Us
    • Disclosures
    • Media Kit
  • Parenting
    • Pregnancy and Postpartum
    • Breastfeeding
    • Car Seat Safety
    • Mental Health
    • Babies
    • Toddlers
    • School Age
    • Older Kids
    • Holiday Crafts & More
    • Green Living
  • Recipes
    • Breakfast
    • Lunches
    • Dinner
    • side dishes
    • Crockpot
    • Desserts
    • Lactation Recipes
    • Snacks
    • The Seasoned Kids (Recipes by Kids)
  • Travel
    • Kid Friendly Outings
    • Restaurants
    • Travel Tips

Coconut Oil Uses

January 24, 2018 by Larisha Campbell Leave a Comment

Coconut Oil is so versatile.  From cooking to DIY bath and beauty products, there’s bound to be a way you love to use it. Today, we’re dishing all the details!

how to use coconut oil

It’s 2018, so you’ve likely heard of coconut oil by now. If not, you may have just woken from a coma. (Slightly kidding, not really). It has been gaining popularity over the last 5 years, but coconut oil is nothing new.

Coconut oil is an edible oil that has been extracted from mature coconuts. It is slow to oxidize, making it resistant to becoming rancid, and therefore can last six months or more without spoiling. Coconut oil has been studied and available in the Americas since the 1920s and 1930s, but it was likely available as early as the 15th century. For many Caribbean and Asian countries, it is a staple in their lifestyle.

Is Coconut Oil Really Good For You?

Well, it depends on who you ask*.  For naturally minded consumers, the answer is yes.

Coconut oil, whether refined or unrefined contain medium chain fatty acids which do not break down when heated. This makes it one of the healthiest oils that you can cook with, because other oils can become toxic when heated over a certain temperature. Controversy comes depending on whether one believes saturated fat is bad for you or not. Many mainstream doctors and the FDA will say that it is bad; however, thousands of studies show that the health benefits of coconut oil outweigh any risks from saturated fat. Plus, saturated fat is coming under fire for actually being beneficial as of recently, not that it should be avoided.

Coconut oil is antiviral, antifungal, anti-inflammatory, antibatical, and antimicrobial. At the most basic level, this means the properties in coconut oil can help and fight many conditions and illnesses.

One difference in coconut oil vs other oils or foods that contain saturated fat is the in coconut oil that saturated fat is naturally occurring.  It’s not manmade in any way. In fact, coconut oil has been show to actually be heart healthy. Additionally, studies have shown that coconut oil can aid in weight loss, boost your immune system, support healthy hair and skin, and more.

is coconut oil really good for you

How do you use coconut oil?

Coconut oil is a wonder oil that has hundreds of uses. From sautéing to mixing into brownies, there are a wide range of benefits in the kitchen. However, coconut oil can used well beyond the kitchen. In DIY bath and beauty products and daily beauty regimens, to household uses as well.

Today, we’re sharing some of our favorite coconut oil uses! Everything from food recipes, to DIY beauty  recipes, to household uses. Bookmark this page to continue coming back as we update it will new ways we find.

how do you use coconut oil

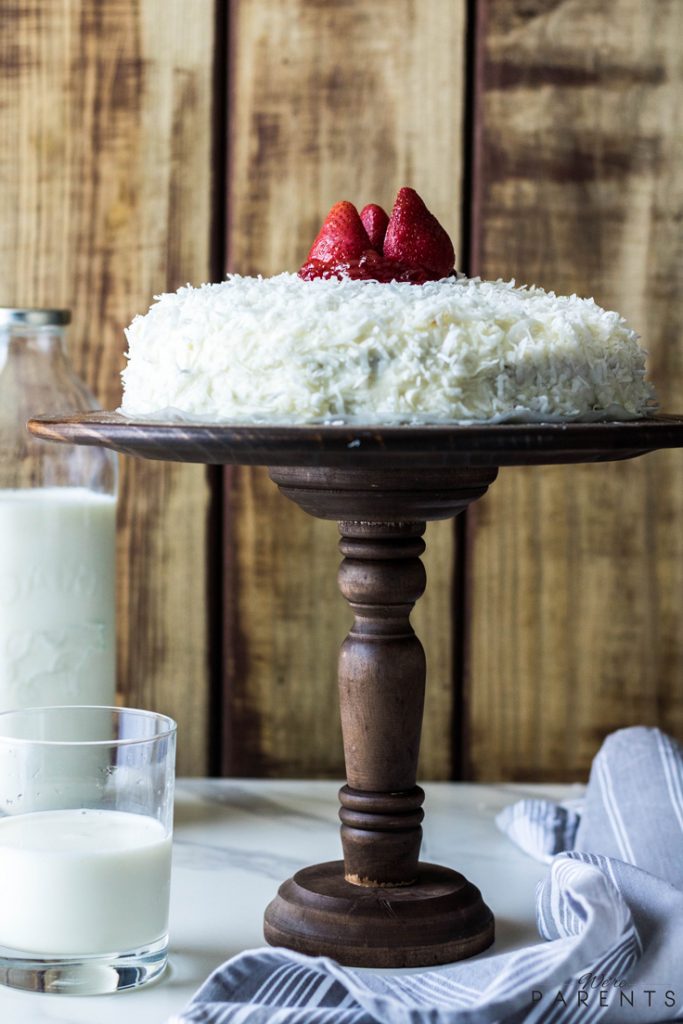
Ways to Use Coconut Oil in the Kitchen

An InLinkz Link-up


Ways to Use Coconut Oil in Bath & Beauty

An InLinkz Link-up


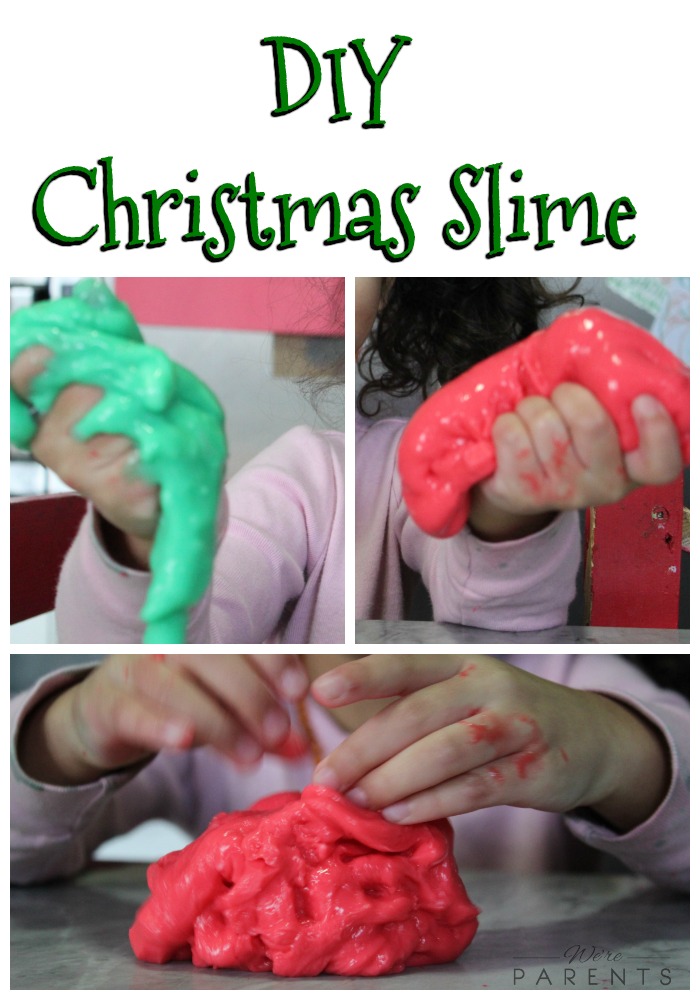
Ways to Use Coconut Oil Beyond Kitchen, Bath or Beauty

An InLinkz Link-up


*Disclosure: These statement have not be approved by the FDA.  Opinions and thoughts are my own.  Please consult a medical doctor before making any health changes. 

Filed Under: DIY Beauty and Body, Green Living, Home, Parenting Tagged With: diy, green living

DIY Farmhouse Cake Stand

September 7, 2017 by Larisha Campbell 2 Comments

Disclosure: This DIY Farmhouse Cake Stand shop has been compensated by Collective Bias, Inc. and its advertiser The National Milk Life Campaign. All opinions are mine alone. #MyMilkMyWay #CollectiveBias

When Andrew and I bought our home, it was a foreclosure. As soon as we walked inside, our realtor wanted to walk out. However, we knew. We knew it was the one.  We had viewed close to 60 houses, but we were determined that we would not settle for anything less than our dream.  Realistically, we were spending close to a quarter million dollars, and we wanted to make sure that it was perfect for our lifestyle, for our newly created family (Serenity was just 6 months when we settled), and our aspirations. Crazily, the house that had no kitchen, no light fixtures in the entire house, and only subflooring throughout the entire first floor, is the one we knew was it.

We made it ours. 

When we moved in our furniture was still from our college days. It was mismatched and older, paint was peeling, and we just disliked most of it. But, we had no idea what style we liked. Over time, we settled on a rustic farmhouse feel for our home.  Don’t get me wrong, we still have a ton of work left to do inside to make it had that perfect farmhouse feel, but we are getting there.

DIY is the way to go. 

We quickly learned that DIY farmhouse items can get pricey, but there’s also no perfect way. Meaning, that we could DIY that stuff that we wanted to have. One place I’ve been trying to fix up is our kitchen. Since it was gutted when we bought our home, we were lucky enough to be able to pick out everything to have our dream kitchen.  However, we rushed our dishes and accessory choices and just now getting around to switching them out.  One thing I’ve been searching for to no avail is a new cake stand.

Andrew and I have a running Saturday date night of making cookies with milk inside our home together and we save leftovers for the girls to have the next day. It’s also a focal point when we are entertaining others in our home and we really wanted something beautiful. So, we made our own DIY Farmhouse Cake Stand.

It was insanely easy. A candle holder and round wooden plate from the local craft store and some stain and butcher block oil from the hardware store and voila. With a little wood glue and a few steps it was completed and it was perfection.

Products Needed:

  • Raw Wooden 8.5″ Candle Stick Holder
  • Raw Wooden 12″ Plate
  • Carpenter’s Wood Glue
  • Danish Oil (we used Dark Walnut stain)
  • Butcher Block oil
  • Foam paint brush
  • Old towel

Directions:

  • Glue candle stick holder to the center of plate. Let dry for the allotted time on directions of glue.
  • Stain the candle stick and plate according to the stain instructions. Let dry for the allotted time on the stain directions. *We only used one coat. 
  • Once stain is dry according to directions, apply the butcher block sealer to the top of the plate. *The sealer is only needed where food will be touching.
  • Allow sealer to dry completely according to directions and then use as desired.
  • Apply butcher block oil as needed depending on frequency of use to keep stand in great condition.

Our DIY Farmhouse Cake Stand is literally perfection. We are both so in love with the results and we’ve gotten so many compliments from it. Whether you are eating cake or having cookies, make sure you are stocked with plenty of milk. It’s something so natural to us. Milk is the first thing that goes on to our grocery list every week and our girls beg for milk in the morning no matter what breakfast option they pick. We feel good about giving it to them, and also drinking it ourselves. Nine essential nutrients, like potassium, calcium, vitamin A, and vitamin D and inside every glass of milk. It’s also a simple way to get high-quality protein in everyone’s body on a daily basis with 8 grams of protein in every 8 ounce glass.

Guess What!?

What if you could give your kids a nutrient-rich, delicious, farm fresh beverage with natural protein and no sugar added – all for about a quarter per serving? Surprise – it’s something that’s likely already in your fridge – white milk! Learn more about the awesomeness of milk by watching the video below:

So, make sure to throw milk on your next grocery list and make everyone happy! Make sure to share with us a picture of your completed DIY Farmhouse Cake Stand as you enjoy your glass of milk and cake!

Filed Under: Home Tagged With: diy, farmhouse

Budget-Friendly Farmhouse Powder Room Refresh

June 26, 2017 by Larisha Campbell 6 Comments

This shop has been compensated by Collective Bias, Inc. and its advertiser. All opinions are mine alone. #MegaSummerRefresh #CollectiveBias

We bought our home as a foreclosure when Serenity was 6 months old. It needed a ton of work, both inside and outside our home, but we immediately knew it was the right one. We have completed a ton of projects, but we still have a ton more to complete.  At the beginning of the year, we decided that our farmhouse powder room would be redone in 2017.  When we first moved in, we put in a new toilet and floors, but never touched it otherwise. It was blah. Drab. Just uninviting, and it had to change.

Our powder room is a busy place. Almost everyone uses it when they attend something we throw and we typically invite family over for the 4th of July, so we were having the itch to get it completed before then. We knew it wasn’t in the budget for an all out remodel, but we know that we could at least start the process of freshening it up. We wanted a warm and inviting space that fit our luxury farmhouse theme.

I ran to Target and found everything that I needed (including Quilted Northern Ultra Soft & Strong® Mega Rolls) to upgrade the space. I love being able to shop at one place and get everything we could have possibly wanted for the powder room refresh.

If you are feeling like you have a drab bathroom space and are looking to freshen it up, we think our small, but impactful tips will help.

Here’s our 5 tips to freshen up a bathroom space on a budget:

  • Think outside the box

    • Most people when they go to get bathroom accessories, go straight to the Target bathroom aisles. WRONG. Granted, you can find a lot there, you can also find a lot if you think outside the box and walk around the entire store.
    • Example #1 – the waste basket in this picture below is actually a storage container from office supplies
    • Example #2 – the toilet paper holder that we’re using for our Quilted Northern Ultra Soft & Strong® Mega Rolls is actually a utensil holder found in the kitchen section
  • Add character to a small space

    • When you have such a small space you need to add little hints of character where you can. We loved these knobs we added with so much fun added in such a small little area
  • Utilize what you already have in your house to save some money

    • You likely already have books in your home, a plant, or other small accessories hanging around. Move them to your new space to add characters and update the space
  • Add inspiration

    • Sometimes people go to the bathroom just to get away for a minute, especially at loud parties. Give them some inspiration to pull themselves together and feel ready to take on the rest of the party.
  • Make a small change to something big

    • When you are trying to refresh a space on a budget, you likely don’t have the time or energy to worry about tackling electrical or plumbing. Paint your cabinets instead of switching the whole vanity. Paint or change lightbulbs in your light fixture.  Switch out your mirror. These are all main pieces to a farmhouse powder room that add a big impact when small changes are done.

We absolutely love the space that we were able to create in just one day.  It made a huge impact and we didn’t have to spend a ton of time or money to upgrade our space. By making small changes, we were able to completely something that’s been on our to do list for a long time.

When you realize you can switch small things to make a big impact, you realize you don’t have to ever sweat the small stuff. Quilted Northern® Mega Roll toilet paper has 4 regular rolls in ONE to save you even more energy. Adding a few extra rolls to the bathroom in view of your guests you never have to worry about running out.

Filed Under: Home Tagged With: bathroom, diy, house, remodel, reno

Simple Last Minute Gift Idea

December 22, 2016 by Larisha Campbell Leave a Comment

last-minute-gift

Super hard to buy for friend.

Invited last minute for a party, need a hostess gift.

Extra guest unexpectedly just arrived at your house and you didn’t have a gift for them. 

You forgot someone that was supposed to be on your list. 

Someone went out of their way for you during the holidays and you just want to do something special for them.

No matter the reason, you are likely freaking out if you are reading this and it’s just days from Christmas or any other holiday you may celebrate. You need something for someone and you are lost. Don’t worry, I’m here to save you! This super simple gift won’t break your budget either. It’s a win/win for everyone.

last-minute-gift-idea

Materials

  • A bottle of sparkling cider or wine
  • A pair of super soft socks (dress socks if gifting to a man) [[*These should be new socks*]]
  • holiday treat bag
  • Festive sticker
  • Bath Bombs

Directions

  • Take one sock and place bottle of cider or wine inside.
  • Take other sock and tie it around the neck of the bottle.
  • Place bath bombs inside the treat bag and tie bag.
  • Place festive sticker on bag.
  • Place bag through the tied sock.
  • Tie sock as tight as possible (Can also use ribbon to tie bag around sock).
  • Gift!

Watch us make it!

We personally make our bath bombs for a cheaper and more personal gifting experience, but if you are really short on time you can go to your favorite bath and beauty store or order them via Amazon (buying will definitely increase cost of the gift).

That’s it guys!  So super simple.  We love keeping extra socks and bottles on hand because you never know last minute! We hope you have a joyous and merry holiday season and get and give everything you desire!

Merry Christmas from our family to yours <3

simple-last-minute-gift-idea


Filed Under: Home Tagged With: christmas, diy, gifts

DIY Ornaments for Kids

December 22, 2016 by Larisha Campbell Leave a Comment

diy-ornaments-for-kids-4-waysCrafting with kids as a parents can either be super joyful for the parent or a complete nightmare.  There is typically no in between. Sallt dough ornaments are typically the rage this time of year, but let’s be honest…typically flour or salt is spilled everywhere, your child keeps trying to eat the dough which freaks you out because of the sodium content, and there’s just a lot of slow turning gray hair happening.  You’re left with a huge mess and half broken ornaments. Oh joy. <– sarcasm.

I knew when I saw clear ornaments at the dollar store that I needed to pick them up. This had to be a win. The ornament part was already done technically, so all I needed to do was find things to stuff them with. Walking around the store, I grabbed pom poms and had ideas for a few other things at home.

Here’s the DIY Ornaments for Kids that we created:

diy-ornaments-for-kids

Materials

  • Clear Fillable Ornaments
  • Pom Poms
  • Present Stuffing
  • Cotton Balls
  • Orange and Black Sharpie
  • Glitter Paint
  • Water

#1 – Pom Pom DIY Ornament

Super simple. Grab various colors of pom poms and stuff ornament until filled. If you are looking for a specific Christmas or other holiday theme, you can pick out certain colors only if you wish.

#2 – Present Stuffing DIY Ornament

Gift baskets or gift boxes typically come filled with this recycled paper present stuffing.  I have started saving this stuffing for various projects around the house. I knew we had white and silver glittered mix stuffing and thought it’d make a super cute ornament.

#3 – Snowman DIY Ornament

Snowman are like the go to holiday ornament because of how easy it is to make usually.  This was no different.  Fill with cotton balls and use a sharpie to draw on a face. Super cute.

#4 – Paint DIY Ornament

Okay, I had to add one ornament that has the potential for a mess. Use paint that has a squeezable tube and have them squeeze directly into ornament. Add 1/4 tsp of water and swirl around.  Add more paint and more water until you have the desired effect on your ornament. Let dry completely inside before adding the top back on.

Watch us make them!

We hope you enjoyed these DIY ornaments for kids that we created today. Looking for even more fun for kids?  Check out our kids YouTube page here!

Filed Under: Home Tagged With: christmas, diy

How to Make Slime (Christmas Slime)

December 15, 2016 by Larisha Campbell Leave a Comment

diy-christmas-slime

As a mom, I’m obsessed with anything that is going to keep at least one of my kids busy for an extended amount of time. Recently, the big one saw a video on YouTube kids where they were playing with slime.  She has relentlessly asked me for slime ever since. (yay).  I remember making slime in science class in grade school, so I knew it was something possible for us to do together. To make me even happier, it was ridiculously simple to make after a little tweaking.

As soon as we were done making it, she played with it for what seemed like forever. (PARENTING WIN). Not only that, but she has continued to ask to play with it every day since.  We’ve added some cookie cutters and various molds into the equation and insert endless fun.

On a side note….slime is actually an amazing stress reliever. It has been so much fun for me to play with as well. There’s something just so relaxing about doing things that make you relate to the fun times of your childhood. So go on, play with it alongside your littles! There’s no judging going on here. 🙂

diy-slime

Materials

  • Water
  • 2oz (half regular size bottle) of school glue
  • 1 tsp borax
  • food coloring

Directions

  • In one bowl, mix 1/4 cup water with glue and mix together until well combined.  Add 10 drops of desired food coloring.
  • In a separate bowl mix 1/4 cup water with borax until dissolved.
  • Slowly mix the glue mixture into the borax mixture.
  • Once both bowl are combined, mix really fast to make ingredients react creating slime.
  • Repeat directions for additional colors. We did red and green to make Christmas inspired slime.
  • Store slime in an air tight container in the fridge.

**Tip: for a goopy slime (like the green one in the video) add an additional 1/4 cup of water to the glue mixture bowl before combining with the borax mixture. 

Watch our video of us making it, then grab your ingredients and make your own!

Filed Under: Home Tagged With: christmas, crafts, diy, the seasoned kids

DIY Twine Napkin Holder Centerpieces

November 15, 2016 by Larisha Campbell Leave a Comment

This shop has been compensated by Collective Bias, Inc. and its advertiser, Dr Pepper Snapple Group, Inc. and Georgia-Pacific LLC. All opinions are my own. #DrinkMakeWishBake #CollectiveBias

DIY Twine Napkin Holder Centerpieces

diy-holiday-tablescape-napkin-tutorial-2447

I remember growing up, every holiday we would head to my great-grandparent’s house.  It would be an hours long event every time with nothing really to do there for kids. When you hear about kids just going outside and playing for hours, that’s what we did. We weren’t allowed to watch TV because there was always a football game, car race, or their favorite talk show on at the time. It was a horrid talk show to a tween, FYI. And even if everyone (i.e., all the men) were asleep in front of the TV, we still weren’t allowed to change it.  So we would run around outside, explore all the oddities of an old house, like tiny hidden closets, and wait until the food was ready. Y’all know we weren’t allowed to be running through the kitchen!

Just thinking about the food brings back memories.  There was always a candy dish that was sitting on the corner of the counter and we would always try to sneak and grab a few pieces.  It was the only time we got chocolate milk. There wasn’t a get together without my great-grandma’s famous homemade potato chips. And it wasn’t even close to being a holiday celebration without the indulgent homemade ice cream and fudge sauce.

Fast forward to after dinner was over and the men went back in front of the TV, and all the women in the family helped clean up everything else. There were piles and piles of dishes to be done because everything was on the “nice china”. However, house was never left messy when everyone was gone.

Now, fast forward again to present time. We have our own house now.  Our great-grandparents have passed and we have started our own traditions with friends and family. One thing is certain. Don’t nobody have time to be toiling for hours over the sink after dinner is over. Even though, unlike my great-grandparents, we have dishwashers now, I need simple. I want to enjoy my company and the memories with them. Life is chaotic enough and for us the holidays are about joy, giving, and friendship.

holiday-tablescape-napkin-tutorial

That’s why this holiday season, I encourage you to stick with the basics.  You can still use paper plates and napkins and still have an amazing, simple tablescape that your guests will swoon over.

finished-holiday-tablescape-napkin-tutorial-2410

A few weeks ago, I decided I would have my closest friends and their families for a “Thanksmas” party. Thanksgiving and Christmas rolled into one and all taking place before any of the holidays actually hit. We all know it gets crazy with our own families so I wanted to make sure that we got together before it was too busy.  I knew I didn’t want to be standing, washing dishes all night after, or loading the dishwasher for the next three days, so I knew I was going to head to our local Target to grab Dixie Ultra® Holiday Plates and Vanity Fair® Impressions® napkins.  My other two stipulations was that I needed a “wow” factor and it had to be “simple, elegant, and budget-friendly”.

napkin-centerpiece-holiday-tablescape-napkin-tutorial-2398

Here’s our step-by-step tutorial on how to make these awesome DIY Twine Napkin Holder Centerpieces.

  1. Using an old toilet paper roll, mark off every inch. You will get four ring per every toilet paper holder.
  2. Cut along the line made in Step 1, keeping as straight at you can.
  3. Using a hot glue gun, place a line from edge to edge on shorted side around.
  4. Being careful of the hot glue guns, slowly wrap twine around under the entire toilet paper roll is covered.
  5. Once the entire piece is covered, add another dab of glue from the glue gun and seal the last bit of string to it.
  6. Using two Vanity Fair® Impressions® napkins stacked together (no one likes just one napkin!), start at one edge and diagonally roll towards opposite end.
  7. Using your twine napkin ring, place it over the  the folded napkins.
  8. Using shrubbery leaves (we clipped ours from our yard!), place some gently between the napkin ring and the napkins.
  9. Stick a cinnamon stick down between the napkin ring and the leaves.
  10. Repeat steps 1-9 until you have desired number of DIY Twine Napkin Holder Centerpieces.

how-to-make-a-twine-napkin-ring-diy diy-twine-napkin-ring-holderdiy-napkin-centerpiece

vanity-fair-holiday-tablescape-napkin-tutorial-2389

*To get the look we have here, layer Dixie Ultra® Holiday Plates in three different sizes on top of each other. Add the DIY Holiday Napkin Ring Centerpieces on top of the layered plates.

inspiring-holiday-tablescape-napkin-tutorial

We added in Canada Dry® Ginger Ale to the table in case our friends wanted to add a little fizz to the homemade fruit punch or sangria we made.

holiday-tablescape-napkin-tutorial-2438

By using Dixie Ultra® Holiday Plates and Vanity Fair® Impressions® napkins we were able to be more present in the moments that mattered the most to us during our “Thanksmas” party and the confidence that the products would hold up during performance.

dixie-vanity-fair-target

You can find Dixie Ultra® Holiday Plates in the Holiday seasonal section at Target or in-aisle with other disposable tableware items. Plus!  Check out these upcoming CartWheel Deals!

  •  25% OFF 7UP® Mini Cans and 20oz Bottles  November 15-26, 2016
  •  10% OFF A&W®, Sunkist®, Canada Dry® & more November 15-26, 2016
  • 10% OFF Mini Cans of 7UP®, A&W®, Sunkist®, Canada Dry® & more November 27 – December 24, 2016
  • 20% OFF Mini Cans of 7UP®, A&W®, Sunkist®, Canada Dry® & more December 25, 2106 – January 1, 2017

Pin to Pinterest!

diy-napkin-rings

Make sure to enter the sweepstakes fun by DPSG/Georgia Pacific below!

 
#DrinkMakeWishBake DPSG/Georgia Pacific Holiday Sweeps

Filed Under: Home Tagged With: centerpieces, diy, holidays, home

3 DIY Home Cleaners

August 22, 2016 by Larisha Campbell 3 Comments

This shop has been compensated by Collective Bias, Inc. and its advertiser. All opinions are mine alone. #ScotchBriteSponges #CollectiveBias

3 diy home cleaners

I’ve had eczema my entire life. After getting pregnant with Skibbles, our toddler, it magnified greatly. Where I have breakouts varies from my arms, to my legs, etc., but since having Baby, it’s primarily stayed on my hands. I remember seeing a dermatologist who said, “I typically recommend avoiding water as much as possible and allowing it to clear up on it’s own.”  I laughed out loud.  Literally. Here I am, a mom, partial food blogger, and this dermatologist recommended avoiding water.  I have to wash my hands at least 562 times a day just because of diapers and well….kids.  They’re messy. Unabashedly messy.  There was no possible way to avoid it.

Obviously, I needed to find my own solutions to this problem.

The first thing I did was start to make my own DIY homemade cleaners. It was surprisingly easy to make, let alone much cheaper, and much safer — not only for my skin, but I no longer had to worry about harmful chemicals near my girls. I could even feel comfortable asking our toddler to clean up her own messes with our DIY all-purpose cleaning solution. That’s definitely a parenting win!

scotch-brite

Today, I’m sharing three of our favorite DIY Home Cleaners with you! An all-purpose cleaner, an oven cleaner, and a garage cleaner.

To make all three, here’s what you’ll need:

0 from 0 votes
Print
3 DIY Home Cleaners
Author: Larisha Campbell
Ingredients
All-Purpose Cleaner
  • 2 cups Apple Cider Vinegar
  • Rinds from two lemons
  • 10 drops of citrus essential oil
  • 2 cups water
Oven Cleaner
  • 1/2 cup baking soda
  • 1/4 cup salt
  • 2-3 tbsp water
  • 1 tbsp dish soap
Garage Cleaner
  • Baking Soda
  • All-Purpose Cleaning Solution from above
Instructions
All-Purpose Cleaner
  1. In a sealable container, add the lemon rinds and apple cider vinegar.
  2. Let sit for two weeks.
  3. After two weeks, remove lemon rinds and pour liquid into a spray bottle.
  4. Add essential oil and water.
  5. Use as needed with Scotch-Brite™ Brand sponges.
Oven Cleaner
  1. In a bowl, combine baking soda, salt, dish soap, and two tablespoons of water.
  2. Mix together.
  3. If needed, add the additional tbsp of water until a paste forms.
  4. Spread paste over oven surfaces.
  5. Let sit overnight.
  6. Spray all-purpose cleaner over paste and remove with Scotch-Brite® Heavy Duty Scrub Sponge.
Garage Cleaner
  1. Spread baking soda over problem area.
  2. Let sit overnight.
  3. Sweep up baking soda, then spray all-purpose cleaner and scrub with Scotch-Brite® Heavy Duty Scrub Sponge.
  4. Depending on the stain and how long it's been there, may need additional applications. Repeat above steps as needed. Best if done immediately after stain occurs.

We recently needed to make more all-purpose cleaner, so we headed over to Target to grab the ingredients we were out of at the time.  While there, we grabbed our favorite Scotch-Brite™ Brand sponges as well. I had no idea before, but they actually have a color coordinated system where Green sponges are for Heavy Duty and Blue ones are Non-Scratch.  Now I always know which ones I want while shopping.Scotch-Brite™ Brand makes the right tools for every surface that I’m cleaning from the kitchen to bathroom to even the garage. It makes things so much easier.

scotch brite at target

I love the Scotch-Brite® Non-Scratch Soap Dispensing Dishwand for cleaning our dishes.  Not having to stop to add more soap while I’m washing is always one of my favorite perks of using these.

scotch-brite dishwand

For our all purpose cleaner, we let lemon rinds sit inside apple cider vinegar for two weeks.  Then, remove the rind, add some essential oil and water, and BAM! Done!  Time to clean.

diy all purpose cleaner

This all-purpose cleaner is great and I love pairing it with the Scotch-Brite® Non-Scratch Scrub Sponge to clean without scratching things like our table, windows, countertops, and stove.

scotchbrite sponges cleaning

For the oven, we combine our ingredients until a paste forms, then spread it out and let it sit over night. The next morning, I spray a little all-purpose solution on it and it instantly foams up. I then use the Scotch-Brite® Heavy Duty Scrub Sponge to clean the mess off. This heavy duty sponge cleans tough messes, like the oven or grill, 50% faster than other competing sponges.

diy oven cleaner

For the garage, we just use baking soda overnight, and then our all-purpose cleaner. We use this as soon as we make a new stain so it’s easier to come up.  For set-in stains, you may have to reapply a few times. The Scotch-Brite® Heavy Duty Scrub Sponge is perfect for getting these stains up.

diy garage cleaner

These DIY Home Cleaners paired with Scotch-Brite™ Brand sponges are the perfect way to clean up all your messes! Always make sure to check your Target Cartwheel app too, because Target frequently has even more savings off their already great prices!

Grab even more cleaning ideas with Scotch-Brite™ Brand from other bloggers here.

Filed Under: Green Living, Home, Natural Cleaning Tagged With: cleaning, diy, garage

Valentines Crafts for Kids – A Canvas of Love

February 10, 2015 by Melanie Leave a Comment

**Disclosure:  Affiliate links contained in this post

valentines crafts for kids

Looking for the perfect valentines crafts for kids idea at the last minute?

Here it is.  Valentine’s Day is a time to express your gratitude to loved ones, usually in the form of cards, flowers and chocolate; however, if you’ve been searching for a unique gift for loved ones, or a keepsake for your own home, below are the instructions for one of the easiest, cutest, Valentines crafts for kids to do on canvas.

What you will need:
A blank canvas (we used 12*24- you will need room for handprints, a footprint and a small quote)
Red Paint
A fine paint brush
Child or children (I used my toddler and infant)
Foil & tape ( this is what I put the paint on)

Tablecloth (to protect your table from messy hands or spilled paint)

Step One: Lay down the table cloth and then squirt some red paint onto the foil. (I tapped the foil down so it didn’t lift when we pressed hands and feet into the paint)

Step Two: If two children are making this craft, I recommend having the older child do this first step. Have your child get red paint on one hand and rub it onto their other hand. After both hands are covered press their hands in the shape of a heart onto the canvas towards the upper right hand side. (I cleaned my son’s hands before moving on)

valentines crafts for toddlers

Step Three: Press the foot of your infant (or the same child if only one child is making this canvas.) Once the foot is covered in paint press it onto the canvas on the opposite side towards the bottom. (I then cleaned my son’s foot)

Step Four: This is where you take over- unless your child is older and has a steady hand. Write near the heart. “From the bottom of my/our heart to” (choose your wording depending on if you have one child or two making the canvas) Next to the footprint write: “to the tip of my/our toes”

Step Five: Below “to the tip of our toes” in bigger letters I wrote: “We Love You!” If it is one child this would say “I Love You”

Step Six: I wrote the names of the boys on the bottom of the canvas along with the month and year to help remember when they created this art when we look back on it in the future.

We love this valentines crafts for kids so much that we are keeping this canvas for ourselves and are hanging it on our wall in the living room. We have a spot where we change out the canvas art the boys create as the seasons change. This was a quick project but is very cute, so we may make a few more for family members. I love art projects that have their hand or footprints so we can see how they grow as the years pass, incorporating other designs and words into them makes them even more memorable. I hope you enjoy this canvas art and quality crafting time as much as we did.

signature melanie


Welcome to Time for Mom!

Time for Mom is a place for mom bloggers to link up and connect with other mom bloggers!  You do not have to link up a post about parenting only, your post can be about anything as long as you’re a mom!  We only ask that it is today’s post or a recent one, and that you don’t link up the same post each week.  Please remember to check out a few others in the hop!  It’s no fun to link and run!  We are here to build a community of mom bloggers and get to know each other!
Please be sure to take a moment to follow your host and co-hosts in some way!
Rachel @ Can’t Google Everything
Larisha @ We’re Parents
Brie @ {…a breezy life}
And if you didn’t get enough of us on our blogs, check out our Time for Mom Superstars Pinterest Board!  Each week we will pin some of our favorites from the link up to the board! Check it out and see who was pinned!


Follow Rachel B // Cant Google Everything’s board Time for Mom Superstars on Pinterest.


Every week each of the co-hosts picks a blogger to feature from the week before! Check out our picks from last week’s link up!

DIY Nailhead Bulletin Board

Color Week: Red

Plantains and Cheese Recipe

Thanks for linking up!  By linking up with us you are opting in to our weekly email reminder for this hop and giving us permission to use an image from your blog if chosen for our weekly featured posts.  We will always link back to your post when we use your image when we feature you!
Be sure to say “hi” if it’s your first time linking up!


Filed Under: Home, Parenting Tagged With: crafts, diy, valentines

Valentine’s Date Night At Home featuring K-Y® Love

February 4, 2015 by Larisha Campbell 10 Comments

*Disclosure:  This shop has been compensated by Collective Bias, Inc. and its advertiser. All opinions are mine alone. #LoveOurVDay #CollectiveBias

valentines date night at home

It was a ritual.  At least every other weekend, we would both get dressed up (I may even wear heels) and head to dinner and a movie for date night.  Andrew and I loved the movies.  However, once Skibbles was born, the desire for both of us to leave her left, especially for a date night together.  We were stuck feeling guilty for wanting to leave her and feeling the distrust of no one being able to take care of her like we would.  No one loves her like we do, right? Fast forward 26 months now, and we still haven’t seen a movie in the theaters together.  However, with our recent announcement of our second pregnancy, obviously our intimacy hasn’t faded.  So how does a couple keep the spark alive in their relationship?

For us, it was simple.  We got creative and I’ve made sure that we spend intimate moments together even if it’s a simple DIY gift basket that I create for us to spend the evening together for a date night at home.  This Valentine’s Day I put together some of his favorite things in a gift basket that I’ll give him including the brand new K-Y® Love available at Target.

valentines day diy date night gift basket EOs

A perfect gift basket to spark at-home intimacy should include:

  • a special gift – Andrew loves watches, so I bought him a new one
  • a great, new movie
  • a giftcard to grab dinner to go at our favorite place
  • WINE! (or sparkling cider)
  • edible treats to share during the movie
  • DIY bath salts using mood enhancing essential oils
  • K-Y Love® for after the bath romance
  • A back massager if you don’t already have one

To make the bath salts- 

  • Mix together – 3 1/2 cups Epsom salts, 1/2 cup Sea Salt, 1/2 cup baking soda, 10 drops lavender essential oil, and 10 drops Ylang Ylang essential oil – until well combined
  • Fill mason jar with mixture and tie with a ribbon
  • valentines day diy date night gift basket idea

diy date night gift basket

Andrew works extremely long days and his job is high-stress.  Typically, by the time he gets home at night, Skibbles is on her way to bed and they just have a few moments together.  For nights that Andrew and I really want some quality time together, this is great that we don’t have to wait hours until she goes to sleep.  After eating dinner together, we’ll turn off our phones, and just enjoy the time we have together. I’ve found that using key essential oils, like in the bath salts recipe above, not only are they able to calm his stress from his day, but they also enhance the passion.

ky love

The Brand New K-Y® Love is available exclusively at Target for Valentine’s Day. Now through 2/14/15 you can get 10% off your purchase of K-Y® Love using Target’s Cartwheel app. There are two types available Sensuality and Passion.  When you get to Target, find K-Y® Love in the feminine care aisle and make sure before checking out that you get your 10% off coupon on Target’s Cartwheel app.

What would you include in your DIY Gift Basket for an at home date night that I didn’t?  Leave a comment below letting me know!

signature button


Filed Under: Home Tagged With: date night, diy, valentines day

  • 1
  • 2
  • Next Page »


We're Parents is all about cooking and traveling our way through imperfect parenting. Learn More

SUBSCRIBE TO OUR WEEKLY NEWSLETTER & GET PARENT & ME COLORING SHEETS

Connect With Us

AvatarWe're Parents is a unique mom and dad natural parenting blog focusing on topics such as breastfeeding, babywearing, and car seat safety. You'll also find Delicious recipes, inspired travel recommendations, and more as you journey with us through parenting. Learn More…

VIEW OUR PRIVACY POLICY

Even More Recent Posts

We’re Parents is a participant in the Amazon Services LLC Associates Program, an affiliate advertising program designed to provide a means for sites to earn advertising fees by advertising and linking to amazon.com

Copyright © 2021 · Foodie Pro Theme by Shay Bocks · Built on the Genesis Framework · Powered by WordPress

We're Parents uses cookies to ensure that you have the best user experience on this website. By clicking okay, you agree to our privacy policy terms & settings. Find out more.