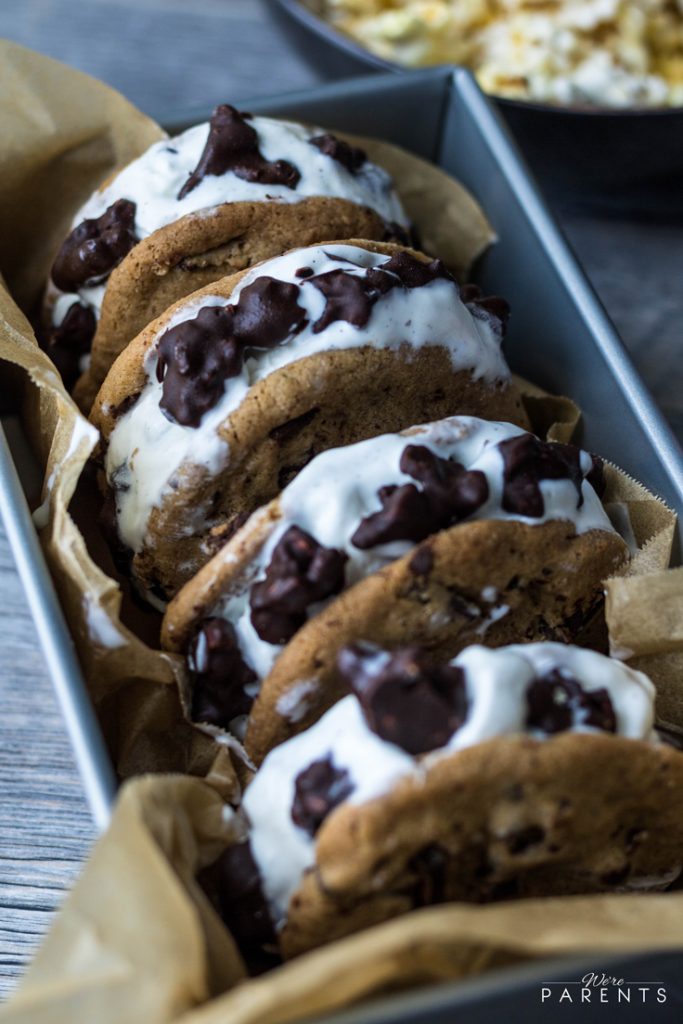
These Chocolate Chip Popcorn Ice Cream Sandwiches are the must have treat of the summer. Perfectly sweet & fun for everyone no matter your age! A perfect chocolate dessert for summer.

You’ve never had an ice cream sandwich like this. These Chocolate Chip Popcorn Ice Cream Sandwiches are literally dessert perfection.
Salty and sweet are the perfect combo, especially when it comes to dessert. This combo of salty popcorn plus sweet cookies, ice cream and chocolate are literally a match made in heaven. It may be an unlikely pairing and one you’ve never thought of, however, once you try it, you will wonder why you’ve never tried it before!
Another reason this is a great reason is that kids will go nuts over making it. Kids love making popcorn. Whether you make it on the stove or in your microwave, the pops send them in a gigglefit every single time.
Then, you’re combining popcorn with chocolate, putting ice cream between two cookies, and then putting them all together.

What ingredients do you need to make Chocolate Chip Popcorn Ice Cream Sandwiches?
- Popcorn
- Vanilla Ice Cream
- Chocolate bar
- Chocolate Chip Cookies
That’s it! These four ingredients are all you need to make these delicious ice cream sandwiches. They do take a little bit of time to make, but it’s perfect for a fun project once the kids are off school!

How do you make Chocolate Chip Popcorn Ice Cream Sandwiches?
You’re going to make these in batch processes. First, you need to make your popcorn according to the instructions. Depending on if you are making this in a bag or with kernels on the stove will depend on how you make. You want to choose a non-buttered popcorn to work best for this recipe.
Once you have your popcorn made, you need to reserve approximately 2 cups of the popcorn. With the remaining amount, feel free to eat it, make a popcorn necklace, or anything else.
In a microwave safe bowl or double broiler, melt the chocolate bar down. Dip your cooked popcorn into the chocolate, then place on a wax lined baking sheet. Freeze for 20 minutes.
Take one large scoop of ice cream and place it between two chocolate chip cookies. Then, push the chocolate coated popcorn into the sides gently.
Serve them immediately or place in an air tight container in the freezer until ready to serve. Good for about 2 months.

Can I prep these chocolate chip ice cream sandwiches ahead of time?
Absolutely! Make the recipe as directed and instead of immediately serving store in an air tight container in the freezer for up to two months. Eat one at a time or serve all together. It’s best to take out 5-10 minutes before serving.
Can I make these vegan or allergy friendly ice cream sandwiches?
As parents, we are fully aware of food allergies and preferences and are working to make our recipes inclusive for everyone. With that, we are happy to say that you can totally make these vegan or allergy friendly ice cream sandwiches.
You can purchase or make allergy friendly chocolate chip cookies. As well as purchasing or making non-dairy popcorn. We like to pop our own kernels in a little bit of oil and use from there. Our go to Top 8 Free chocolate is Enjoy life. Just melt down 1/2 cup of chips in the same process as using the bar in the original recipe. And lastly, swap with a non-dairy, allergy safe ice cream. Even a banana nice cream would work, it would just have a banana taste.
Follow the recipe instructions as written and you’ll have food allergy safe ice cream sandwiches!
What are other cookie recipes that I should try?
There are endless cookies that you should try, but here are some of our favorite!
- Peanut Butter & Jelly Cookies
- Double Chocolate Cake Cookies
- Cranberry Cheesecake Cookies
- Smores Chocolate Chip Cookies
- Vegan M&M Cookies (these are allergy safe!)
Pin these chocolate chip popcorn ice cream sandwiches for later:

These Chocolate Chip Popcorn Ice Cream Sandwiches are the must have treat of the summer. Perfectly sweet & fun for everyone no matter your age! A perfect chocolate dessert for summer.
- 2 cups cooked popcorn
- 1 quart vanilla bean ice cream
- 4 oz baking chocolate bar
- 12 chocolate chip cookies
-
Make popcorn according to instructions on bag or container using. Cool.
-
In a microwave safe bowl or double broiler, melt chocolate bar down.
-
Dip popcorn into chocolate and place on wax lined baking sheet.
-
Freeze for at least 20 minutes.
-
Take one scoop of ice cream and sandwich it between two cookies.
-
Push popcorn gently into sides of ice cream.
-
Serve immediately or place on a baking sheet and into freezer until ready to serve.
-
Store any leftovers in freezer safe container up to 2 months.
**Nutritional facts are just estimates. Please utilize your own brand nutritional values to double check against our estimates.
**Please see notes above recipe card about allergy friendly baking for this recipe.
This post was originally published on 8/29/17 and updated on 5/15/19.