We're Parents

  • Home
  • About Us
    • About Us
    • Privacy Policy
    • Contact Us
    • Disclosures
    • Media Kit
  • Parenting
    • Pregnancy and Postpartum
    • Breastfeeding
    • Car Seat Safety
    • Mental Health
    • Babies
    • Toddlers
    • School Age
    • Older Kids
    • Holiday Crafts & More
    • Green Living
  • Recipes
    • Breakfast
    • Lunches
    • Dinner
    • side dishes
    • Crockpot
    • Desserts
    • Lactation Recipes
    • Snacks
    • The Seasoned Kids (Recipes by Kids)
  • Travel
    • Kid Friendly Outings
    • Restaurants
    • Travel Tips

Smoked Walnut Crusted Salmon

September 11, 2017 by Larisha Campbell Leave a Comment

This Smoked Walnut Crusted Salmon post was sponsored by Alaska Seafood as part of an Influencer Activation for Influence Central and all opinions expressed in my post are my own. 

Even as a stay-at-home mom, life is hectic.  I’m running a business. We are a homeschooling family. We have other business ventures we are currently exploring. And our oldest daughter is in soccer.  Admittedly, some days I wonder how we are going to survive when there’s more added into the mix.  I keep telling myself that moms always figure it out.

One thing I seem to get right, most of the time, is getting food on the table for my family.

Honestly, cooking at home most nights now stemmed from us trying to budget and save money. Now, it’s because I actually enjoy having a home cooked meal with my family on an almost nightly basis. Truthfully though, as much as I love to cook, I am not great at remembering to pull meat out to thaw the night before or even early in the day.

Enter my love of Alaska salmon.

Not only do I love the taste and versatility of Alaska salmon, but I love that it’s super easy to work with and thaw out. I always keep a bag of frozen Alaska salmon in our freezer and I have (often) gone from nothing thawed to dinner on the table in under an hour and a half before. Alaska salmon is so easy to work with and you have the ability to pack a ton of flavor into a dish with simple ingredients.

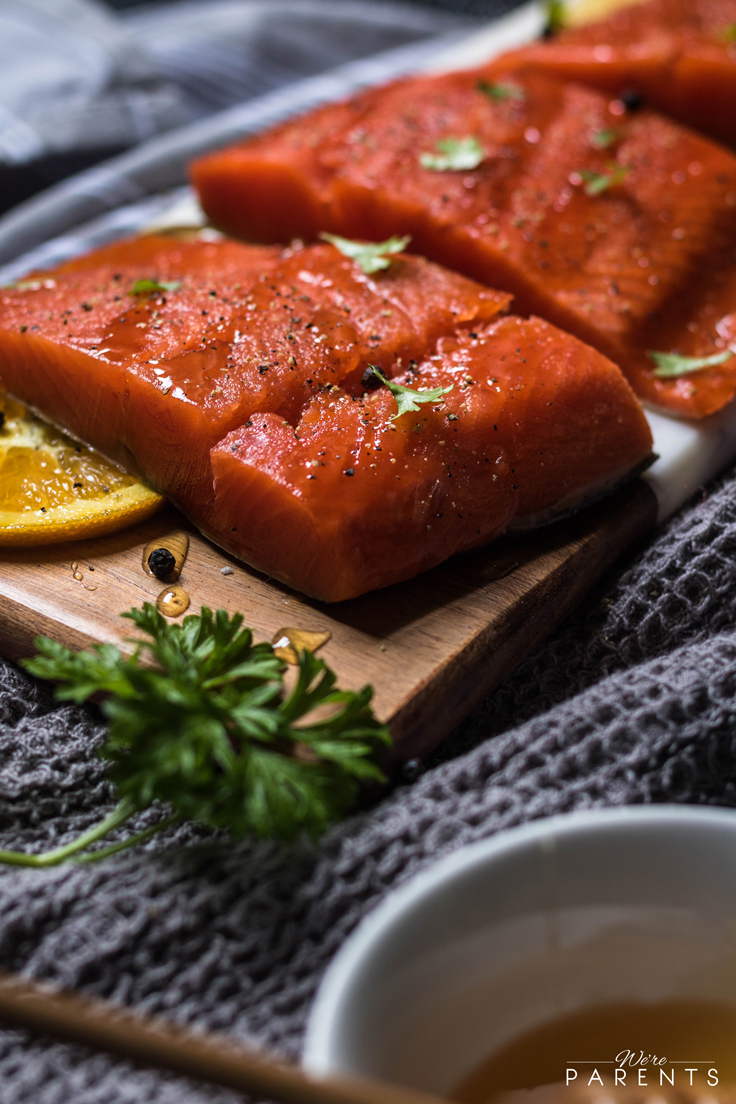
Today, I’m sharing our Smoked Walnut Crusted Salmon recipe. 

We start by seasoning the Alaska salmon, then drizzling maple syrup on each piece, followed by a walnut topping. What you are left with is utter perfection.

0 from 0 votes
Print
Smoked Walnut Crusted Salmon
Author: Larisha Campbell
Ingredients
  • 4 Alaska salmon filets
  • 1 1/2 cups walnuts chopped
  • 1/4 cup dark brown sugar packed
  • 1 Tbsp unsalted butter
  • 1 tsp smoked paprika
  • 1 tsp freshly cracked black pepper
  • 1/4 tsp pink salt
  • 3 tsp fresh dill chopped
  • zest from one lemon
  • 3 tbsp maple syrup
Instructions
  1. Line a baking sheet with parchment paper.
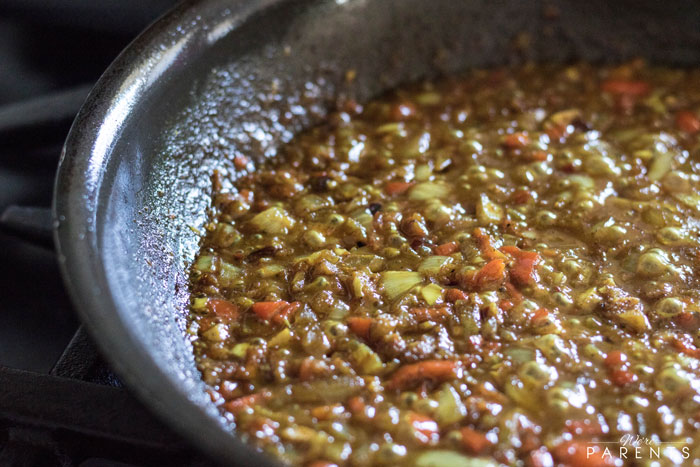
  2. In a skillet over medium low heat, add the chopped walnuts, brown sugar, and butter.
  3. Stir constantly for 5 minutes. Transfer to parchment lined baking sheet and spread out quickly.
  4. Set aside to cool.
  5. Preheat oven to 400 degrees.
  6. In a small bowl, combine smoked paprika, cracked black pepper, and pink salt.
  7. Gently rub seasoning mixture into each of the four fillets evenly.
  8. Spread chopped fresh dill and lemon zest across each fillet.
  9. Drizzle maple syrup evenly across the salmon.
  10. Gently and evenly top salmon fillets with the walnut mixture.
  11. Cook in preheated oven for 10 minutes or until temperature has reached 145 degrees.
  

Curious about Alaska salmon, here’s more information:

Wild-caught Alaska salmon includes five species including king, sockeye, coho, keta and pink. You can feel confident that if your package says Alaska salmon that it was wild and never farmed whether you get in the freezer or deli section of your local store.  All Alaska salmon is natural and sustainable as well. Visit www.wildalaskaseafood.com for more recipes, as well as cooking techniques and tips.

Make sure when you are at your local store (or restaurant) next time that you #AskForAlaska.

Filed Under: Dinner, Home, Recipes Tagged With: dinner, recipes, salmon

Homemade Pocket Sandwiches – 3 Ways

September 7, 2017 by Larisha Campbell Leave a Comment


This is a sponsored post written by me on behalf of Columbus Craft Meats for IZEA. All opinions are 100% mine.

Watch us make these!

It’s back to school season which means that the calmness of summer has ended and the chaos has ensued. Trying to wake up the kids to get out the door on time, pack lunches, get everyone to extracurriculars on time, and you still need to feed them dinner, do homework, and shower them.  It’s a lot to do. And most days, it can get really stressful.  Even as a homeschool mom, while we aren’t so rushed for time, we still have a lot to do. Most days, I’m still trying to figure out meals.

Seriously, why do they need to eat 3 times a day.

Just playing, I happily feed them. But it does get stressful. I’m constantly trying to figure out meals to make my life easier.  My conditions are that it ideally needs to:

  • taste delicious
  • be able to be prepped ahead of time
  • moderately healthy
  • freezable

When I hit all four of those conditions, I know we have a winner that every parent will swoon over. Well guys, this is it!

Introducing: Homemade Pocket Sandwiches

Similar to those frozen pocket sandwiches that you heat in the microwave, these will leave you with more time to get other things done while providing a better alternative. Flakey pastry shells stuffed with Columbus Craft Meats deli meat, sauce, and cheese, and you have an amazing, easy to make, and fun alternative.  I love Columbus Craft Meats because they are antibiotic free, which means that are better for my family to enjoy. The taste and quality is outstanding.

0 from 0 votes
Print
Homemade Pocket Sandwiches – 3 Ways
Author: Larisha Campbell
Ingredients
  • Puff Pastry Shells
  • 1 Egg
Ham and Cheese
  • Columbus Craft Meats Honey Ham
  • Sliced Cheddar Cheese
  • Yellow Mustard
Turkey and Cheese
  • Columbus Craft Meats Peppered Turkey
  • Sliced American Cheese
  • Honey Mustard BBQ Sauce
Buffalo Chicken
  • Columbus Craft Meats Buffalo Chicken
  • Sliced Blue Cheese
  • Buffalo Sauce
Instructions
  1. Thaw puff pastry shells according to boxed directions.
  2. Beat egg in a small bowl, set aside.
  3. Heat oven to 400* F.
  4. Unfold pastry shells and cut into four equal squares.
  5. Roll out each square.
  6. On one side, layer meat, sauce, and cheese.
  7. Brush egg along the edges of the shell.
  8. Fold shell over and seal edges with a fork.
  9. Cut 3 small slits in each pocket sandwich.
  10. Brush egg wash on outside of pocket sandwich.
  11. Cook for 20-25 minutes or until bottom is golden brown.
  12. To Freeze: Let cool completely, put in air tight freezer container, and store in freezer. To eat from freezer, place on microwave safe dish, and cook for 2 minutes. Let cool before eating.
Recipe Notes

A normal box of puff pastry dough, contains two puff pastry shells. Each shell is enough to make 4 sandwiches.

The possibilities for these Homemade Pocket Sandwiches are really endless.  You could add vegetables inside, make dessert pockets, and so much more. It’s truly versatile. I love that we have a healthier alternative to the traditional deli meats that are stocked right in our local grocery store.  You too can find Columbus Craft Meats at your local stores. Enjoy!

follow Columbus on Facebook

Visit Sponsors Site

Filed Under: Dinner, Home, Recipes Tagged With: dinner, lunch, recipes

Cinna-Toast Air Fryer Monte Cristo Sandwich

July 11, 2017 by Larisha Campbell 1 Comment

This shop has been compensated by Collective Bias, Inc. and its advertiser. All opinions are mine alone. #LeggoMyEggo #HearTheNews #CollectiveBias

When I first went to college, I wasn’t very opening to trying new foods.  Like ever. I blame my mom. Funny thing is, I wasn’t even really that picky. But “weird foods”, like tomato basil bread, or serving preserves alongside a sandwich, or tzatziki sauce…nope. Not going there. I credit my sister with helping to expand my pallet.

When I arrived freshman year of college at West Virginia University, she was starting her Master’s degree. Luckily for me, she was already at the try anything stage. I remember us going to this restaurant where I ordered chicken tenders and fries.  She goes and orders a “Monte Cristo” sandwich.  “A what”, I said!? She explains that it’s this ham, turkey and cheese sandwich that’s deep fried and topped with powdered sugar and served with raspberry preserves.

Okay, sounds intriguing.  

Our food comes out and I instantly want to taste her food.  It looked amazing.  I was hesitant to dip it in the raspberry preserves, but I did, and that too was amazingly delicious. Fast forward to today and I will pretty much try anything and I’m working to make sure my girls have an expanded pallet.  Now, don’t get me wrong, I’m not offering up caviar and kangaroo, but they definitely aren’t ones to balk at speciality breads and will consume almost anything you sit down in front of them.

Back to the Monte Cristo Sandwich.

Obviously it’s ham, turkey, and cheese, layered to perfection. I wanted to make this for our family, but I wanted to option to not deep fry it.  Insert: Air Fryer. An air fryer gives you the ability to have the perfect crunch with the added calories of frying.  It’s a win-win. Then, one day I was walking through my local Wal-mart and saw these new Eggo Cinna-Toast and a brilliant light went off in my head.

Make an Cinna-Toast Air Fryer Monte Cristo Sandwhich. 

I quickly noticed on the packaging that Eggo’s are now made with artificial flavors and colors from natural sources, which makes me a happy mama. The Eggo® Cinna-Toasts™ are cinnamon roll flavored and naturally a delicious, fun-filled way to eat breakfast! But they can be used for so much more.  I also love that they are perforated to pull apart which would make these the perfect sized sliders for parties. This air fryer monte cristo sandwich is great for lunch or an after school snack!

Here’s how you can make one too!

4.5 from 2 votes
Print
Air Fryer Cinna-Toast Monte Cristo Sandwich
Prep Time
10 mins
Cook Time
10 mins
Total Time
20 mins
 

Monte Cristo level up!  Pair New! Eggo Cinna-Toast bread with traditional monte cristo sandwich ingredients for the ultimate sandwich with a healthier twist.

Course: Lunch, Main Course
Cuisine: American, French
Servings: 4 sandwiches
Calories: 714 kcal
Author: Larisha Campbell
Ingredients
  • 3/4 lb Black Forest Ham thinly sliced
  • 1/2 lb Smoke Turkey Breast thinly sliced
  • 4 slices Gouda cheese
  • 8 slices swiss cheese
  • 8 slices Eggo Cinna-Toast
  • 1 tbsp Powdered Sugar
  • Raspberry Sauce
Instructions
  1. Lay out one slice of Eggo Cinna-Toast.

  2. Layer sandwich as follows: one slice gouda, 2-3 slices ham, slice of swiss, 2-3 slice turkey, slice of swiss, 2-3 slices ham, slice of gouda
  3. Top with another slice of Eggo Cinna-Toast.
  4. Repeat with remaining sandwiches.

  5. Place in air fryer on 392 degrees F for 8 minutes.
  6. Carefully remove sandwich (will be hot!).
  7. Sprinkle with powdered sugar.
  8. Serve alongside prepared raspberry sauce.
Recipe Notes

Nutritional Facts do not contain value for raspberry sauce.

Nutrition Facts
Air Fryer Cinna-Toast Monte Cristo Sandwich
Amount Per Serving (1 sandwich)
Calories 714 Calories from Fat 306
% Daily Value*
Fat 34g52%
Saturated Fat 17g106%
Cholesterol 169mg56%
Sodium 2220mg97%
Potassium 654mg19%
Carbohydrates 46g15%
Sugar 21g23%
Protein 50g100%
Vitamin A 760IU15%
Calcium 683mg68%
Iron 1.9mg11%
* Percent Daily Values are based on a 2000 calorie diet.

Ready to make yours?  Grab this Ibotta offer first! Earn $1 when you purchase ONE
Eggo® Choco-Toast™ Chocolatey Chip or Eggo® Cinna-Toast™ Cinnamon Roll at Walmart.

Filed Under: Dinner, Home, Recipes Tagged With: cheese, dinner, ham, lunch, lunch meat, recipes, sandwiches, turkey

Jerk Chicken Quesadillas

July 11, 2017 by Larisha Campbell Leave a Comment

These jerk chicken quesadillas are the perfect summer lunch or dinner recipe!

I really hate to admit it, but before Andrew and I got together, I had never had jerk chicken before.  Shoot, I had never had jerk anything before. Now, it’s a staple at any family function with Andrew’s family and I’m in love.  Admittedly, I was a bit nervous before trying, because I’ve heard jerk can be insanely spicy and while I like spice, I didn’t like my mouth on fire. Luckily, jerk, to me, is the perfect balance.

For the longest time, I was terrified to even attempt to make jerk.  I mean Andrew’s parents are Jamaican.  How do I even compete with that?  When I first made jerk chicken pizza, Andrew laughed.  Before he even tried it, he said there was no way that it was going to taste anything remotely like jerk chicken he was used to eating.  Much to his surprise, he loved it.  We’ve made that pizza so many times.

Then, one day, my friend was like, “OMG, you need to make jerk chicken quesadillas”, and I was all, “OMG, we do.” You guys…

JERK CHICKEN QUESADILLAS. 

Life happened and we’ve ended up pushing off this jerk chicken quesadilla recipe forever, but….BUT….here it is. And it was just as magical as the pizza. Maybe even more so. It’s the perfect balance of sweet and spicy wrapped into a delicious flour tortilla and then grilled to perfection. I love that they are handheld pockets of tastebud joy. Added to the fact that both my children actually loved them and that’s the perfect combination of a win-win in our house.  These will definitely be going into our menu rotation ASAP.

Do me one favor before you grab this recipe.  Do not.  I repeat DO. NOT. YOU. EVEN. DARE. try to make this recipe with marinating the chicken for at least 8 hours. Make this ahead a day or two but don’t try to do it for less. Pretty, pretty please 🙂

0 from 0 votes
Print
Jerk Chicken Quesadillas
Author: Larisha Campbell
Ingredients
Marinade
  • 3 tbsp Jerk chicken seasoning
  • Juice from 1 Lime
  • 2 tbsp Pineapple Orange juice
  • 1 tbsp Low Sodium Soy Sauce
  • 1 tbsp Olive Oil
  • 2 tbsp white vinegar
  • 2 boneless chicken breasts cut into bite sized pieces
Quesadillas
  • 1 tbsp Olive Oil
  • 1/2 cup Red onion diced
  • 1 Green pepper diced
  • 2 cups mozzarella cheese
  • 1 cup fresh pineapple diced + 2 more 1/2 inch slices
  • 10 inch tortilla shells
  • plain Greek yogurt optional
  • lime wedges optional
Instructions
  1. Mix all marinade ingredients together, except chicken, and whisk until well combined.
  2. Add chicken and combine well.
  3. Add to ziplock bag or tightly sealed container and refrigerate overnight (at least 8-12 hours).
  4. In a large skillet, over medium heat, saute half the peppers and onions for 2-3 minutes.
  5. Add entire container of chicken mixture.
  6. Chop the 2 pineapple slices into large chunks and toss into skillet.
  7. Cook chicken thoroughly, about 10 minutes, stirring frequently.
  8. Remove from heat. Remove large chunks of pineapple.
  9. Assemble the quesadillas by evenly spreading out the chicken mixture, red onions, green peppers, mozzarella cheese, and diced pineapple,
  10. Once assembled, in a clean skillet, cook 2-3 minutes on each side or until the tortilla is golden brown and cheese has melted.
  11. Serve with lime wedges and plain Greek yogurt if desired.

Enjoy!

Filed Under: Dinner, Home, Recipes Tagged With: chicken, dinner, jerk, lunch, pineapple, quesadillas, recipes

Grilled Fish Tacos with Mango Salsa & Avocado Lime Sauce

June 17, 2017 by Larisha Campbell Leave a Comment

Disclosure: This Grilled Fish Tacos with Mango Salsa and Avocado Lime Sauce recipe has been sponsored by the American Heart Association’s Healthy For Good campaign.  The views, opinions and positions expressed within this post belong to blog name and do not necessarily represent those of The American Heart Association unless explicitly stated. This is an original recipe not endorsed by the American Heart Association.

grilled fish tacos with mango salsa and avocado lime sauce

A few years ago, before we had kids, Andrew complained to me about his heart racing whenever he got worked up about something. It wasn’t like Andrew to complain, so I made a doctor’s appointment. I also scheduled time off to go with him. I remember sitting there as the doctor ran some tests and ordered others. After a follow-up visit, I remember Andrew and I staring in confusion as she told him “you have pre-hypertension”. What did that mean?  How do we get rid of it? What is the outcome of something like this?

Pre-hypertension is higher than normal blood pressure. The doctor insisted that there were things Andrew could do to get his blood pressure back into a normal range, but it would be a lot of work and medication would be needed to begin. Reluctantly, Andrew took the medicine. We made some small changes in our lives, but not enough. When we went back for a follow up, he was still in the same situation. The doctor upped his meds.

Things got a little more serious in terms of lifestyle changes at that point. However, quite honestly, it wasn’t until we had kids that things really changed. Both of us completely changed our diets once we had our oldest. We limited overly processed foods, we changed how we looked at dietary fats, and we stopped eating out so much. We knew that if Andrew was going to live a long life with our kids and we were going to ensure they didn’t face the same diagnosis, we had to set up our whole family for a heart healthy lifestyle.

healthy avocados

Fast forward.

Andrew no longer has a pre-hypertension diagnosis and he’s no longer on medication. We could write another whole post about what he did, but there’s one thing that remained constant – how he changed his thoughts on his food consumption. This mainly happened by cooking at home and getting more whole foods into our diet. We reduced the amount of sodium and sugar intake and increased the color of the food we were eating.

mango salsa

Clearly, eating well has been such a huge part of our family’s journey, which is why I’m really excited to share about the American Heart Association’s Healthy For Good movement. Right now, you too can join the Healthy For Good movement.  

Here are five things you can change today:

  1. Have a smoothie for breakfast instead of cereals or bagels
    • For example, try our Banana Bread Breakfast Smoothie or Coconut Cashew Strawberry Banana Smoothie
  2. Replace meat with vegetables, legumes, and whole grains for one meal a week.
    • Our Black Bean Burger recipe is a tasty place to start.
      avocado lime sauce
  3. Add Color to your meals by eating the rainbow!
    • Our favorite way to add color is with avocados! They are a great source of healthy fats, are versatile, and full of nutrient dense! Love One today!
      eat more color
  4. MOVE MORE!
    • Even just 30 minutes 3 times a week can greatly help to be more heart healthy!
  5. Skip the frying! Try over a dozen non-fry methods that are healthier for you. Try our delicious grilled fish tacos.

Recipe: Grilled Fish Tacos with Mango Salsa and Avocado Lime Sauce!

When most people think of fish tacos, they think of fried fish, but grilled fish tacos are even better! The flavor infused when you grill fish is amazing. Try out our Grilled Fish Tacos with Mango Salsa and Avocado Lime sauce tonight for dinner.  The flavor infusion is INSANE!

grilled fish tacos with mango salsa and avocado lime sauce

0 from 0 votes
Print
Grilled Fish Tacos with Mango Salad & Avocado Lime Sauce
Author: Larisha Campbell
Ingredients
Grilled Fish Tacos
  • 1 lb fish any white fish will work - we use flounder
  • 2 medium limes
  • 3 cloves garlic minced
  • 1/2 tsp cumin
  • 1/4 tsp chili powder
  • 1/4 tsp smoked paprika
  • 3 tbsp oil divided
  • salt pepper to taste
  • 1/2 head red cabbage chopped
  • 1/2 medium red onion diced
  • 1/4 cup cilantro chopped
  • Corn or flour tortillas
  • Extra lime wedges for serving
  • Avocado Lime Sauce Recipe
  • Mango Salsa Recipe
Instructions
  1. Dry fish with a towel.
  2. Squeeze 1/2 a lime over fish.
  3. To a small bowl, add garlic, cumin, chili powder, paprika, 2 tbsp oil, and salt and pepper to taste.
  4. Spoon mixture across all fish. Flip fish a few times to make sure both sides are coated.
  5. Place in fridge and let marinate for 30 minutes (can do 15 minutes if in a rush).
  6. While fish is marinating, make the slaw by combining cabbage, red onion, juice from 1 lime, cilantro, remaining oil, salt pepper in a bowl.
  7. Toss to combine.
  8. Set aside in fridge until ready.
  9. Brush grates of grill with oil and heat to 300-400 degrees.
  10. Cook 3 minutes each side, only flipping once. *Don't worry if fish breaks apart for this recipe.
  11. Remove from grill.
  12. Layer tortillas with avocado lime sauce, fish, slaw mixture, and mango salsa.
  13. Serve lime wedges with tacos.
  14. Enjoy!


grilled fish tacos with mango salsa and avocado lime sauce

JOIN US!

We’d love to have you join us in creating and maintaining behaviors that improve your health. Small, daily changes are the key to maintaining this lifestyle long-term. You can visit the American Health Association’s Healthy For Good website to get more recipes, videos, and info about health. Join us in the Healthy For Good movement TODAY!

Filed Under: Dinner, Home, Recipes Tagged With: avocado, dinner, fish, lime, mango, recipes, salsa, sauce, tacos

Honey Citrus Salmon

May 31, 2017 by Larisha Campbell Leave a Comment

This Honey Citrus Salmon post was sponsored by Alaska Seafood as part of an Influencer Activation for Influence Central and all opinions expressed in my post are my own. 

I remember growing up the only time I ever had fish was if it was frozen in little stick form or came alongside my fast food hushpuppies.  That’s it. I grew up not knowing the amazingness that was salmon. Because of this, I always assumed I didn’t like salmon. I was so hesitant to try it and I don’t remember actually ever trying until I was in college.  I don’t ever remember personally cooking salmon until I was in my late 20s.

Then it was like a lightbulb moment.

I actually loved salmon. Well, I should say love. It’s a family favorite in our house. It’s on our menu plan at least once a week and both our girls, ages 4.5 and almost 2, devour it. I love that it’s so easy to make.

Fresh salmon always tastes best in my opinion, but I love keeping a bag of frozen Alaska salmon at all times.  Even if I forget to thaw something and don’t remember until an hour before dinner, I can still get it done relatively on time. It just takes about 30 minutes to thaw completely and then ready to be seasoned. Alaska salmon is such a delicate protein that it doesn’t need overpowering with a lot of seasoning either. That means I don’t have to fuss with a bunch of additional ingredients. This Honey Citrus Salmon recipe using Alaska salmon is one of our favorites because it’s not fussy whatsoever.

Did you know? More than 90% of all salmon caught in the U.S. is Alaska salmon?

Before we get to the Honey Citrus Salmon recipe, let’s discuss what to look for at the store. 

First, it’s important that you get Alaska salmon. All Alaska salmon is wild-caught.  You want to make sure that you are not buying farmed salmon. Don’t worry, this isn’t difficult. We’ve found frozen Alaska salmon at our local Target. All Alaska salmon is natural, sustainable, and the highest quality. You can find 5 different species of salmon depending on the store you are shopping: king, sockeye, coho, keta, and pink. You can visit www.wildalaskaseafood.com for cooking techniques and tips, and to learn why it’s important to #AskForAlaska at your local grocer and in restaurants.

Now for our Honey Citrus Salmon recipe:

0 from 0 votes
Print
Honey Citrus Salmon
Author: Larisha Campbell
Ingredients
  • 4 pieces of Alaska Salmon
  • 1/4 cup raw Honey
  • Juice and zest from one large orange
  • salt and pepper to taste
  • Fresh Parsley optional
Instructions
  1. Preheat oven to 400 degrees.
  2. Salt and pepper both sides of salmon to taste.
  3. In a small bowl, combine the honey and the juice and zest from the orange. Combine well.
  4. Drizzle the entire bowl across the salmon.
  5. Cook according to packaged instructions or fish flakes easily (1/2 in salmon is typically 8-10 minutes, 1in salmon is typically 18-20 minutes)
  6. Top with chopped fresh parsley if desired.

Visit www.wildalaskaseafood.com for even more recipes! 

Visit Alaska Seafood Online:

  • Facebook: https://www.facebook.com/alaskaseafood
  • Twitter: https://twitter.com/Alaska_Seafood
  • Instagram: https://www.instagram.com/alaskaseafood/
  • Pinterest: https://www.pinterest.com/alaskaseafood/

Filed Under: Dinner, Home, Recipes Tagged With: dinner, honey, oranges, recipes, salmon

Homemade Low Sodium Sloppy Joes

May 1, 2017 by Larisha Campbell 4 Comments

These homemade low sodium sloppy joes are an incredibly easy dinner recipe that should be in everyone’s meal rotation! Real ingredients, still super fast to make!

5/1/2017 Update:  We had no idea this Homemade Low Sodium Sloppy Joes recipe would be as popular as it is! We’ve officially updated our images and have now included a video! Thank you for the love and support!

Growing up, my mom always took the easiest possible route for dinner. We had our fair shares of mac and cheese, hot dogs, frozen dinners (I know all about how the mashed potatoes are cold in the inside while the brownie is so hot it burns your mouth), hamburger helper, and one of my personal favorites…Sloppy Joes. My mom’s version of sloppy joes was browning meat and adding a can of Manwich.  However, the sodium content in a can of sloppy joe mixture is extremely high and something we just can’t risk eating with Andrew’s high blood pressure.
Even before we started on our “semicrunchyish” journey, we knew reading labels was one of the first changes we made.  It was the start of the change in process in how we look at food.  Now that we are parents, we look even closer and know canned “meals” typically aren’t foods that we want to be consuming.
We both, however, still enjoy a good sloppy sandwich. Both of the girls enjoy it as well. I sat out to create a homemade low sodium sloppy joes recipe. I tweaked a combination of a few different recipes over the years and it’s now one of our favorite dinners.

How to make Low Sodium Sloppy Joes:

4.49 from 25 votes
Print
Homemade Low Sodium Sloppy Joes
Prep Time
10 mins
Cook Time
15 mins
Total Time
25 mins
 

These homemade low sodium sloppy joes are an incredibly easy dinner recipe that should be in everyone's meal rotation! Real ingredients, still super fast to make!

Course: Main Course
Cuisine: American
Servings: 6 burgers
Calories: 278 kcal
Author: Larisha Campbell
Ingredients
  • 1 lb ground chicken turkey or beef will work also
  • 1/3 cup yellow pepper
  • 1/3 cup red pepper
  • 1/3 cup red onion
  • 1/2 teaspoon garlic powder
  • 1 1/2 teaspoon yellow mustard
  • 3/4 cup ketchup
  • 1 tablespoon brown sugar
  • salt and pepper to taste
  • 6 hamburger buns
Instructions
  1. Add the meat, onions, and peppers to a skillet over medium high until meat is brown.
  2. Drain any excess liquid and return to skillet.
  3. Reduce heat to low.
  4. Add ketchup, mustard, brown sugar, and garlic powder until well combined.
  5. Heat until cooked throughout.
  6. Add salt and pepper to taste.
  7. Add mixture evenly over bread/buns of choice!
Nutrition Facts
Homemade Low Sodium Sloppy Joes
Amount Per Serving (1 burger)
Calories 278 Calories from Fat 63
% Daily Value*
Fat 7g11%
Saturated Fat 2g13%
Cholesterol 65mg22%
Sodium 548mg24%
Potassium 591mg17%
Carbohydrates 33g11%
Fiber 1g4%
Sugar 11g12%
Protein 18g36%
Vitamin A 430IU9%
Vitamin C 28.2mg34%
Calcium 86mg9%
Iron 2.3mg13%
* Percent Daily Values are based on a 2000 calorie diet.


**The pictures below were the original pictures for this Homemade Low Sodium Sloppy Joes recipe, posted on 8/1/2012, which you may have seen floating around Pinterest.  It’s the same recipe, we’ve just gotten a lot better at photography!

Filed Under: Dinner, Home, Recipes Tagged With: dinner, low sodium, recipes

Cheesy Corn Pizza with Bacon and Scallions

April 20, 2017 by Larisha Campbell Leave a Comment

 This Cheesy Corn Pizza with Bacon and Scallions post was sponsored by Sunshine Sweet Corn as part of an Influencer Activation for Influence Central and all opinions expressed in my post are my own. 

Summertime is right around the corner. (YAYYY!!!) You can almost taste the salt in the air as we get closer to being able to take beach trips. We had a few days of summer-like weather last week and I must admit that we were so excited.  The kids happily ran around and played in the hose and at the playground everyday. The girls were excited to plant seeds for new flowers all over the flower beds and start working in our vegetable garden. We love being able to play outside all day, swim in the pool, and of course, cookouts! We love hosting and being invited to cookouts and BBQs. Grilled burgers, fresh fruit, potato salad, and of course, sweet, juicy corn on the cob.

What if I told you that you didn’t have to wait until summer to taste that sweet, juicy, corn on the cob? That you could get it right now. Say whatt!? It’s true! I couldn’t believe it myself.  As soon as I learned that I could grab it in the store right now, I was super excited and ran out to grab some.  Sunshine Sweet Corn, grown in Florida, is available right now without having to wait until it’s really summer! Thank you Florida!

We visited the website and were instantly drawn to the Cheesy Corn Pizza with Bacon & Scallions. Cheese + Corn + Bacon…Yes, Please! I was a little skeptical because there’s no actual sauce on here, but the juiciness from the corn gives it the impression that there is one. Sunshine Sweet Corn is non-GMO, tender, and your best guarantee for delicious, sweet corn in April and May.

With fresh mozzarella, corn, and scallions, alongside freshly crumbled bacon and homemade pizza dough, you will be left feeling like you are already in the midst of summertime. We highly recommend trying this Cheesy Corn Pizza with bacon and scallions!

0 from 0 votes
Print
Cheesy Corn Pizza with Bacon and Scallions
Author: Larisha Campbell
Ingredients
  • 1 pound whole wheat pizza dough we used our homemade dough -see below
  • 1-1/4 cups Sunshine Sweet corn kernels
  • 3 tablespoons grated Parmesan cheese
  • 1/4 teaspoon salt
  • 2 tablespoons olive oil divided
  • 2 large garlic cloves minced and divided
  • 8 ounces mozzarella cheese thinly sliced
  • 8 slices bacon cooked and crumbled
  • 1/3 cup thinly sliced scallions
  • 1/4 teaspoon black pepper
Instructions
  1. Make dough according to directions or packaging.
  2. In a blender or food processor combine corn, parmesan cheese, salt, 1 tablespoon of the oil and half of the garlic; blend until almost smooth.
  3. In a small bowl combine remaining oil and garlic.
  4. Heat oven to 400⁰F; adjust rack to lower third of the oven.
  5. Brush a large baking sheet or pizza pan with a little of the garlic oil.
  6. Press the dough into a large flat disk or square and place on the prepared pan.
  7. Press the dough out to an even thickness leaving a lip around the border.
  8. Brush dough all over with the garlic oil.
  9. Cook for 8 minutes.
  10. Remove from oven and top with corn mixture, mozzarella, bacon, scallions and pepper.
  11. Return to oven and bake until crust is golden brown and cheese is melted, 15 to 20 minutes.
Recipe Notes

Recipe adapted from Sunshine Sweet Corn

Sunshine Sweet Corn is on sale now!  Visit your local Grocer to buy some today. We’ve seen some in four different grocery stores we were in, including Wal-mart. Now that I know I can buy it right now, we’ve definitely already added some meals to our meal plan in the upcoming weeks. I’m personally looking forward to trying the Sweet Corn, Tomato and Avocado salsa the Sunshine Sweet Corn website.

You can use our homemade pizza dough recipe and just swap white for whole wheat flour.

You may be interested in these products:

Filed Under: Dinner, Home, Recipes Tagged With: bacon, corn, dinner, pizza

Honey Mustard BBQ Bacon Wrapped Pork Chops

April 10, 2017 by Larisha Campbell 1 Comment

This shop has been compensated by Collective Bias, Inc. and its advertiser. All opinions are mine alone. #AllNaturalPork #CollectiveBias
 

If you’re ready to fire up the grill, then these Honey Mustard BBQ Bacon Wrapped Pork Chops are calling your name!

The end of March and beginning of April are always this awkward time.  Do you need a winter coat or sun dress? Is it going to pour down rain for three days or are we getting a blizzard? The slight uptick in warmer weather excites the best of us.  Longer days of sun, getting our hands dirty in the Earth’s soil, and the aroma of the grill excite our entire family.  There’s just something about being out in the fresh air that truly lifts your spirits.  Even the smallest of our family members truly enjoys the outdoors and the changing of seasons.

Now, I don’t know about you, but for me, the longer days always lead me to loosing track of time.  I feel like it’s only 2 o’clock when it’s really 5:30pm. Then, I’m freaking out about what to get on the table. As soon as the weather warms up, I’m ready to fire up the grill.  I’ve always loved cooking on a grill and the way food tastes after being cooked this way.  There’s just something so delicious about grilled food. The added flavor means you can really get it packed in there even if you are running short on time. Plus, no one likes the house hot once the weather warms up. Grabbing hot off the grill food is the perfect way to solve that conundrum too.

Now, I’ll admit, I hadn’t been grilling much besides hot dogs and burgers up until a few years ago.  It was then, that I realized that grilling possibilities are really endless. Now I’m a grilling machine, always wanting to test out the waters of what our grill can do. I’m always seeing bacon wrapped food, so I’ve been wanting to try it myself. Then, I recently had a brilliant idea for using our honey mustard BBQ sauce to make honey mustard BBQ bacon wrapped pork chops.

I went to our local Walmart and grabbed Smithfield’s All Natural Fresh Pork boneless pork chops. It’s naturally tender, but without added steroids, hormones, or artificial ingredients and raised in the USA. One home, I sprinkled a little salt and pepper on both sides and smothered with our homemade honey mustard BBQ sauce.  Then wrapped Smithfield All Natural uncured bacon around each chop, smothered with more sauce and grilled! DELICIOUS!  These honey mustard BBQ bacon wrapped pork chops are sure to please a crowd and are the perfect dish to whip up when you’re having company over.

0 from 0 votes
Print
Honey Mustard BBQ Bacon Wrapped Pork Chops
Author: Larisha Campbell
Ingredients
  • 1 package Smithfield All Natural Fresh Pork Boneless Pork Chops
  • 1 package Smithfield All Natural uncured bacon
  • Honey Mustard BBQ Sauce doubled if you want extra for dipping
  • Salt Pepper to taste
Instructions
  1. Heat and oil grill to 450 degrees.
  2. Salt and Pepper both sides of each pork chop to taste.
  3. Smother each side in Honey Mustard BBQ sauce.
  4. Wrap two pieces of bacon around each pork chop.
  5. Secure bacon with toothpicks.
  6. Smother with more sauce.
  7. Place bacon wrapped pork chops on the grill.
  8. Cook for 3 minutes, flip and cook for another 3 minutes.
  9. Remove to indirect heat and cook until an internal temperature of 145 degrees is reached.
  10. Take off of grill and let set for 3 minutes to reach an internal temperature of 165 degrees.
  11. Remove toothpicks and serve.
Recipe Notes

It's really important that you oil the grill.

Repurpose leftover All Natural Fresh Pork by slicing up and adding to a wrap with tomatoes, lettuce, grilled mushrooms, and leftover sauce!

Grab your $1 Off any Smithfield All Natural Fresh Pork item here. Head over to Walmart to grab yours today.

Need more inspiration?  Check out these Maple Chipotle Glazed Pork Chops!

Filed Under: Dinner, Home, Recipes Tagged With: dairy free, dinner, grill, honey mustard bbq, pork, recipes

Dairy Free Peach Mango Yogurt Chicken

April 6, 2017 by Larisha Campbell 2 Comments

This shop has been compensated by Collective Bias, Inc. and its advertiser. All opinions are mine alone. #DairyFreeGoodness #CollectiveBias

Dairy Free Peach Mango Yogurt Chicken with a Peach Mango Chutney.

dairy-free-peach-mango-yogurt-chicken

I know, there’s a word in there that is throwing off your idea of whether you want to try this recipe or not. The answer is yes.  Yes, you do want to try this recipe. I promise it’s not as crazy as you may actually think it is either. The inspiration behind this idea actually came from my friend Amiyrah, and I too thought the idea of yogurt chicken was baffling. However, the more I considered the idea, the more I became okay with the thought of it.

I mean, we put creamed soup on chicken, we put sour cream on chicken, we put butter on chicken, so why not yogurt? Once I finally got the courage to try it, I was blown away. However, I still had to convince Andrew. He gets home later than we eat and when I told him what it was, his picky behind was like, nope, not eating it. Eventually, I got him to try it! And guess what! He liked it!

dairy-free-peach-mango-yogurt-chicken

The thing is, we’ve only ever used plain Greek yogurt to make our yogurt chicken. I wanted to be bold and adventurous and try new flavors. When I saw Silk Dairy-Free yogurt alternative, I knew that we immediately needed to try it.  The delicious taste and creamy texture make it the perfect topping for any meal.

I am always trying to figure out flavorful recipes for friends who are dairy free because I know how hard it can be to find them. I was dairy free for 6 months after each pregnancy until our girls outgrew their dairy intolerance. Even now, my close friend is searching for dairy free meals for her family.

The result. Perfection.

dairy-free-peach-mango-yogurt-chicken

dairy-free-peach-mango-yogurt-chicken

dairy-free-peach-mango-yogurt-chicken

This well seasoned chicken is smothered in Peach Mango Silk Dairy-Free Yogurt Alternative (made with soy milk) and then topped with a flavor-packed spicy peach mango chutney that will blow your taste buds away.

dairy-free-peach-mango-yogurt-chicken

dairy-free-peach-mango-yogurt-chicken

The taste together is really impeccable and I know we will have this so many more times in the future. This recipe would also be amazing on top of pork chops as well.

dairy-free-peach-mango-yogurt-chicken

0 from 0 votes
Print
Dairy Free Peach Mango Yogurt Chicken
Author: Larisha Campbell
Ingredients
for Peach Mango Chutney
  • 1 fresh mangos ripe but not too soft, peeled and cubed
  • 1 fresh peach skin removed and cubed
  • 1 tablespoon coconut oil
  • 1/2 medium sweet onion finely diced
  • 2 cloves garlic minced
  • 1/4 cup red sweet pepper finely diced
  • 1/4 cup apple cider vinegar
  • 1 tablespoon brown sugar
  • 1 tablespoon minced fresh ginger
  • 1/2 cup orange peach mango juice
  • 1/2 tablespoon yellow curry powder
  • pink salt and fresh cracked pepper to taste
  • 1/4 teaspoon cinnamon
  • 1/4 teaspoon red pepper flakes
  • 1/4 teaspoon cloves
  • 1/4 teaspoon allspice
  • zest from 1/2 large orange
  • 1/3 cup golden raisins
for seasoned chicken
  • 4 large boneless chicken breasts
  • 1 container Silk Dairy-Free Yogurt Alternative Peach Mango flavor
  • 1 teaspoon chicken rub
  • 1/4 teaspoon cumin
  • 1/4 teaspoon ginger
  • 1/4 teaspoon ground mustard
  • 1/8 teaspoon allspice
Instructions
for Peach Mango Chutney
  1. In a large skillet, melt coconut oil over medium heat.
  2. Once melted, add all ingredients except the mangoes, peaches, and raisin.
  3. Cook down for 5 minutes.
  4. Stir.
  5. Turn down heat to low and add in peaches and mangoes.
  6. Cook, stirring occasionally, for 15 minutes.
  7. Add in raisins and good another 10 minutes, stirring occasionally.
  8. Remove from heat and let cool.
for seasoned chicken
  1. Combine all seasoned together well and rub into each chicken breast on both sides
  2. Smoother chicken with Silk Dairy-Free Yogurt Alternative, Peach Mango flavor
  3. Cook chicken at medium high 5 minutes on each side or until an internal temperature of 165 degrees F is reached.
  4. Top with Peach Mango Chutney and serve.
Recipe Notes

Serve on a bed of arugula

Silk Dairy-Free Yogurt Alternative is available at your local Walmart store. It comes in the Peach Mango flavor that we showcase here, as well as Vanilla, Blueberry, and Strawberry. You can’t even tell the difference from your favorite dairy brand. Grab some today! Learn more about the new products and see other Silk deliciousness here.

Filed Under: Dinner, Home, Recipes Tagged With: chicken, dairy free, dinner, mango, peach, recipes, yogurt

  • « Previous Page
  • 1
  • 2
  • 3
  • 4
  • 5
  • …
  • 8
  • Next Page »


We're Parents is all about cooking and traveling our way through imperfect parenting. Learn More

SUBSCRIBE TO OUR WEEKLY NEWSLETTER & GET PARENT & ME COLORING SHEETS

Connect With Us

We're Parents is a unique mom and dad natural parenting blog focusing on topics such as breastfeeding, babywearing, and car seat safety. You'll also find Delicious recipes, inspired travel recommendations, and more as you journey with us through parenting. Learn More…

VIEW OUR PRIVACY POLICY

Even More Recent Posts

a black and white photo of a curly haired african american woman in a sweater holding a new born baby while standing up.

We’re Parents is a participant in the Amazon Services LLC Associates Program, an affiliate advertising program designed to provide a means for sites to earn advertising fees by advertising and linking to amazon.com

Copyright © 2026 · Foodie Pro Theme by Shay Bocks · Built on the Genesis Framework · Powered by WordPress

Rate This Recipe

Your vote:


A rating is required
A name is required
An email is required