We're Parents

  • Home
  • About Us
    • About Us
    • Privacy Policy
    • Contact Us
    • Disclosures
    • Media Kit
  • Parenting
    • Pregnancy and Postpartum
    • Breastfeeding
    • Car Seat Safety
    • Mental Health
    • Babies
    • Toddlers
    • School Age
    • Older Kids
    • Holiday Crafts & More
    • Green Living
  • Recipes
    • Breakfast
    • Lunches
    • Dinner
    • side dishes
    • Crockpot
    • Desserts
    • Lactation Recipes
    • Snacks
    • The Seasoned Kids (Recipes by Kids)
  • Travel
    • Kid Friendly Outings
    • Restaurants
    • Travel Tips

15 Lactation Boosting Foods Recipes

October 12, 2018 by Larisha Campbell 2 Comments

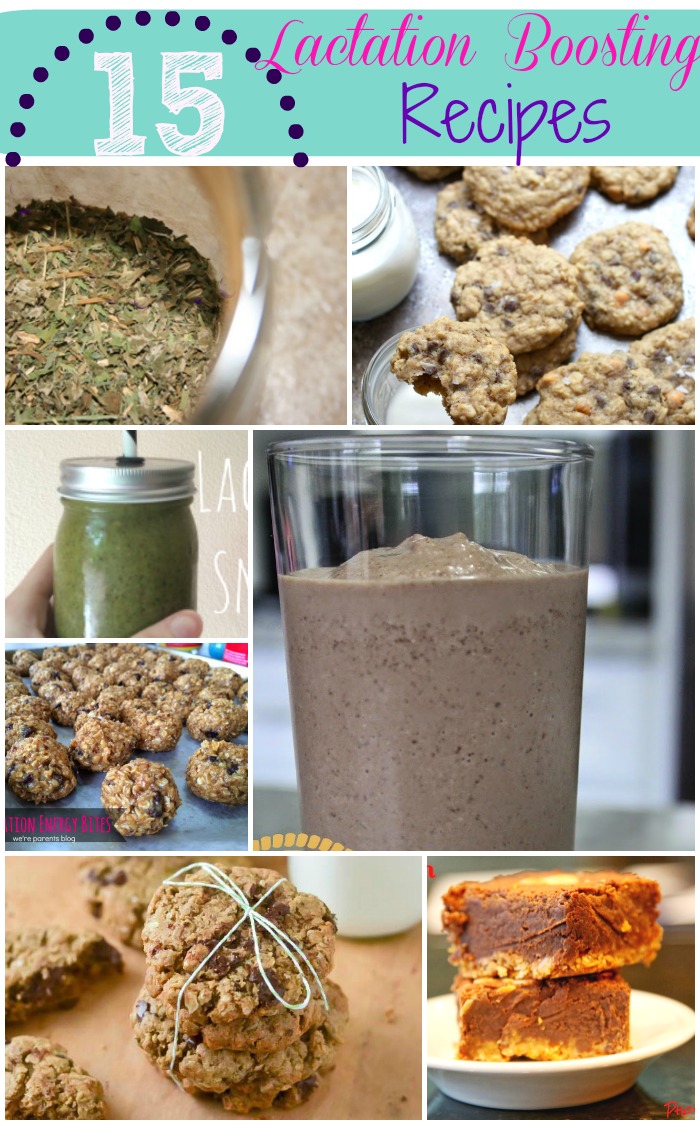
Breastfeeding is hard work! Check out these 15 Lactation Recipes to ensure you are getting enough healthy calories to help with breastfeeding. 

Breastfeeding, especially your first time, can be a very intimidating. For starters, your body just went through a very traumatic experience.  You are sore, tired, and very emotional. Add to that, you now have this very tiny human that didn’t come with an instruction manual and you aren’t quite sure what to do. Breastfeeding is a great place to start.

Breastfeeding a newborn is a very natural instinct that mothers have. You naturally want to place baby to your breast immediately after being born. Also, babies intuitively root around until they get to the breast after being born.  It’s one of the most natural biological practices you can ever feel or witness.

For almost all mothers though, breastfeeding isn’t easy. We question our bodies. Are we producing enough? Is baby transferring enough? There are so many breastfeeding myths out there that set us up for failure. I’m here to tell you to stop doing that.  Trust your body!

Do Lactation Recipes Work?

Now, for a variety of reasons you may be interested in trying out some lactation recipes.  I would encourage you if you truly think you have a lactation issue to first seek out a lactation consultant (not a pediatrician or a general physician).

For many mothers, adding lactation recipes into their diets work to help with caloric intake and consuming lactation foods that are known to produce more milk. However, it’s important to know whether there’s a true medical reason or if you just need a diet change.  Some women prefer to eat more lactation recipes on days that they know their kids are going through a leap or if the month is getting her menstrual cycle.

The short answer is yes, lactation recipes will work to increase supply. The longer answer has to deal with it’s more of a healthy, fattier caloric intake that is causing the boost rather than specific ingredients.

What Ingredients Should I Have for Lactation Recipes?

There are so many lactation increasing ingredients around that you may not even realize it. However, I would definitely recommend that you keep ground flax seed, brewer’s yeast, and old fashioned oats on hand ahead of time. Most of the lactation boosting foods recipes that we share here contain those three things the most. Because of this you don’t want to get caught off guard, ready to make the recipe and then not be able to because you’re missing simple ingredient.

I Don’t Have Time to Make Lactation Recipes? Now what?

Good new! You don’t technically have too make your own lactation foods.  I would highly recommend that you at least try one (or all of them) at some point in your nursing journey. There’s just something about being able to make your own recipes with your own ingredients and the ability to control the contents of the lactation recipes.

The good news is that you don’t technically have to make them yourself. If you are short on time or battling postpartum depression, you may just literally not be up to it.

You can check out the following brands and see if they would for you:

  • Milkmakers Lactation Cookies
  • Mother’s Milk Tea
  • Happy Mama Lactation Oat Bars

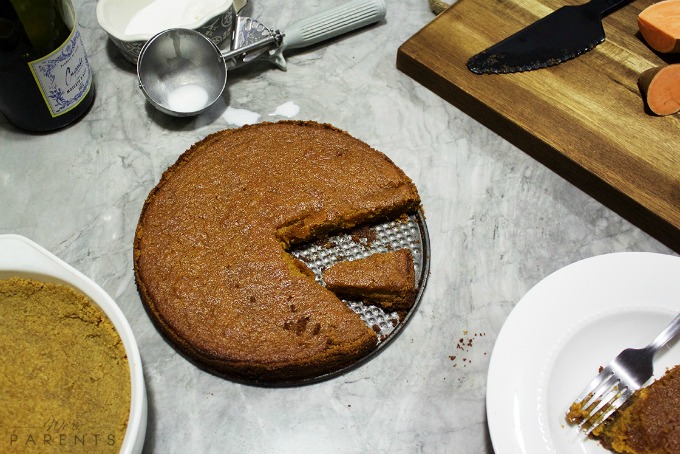
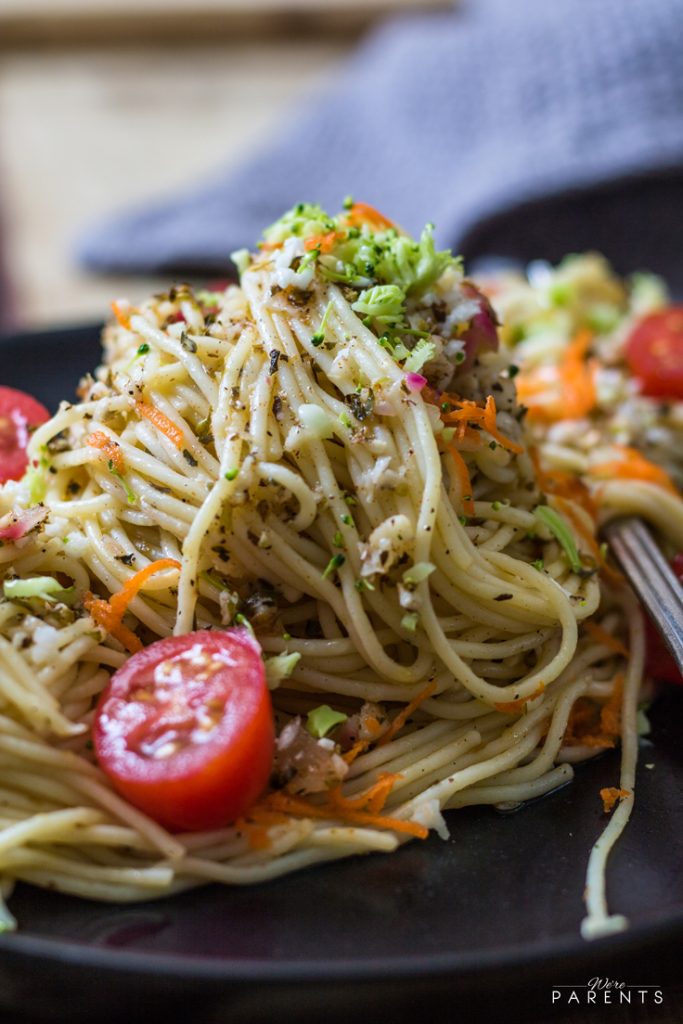
Delicious Lactation Foods Recipes

Whether you are looking for a lactation cookies recipe or a lactation smoothie recipe, or even milkshake, we have you covered.  Our list includes some of the best lactation recipes on the internet. We are sure that you will find one (or 15) that you absolutely love!

An InLinkz Link-up


Pin these 15 Lactation Boosting Foods Recipes for later!

lactation boosting recipes

*This post was originally published on 3/20/2015

Filed Under: Breastfeeding, Home, Lactation Recipes Tagged With: breastfeeding, lactation, recipes

Lemon Raspberry Curd

October 1, 2018 by Larisha Campbell Leave a Comment

Lemon Raspberry Curd is sweet and tart making it an amazing filling for pies, doughnuts, cakes, and more. This lemon raspberry curd recipe also makes a great edible gift. 

About two years ago now, I made lemon curd for the first time to go into some hand pies I was trying out. When I told Andrew what I was making, he cringed. Why would anyone call it curd? What an awful name for something you are eating. I reminded him that he loves cottage cheese and those are also called curds. He wasn’t amused.

Nonetheless, it was one of the best desserts I had ever had. I was literally licking the lemon curd off the spoon. He also agreed is was an amazing dessert and we spent the next few days putting it on everything we could think of in our house.

how to make lemon raspberry curd

I wanted to try out other varieties and see if they were just as amazing. It had gotten pushed to the back burner until recently.  And boy once I made this lemon raspberry curd, I was so disappointed I had never made it sooner. It was amaziingggg. We’ve made it multiple times since the first and it’s even better than just regular lemon curd.

Why is it called curd?

A curd is smooth, thick, creamy spread that is in the same family as jams and preserves. The earliest accounts show lemon curd being made and referred to as lemon cheese. It explains that lemon juice was added to cream to make curds.  As time has evolved, a curd now refers to a citrus fruit (lemon, lime, orange, etc) being combined with eggs and sugar, and sometimes butter.  Berries, like in this lemon raspberry curd, are sometimes used as well.

What are the ingredients to make lemon raspberry curd?

The full recipe to make this lemon raspberry curd recipe is below, but the ingredients you need to make lemon raspberry curd are:

  • Eggs
  • Sugar
  • Raspberries
  • Lemon Juice
  • Lemon Zest
  • Unsalted Butter

What do you use lemon raspberry curd for?

Fruit curd is used for a variety of treats like scones, pies, and in between cake layers. However, it can also be used on bread or toast, muffins, waffles, pancakes, cheesecake and more.  Some people also mix curd into yogurt or cottage cheese. The possibilities are really endless.

Some ideas you can use are:

  • Mini Chocolate Raspberry Napoleons 
  • Fluffy Buttermilk Pancakes
  • Homemade Waffles
  • White Chocolate Raspberry Cheesecake
  • Traditional British Scones
  • Classic Pound Cake

How do you make Lemon Raspberry Curd?

3.86 from 21 votes
Print
Lemon Raspberry Curd
Prep Time
18 mins
Cook Time
4 hrs
Total Time
4 hrs 18 mins
 

Lemon Raspberry Curd is sweet and tart making it an amazing filling for pies, doughnuts, cakes, and more. This lemon raspberry curd recipe also makes a great edible gift. 

Course: Condiments
Cuisine: American
Servings: 32
Calories: 61 kcal
Author: Larisha Campbell
Ingredients
  • 4 eggs
  • 2 cups sugar
  • 2 cups raspberries fresh or frozen
  • 1/2 cup lemon juice
  • Zest from one large lemon
  • 1 stick unsalted butter cut into pats
Instructions
  1. In a bowl, whisk together sugar and eggs.
  2. In a medium saucepan, over medium low heat, add raspberries, lemon juice and lemon zest.
  3. Heat until raspberries start to break down (around 5 minutes), carefully stirring watching to ensure it doesn't burn.
  4. Add in the sugar mixture and constantly whisk for 2 minutes.
  5. Stir often until it begins to thicken (about 5 minute).
  6. Add butter and continue stirring often until all butter is melted.
  7. Over a bowl, use a strainer to press the solids out of the mixture.
  8. Refrigerate until cold (at least 4 hours).
  9. Keep refrigerated in air tight container for up to 10 days.
Recipe Notes

**Nutritional facts are just estimates. Please utilize your own brand nutritional values to double check against our estimates. 

Nutrition Facts
Lemon Raspberry Curd
Amount Per Serving (2 tbsp)
Calories 61
% Daily Value*
Cholesterol 20mg7%
Sodium 8mg0%
Potassium 22mg1%
Carbohydrates 13g4%
Sugar 12g13%
Vitamin A 30IU1%
Vitamin C 3.5mg4%
Calcium 5mg1%
Iron 0.2mg1%
* Percent Daily Values are based on a 2000 calorie diet.

Whether you put this in pies, spread on tarts, or lick it off the spoon (I won’t judge) you’ll want to make this ASAP. Promise me you will make this soon!

Pin this Lemon Raspberry Curd recipe for later!

Filed Under: Desserts, Home, Recipes Tagged With: desserts, recipes

The Best Sweet Potato Pie Recipe

September 26, 2018 by Andrew Leave a Comment

This is the Best Sweet Potato Pie Recipe you will find for your fall get together! Surprise everyone with this amazingly delicious homemade sweet potato pie. 

best sweet potato pie recipe

Holidays Are A Special Time

When you think about holidays, what comes to mind? For me, it’s a ton of things. I actually start to get a giddy and smirk in a way that if you seen me from afar you would think I lost it! Fantasizing about how giving everyone becomes — and I don’t mean just presents.

I mean more simple things. Like more people holding the mall door open after walking through. It’s such a simple gesture, but if your from the Jersey/Philly/New York/Bmore/DC regions — Folks walk around like “The Walking Dead” most of the year. So, when this time of the year hits, I don’t take it for granted.

The cities and town also become more beautiful. With amazing decorations and music that gets even the grinch doing the “whip and nay nay”. But, what I truly look forward to the most is family and tradition.

For me nothing compares to that quality time.

I love “people watching” in my old household. Seeing mom and dad holding hands, feeding each other. Remember you use to get all grossed out, but now you think its cute (well, I’m still grossed out). My older brother still taking advantage of me. Like tapping on one shoulder and when I look, stealing my last bite from over the other shoulder (just wait till he needs to find his key to go home later). My little sister somehow after all these years still has my parents giving her whatever she wants (so jealous).

Yet and still loving every moment.

homemade sweet potato pie recipe

Passing down family traditions

What are your family traditions for the holidays? You can see some of our holidays traditions that we do every year, but I want to focus on one in this post.

It’s one that I started years before Larisha and I even got together.  That’s right, I started a tradition in the family myself. A food tradition. And this family tradition I have already started passing down to my little girls. But I want to include you too! Our big girl has been helping me make this sweet potato pie recipe since she was 2!

kids in the kitchen mini chef mondaysWhether or not you’ve ever had Sweet Potato Pie before, you really need to make it happen this year.  It’s really quite incredible and easy to make. It’s the best sweet potato pie recipe ever! I mean even my mama calls to make sure I’m making it so you know it’s gotta be good!

sweet potato pie recipe

Ingredients for Sweet Potato Pie

To make homemade sweet potato pie isn’t complicated.  It’s one of the more simple dessert recipes to make for Thanksgiving or other fall holidays. The full recipe is below, but the ingredients you need to make sweet potato pie are:

  • Sweet Potatoes
  • Unsalted Butter
  • Brown Sugar
  • Whole Milk
  • Eggs
  • Nutmeg
  • Cinnamon
  • Vanilla
  • Store bought graham cracker crust or to make your own crust you’ll need unsalted butter, brown sugar, and graham crackers

How to Make Sweet Potato Pie

If you’ve never made a homemade sweet potato pie recipe before, you may be a little intimidated. I’m here to tell you that you don’t have to be.  It’s as easy as pie (HA! – Dad joke!)

You start by boiling potatoes until soft. If you are making a homemade crust for the sweet potato pie recipe,  you’ll want to do that while potatoes are cooking. Then, mash the potatoes.  Add in butter. After that, add in the brown sugar, milk, eggs, nutmeg, cinnamon, and vanilla. Mix all that together until it’s nice and smooth. Pour into crust and let bake at 350 degrees for 65-75 minutes.  A toothpick should come out clean when inserted. Cool and serve. It’s great topped with homemade whipped topping or ice cream!

How to make sweet potato pie

Other Sweet Potato Recipes to Try

We think this is the best sweet potato pie recipe and a must have for the fall. However, with fall goes great pricing on sweet potatoes.  You should try these other sweet potato recipes sometime during the fall as well!

  • Twice Baked Sweet Potatoes with Sausage and Apples (*Vegan)
  • Roasted Sweet Potatoes and Beets
  • Sweet Potato and Egg Muffins
  • Easy Air Fryer Sweet Potatoes
  • Sweet Potato Stew
  • Steak and Sweet Potato Hash

The Best Sweet Potato Pie Recipe

5 from 1 vote
Print
The Best Sweet Potato Pie Recipe
Prep Time
1 hr
Cook Time
1 hr 5 mins
Total Time
2 hrs 5 mins
 

This is the Best Sweet Potato Pie Recipe you will find for your fall get together! Surprise everyone with this amazingly delicious homemade sweet potato pie. 

Course: Dessert
Cuisine: American
Keyword: dessert, pie, sweet potato recipes, thanksgiving recipes
Servings: 8 slices
Calories: 440 kcal
Author: Andrew
Ingredients
  • 1 lb sweet potatoes
  • 1/2 cup unsalted butter, softened
  • 1 cup packed brown sugar
  • 1/2 cup whole milk
  • 2 eggs
  • 1/2 teaspoon nutmeg
  • 1/2 teaspoon cinnamon
  • 1 teaspoon vanilla
For crust (buy a 9in graham cracker crust or make recipe below)
  • 6 tablespoons unsalted butter, melted
  • 2 tbsp brown sugar
  • 1 1/2 cups graham crackers crumbs, about 9 whole crackers
Toppings
  • Homemade Whipped Topping, optional
Instructions
  1. Boil Potatoes for 50 mins making sure water is always covering the potatoes or until soft. *If making crust, see directions below and make while potatoes are boiling.

  2. Immediately drain and run cool water over potatoes and skin the potatoes.
  3. Preheat oven to 350 degrees.
  4. In a large bowl, mash the potatoes.
  5. Add in butter and mix well.
  6. Add in brown sugar, milk, eggs, nutmeg, cinnamon, and vanilla.
  7. Mix until smooth.
  8. Pour into pie crust.
  9. Bake for 65-75 minutes or until toothpick in center comes out clean.
  10. Let cool and serve.
  11. Top with Homemade Whipped Topping if desired. 

For the crust
  1. Mix the melted butter, brown sugar, and crumbs into a pie dish. Press down evenly with the back of a spoon until all the mixtures is evenly spread on bottom and up the sides of the dish. Cook at 350 degrees for 7 minutes, then let cool completely before adding filling.
Recipe Notes

**Nutritional facts are just estimates. Please utilize your own brand nutritional values to double check against our estimates. 

Nutrition Facts
The Best Sweet Potato Pie Recipe
Amount Per Serving (1 slice)
Calories 440 Calories from Fat 207
% Daily Value*
Fat 23g35%
Saturated Fat 13g81%
Cholesterol 95mg32%
Sodium 175mg8%
Potassium 292mg8%
Carbohydrates 55g18%
Fiber 2g8%
Sugar 36g40%
Protein 4g8%
Vitamin A 8745IU175%
Vitamin C 1.3mg2%
Calcium 85mg9%
Iron 1.4mg8%
* Percent Daily Values are based on a 2000 calorie diet.

Pin this Best Sweet Potato Pie Recipe for later: 

This post was originally posted on 11/23/2015 as part of Mini Chef Mondays. Scroll down to see our original images. And see some other amazing recipes from our friends apart of our Mini Chef group.

  1. Peppermint Chocolate Chip Milkshake with Whipped Cream // Courtney’s Sweets
  2. One Hour Bread Recipe // Momma Lew
  3. Homemade Berry Granola // Baby Loving Mama
  4. The Best Sweet Potato Pie Recipe // We’re Parents
  5. Cranberry, Orange, & White Chocolate Bars // Frugal Novice
  6. Easy French Pastries Kids Can Make // Eating Richly
  7. Thanksgiving Fruit and Cheese Turkey Centerpiece // Giggles, Gobbles and Gulps
  8. Easy Peasy Cheesy Puffs // Step Stool Chef
  9. Twinestrone Soup // Vegging at the Shore
  10. Banana Smoothies // Mom’s Messy Miracles
  11. Harvest Kale Salad // O’Boy! Organic
  12. Zwetschgenwähe: Swiss Plum Pie // Can’t Google Everything


the best sweet potato pie recipe

sweet potato pie recipe

Filed Under: Desserts, Home, Kids In The Kitchen, Recipes Tagged With: desserts, mini chef mondays, recipes

Slow Cooker BBQ Parmesan Pork Loin

September 18, 2018 by Larisha Campbell 6 Comments

This Slow Cooker BBQ Parmesan Pork Loin is one of the easiest, but most flavorful easy dinner recipes that you can throw together!

Being a parent means that every night, there are little ones that need fed. It’s a never-ending cycle and while we all love our kids dearly, having to physically make someone three meals a days, does get exhausting.  Especially, I’m sure if you don’t like to cook to being with.
When I first had our daughter, my idea of cooking meals consisted of some cans or jars, a few boxes, and a lot of hope. We quickly realized we didn’t want to eat a lot of processed foods for our children and because of that, it meant that I needed to get better with cooking.
One of the biggest things that helped me was being able to find super flavorful meals, like this Slow Cooker BBQ Parmesan Pork Loin, that could not only feed us multiple meals, but also were easy to throw together.  One of the reasons I love our slow cooker so much is that I am able to throw everything inside of it early in the morning and then by the end of the day dinner is completely ready.  The meals, whether making meat or a soup, are always so tender and it feels like the flavors have more of a chance to really merry together.

What Ingredients Do You Need To Make Slow Cooker BBQ Parmesan Pork Loin

In order to make this slow cooker pork loin recipe, you are going to need the following ingredients. Of course, the entire recipe and cooking instructions are below if you scroll down a bit more.

  • Pork Loin
  • BBQ Sauce
  • Parmesan Cheese
  • Honey
  • Olive Oil
  • Dried Basil
  • Garlic Powder
  • Salt

What Sides Go With Slow Cooker BBQ Parmesan Pork Loin

Of course, you could eat this entirely on it’s own. It’s so delicious. However, you probably want some sides to go along with your easy pork loin recipe.

  • Honey Glazed Carrots
  • Air Fryer Baked Potato
  • Lemon Butter Green Beans 
  • Mashed Potatoes
  • BBQ Asparagus 
  • Spicy Garlic Corn on the Cob
  • Easy Coleslaw
  • Zesty Pasta Salad
  • German Style Potato Salad

What to Make With Leftover Slow Cooker BBQ Parmesan Pork Loin

One of the biggest things when making such a large piece of meat for us is that we often have a lot leftover. No one really likes the same meal over and over again, so often you make wonder what to make with leftover pork loin.  This is also a great way to knock two or more dinners out of the way. Simply purchase a larger pork loin than the recipes calls for and double the sauce.  Then, you can use the leftover pork loin for multiple meals throughout the week.  Some of our favorite leftover pork loin recipes are:

  • Pork Fajitas 
  • Easy Pork Ramen
  • Pork Tacos 

Of course, one really simple idea is just to shred the pork tenderloin pieces, add in some more homemade bbq sauce and make pulled bbq sandwiches. Easy peasy!

Recipe for How To Make Slow Cooker BBQ Parmesan Pork Loin 

5 from 3 votes
Print
BBQ Parmesan Slow Cooker Pork Loin
Prep Time
5 mins
Cook Time
4 hrs
Total Time
4 hrs 5 mins
 

This Slow Cooker BBQ Parmesan Pork Loin is one of the easiest, but most flavorful easy dinner recipes that you can through together!  

Course: Main Course
Cuisine: American
Keyword: dinner, pork, slow cooker
Servings: 8 people
Calories: 426 kcal
Author: Larisha Campbell
Ingredients
  • 1 2-3lb pork tenderloin
  • 1 cup BBQ Sauce recipe
  • 1/2 cup Parmesan cheese
  • 1/4 cup honey
  • 2 tbsp olive oil
  • 2 tbsp dried basil
  • 1 tbsp garlic powder
  • 1/2 tsp Salt
Instructions
  1. Spray slow cooker with cooking spray.
  2. Remove excess fat from tenderloin if desired.
  3. Place loin in slow cooker.
  4. In a bowl, mix bbq sauce, cheese, honey, basil, garlic, olive oil, and salt until well combined.
  5. Pour entire mixture over top of the loin, cover, and cook on high for 4 hours or low for 7-8 hours.

  6. Internal temperature should be 165 degrees when finished.
Recipe Notes

**Nutritional facts are just estimates. Please utilize your own brand nutritional values to double check against our estimates. 

**If you would like to make a gravy with the juice, mix one cup of juice with one tablespoon flour.  Whisk in pot on medium heat until desired thickness is reached.  If it’s too thick, add more juice.  Too thin, add 1/2 teaspoon more flour at a time until desired thickness is reached.

Nutrition Facts
BBQ Parmesan Slow Cooker Pork Loin
Amount Per Serving (2 slices)
Calories 426 Calories from Fat 117
% Daily Value*
Fat 13g20%
Saturated Fat 4g25%
Cholesterol 151mg50%
Sodium 732mg32%
Potassium 1013mg29%
Carbohydrates 24g8%
Sugar 20g22%
Protein 49g98%
Vitamin A 130IU3%
Vitamin C 0.2mg0%
Calcium 111mg11%
Iron 3.1mg17%
* Percent Daily Values are based on a 2000 calorie diet.

Pin this Slow Cooker BBQ Parmesan Pork Loin for later

This post was originally published on August 16, 2012. We’ve gotten much better at photography since then.  Check out some of the old photos of our Slow Cooker BBQ Parmesan Pork Loin for giggles!

Filed Under: Dinner, Home, Recipes Tagged With: dinner, pork, recipes

Pumpkin Cheesecake Pancakes Recipe

September 10, 2018 by Larisha Campbell 17 Comments

These pumpkin cheesecake pancakes are the best pumpkin pancakes recipe that you’re going to find. Deliciously, fluffy pancakes packed with pumpkin flavor and oozing with cheesecake bits. 

Fall time for millions of people means pumpkin everything! You likely will have a lot one thing pumpkin during the fall months unless you’re adamantly opposed to the flavor. Admittedly, we are huge fans of pumpkin in our home and usually, there is something made with pumpkin weekly in our house. One of our must have fall recipes are these pumpkin cheesecake pancakes. In my opinion, they are the best pumpkin pancakes recipe that you are going to find.

What do you need to make pumpkin cheesecake pancakes?

In order to make this pumpkin pancake recipe, you are going to need the following ingredients. Of course, the entire recipe and cooking instructions are below if you scroll down a bit more.

  • Flour
  • Buttermilk
  • Egg Whites
  • Coconut Oil
  • Brown Sugar
  • Baking Soda
  • Baking Powder
  • Salt
  • Pumpkin Puree
  • Frozen Cheesecake

What toppings do you put on pumpkin cheesecake pancakes?

Our absolute favorite thing with these pumpkin pancakes is a homemade blueberry syrup. The flavor profiles pair so well together.

Other toppings include:

  • Homemade Butter
  • Homemade Whipped Topping
  • Coconut Caramel Sauce
  • Buttermilk Syrup

What sides go with pumpkin cheesecake pancakes?

Side dishes for these homemade pumpkin pancakes include:

  • Easy Oven Baked Bacon
  • Cantaloupe Fruit Salad
  • Poached Eggs
  • Creamy Cheddar Grits
  • Hashbrown Casserole
  • Apple Pork Breakfast Sausage
  • Winter Fruit Salad
  • Spicy Maple Candied Bacon

We got the idea for these from one of our many visits to IHOP before having children. IHOP pumpkin cheesecake pancakes were the perfect fall breakfast meal when out to eat, but since having children, we try to limit our eating out now. We love recreating similar meals at home (and truthfully the taste better usually!) If pumpkin is not your thing, but you’d really like to try our cheesecake pancakes, feel free to try our regular cheesecake pancakes or blueberry cheesecake pancakes.

Recipe for Pumpkin Cheesecake Pancakes

5 from 4 votes
Print
Pumpkin Cheesecake Pancakes Recipe
Prep Time
10 mins
Cook Time
20 mins
Total Time
30 mins
 

These pumpkin cheesecake pancakes are the best pumpkin pancakes recipe that you're going to find. Deliciously, fluffy pancakes packed with pumpkin flavor and oozing with cheesecake bits. 

Course: Breakfast
Cuisine: American
Keyword: breakfast, cheesecake pancakes, cheesecake recipes, pumpkin pancakes
Servings: 8 pancakes
Calories: 496 kcal
Author: Larisha Campbell
Ingredients
  • 1 1/2 cups flour
  • 2 teaspoons baking powder
  • 1 teaspoon baking soda
  • 1 teaspoon salt
  • 1 1/2 cups buttermilk
  • 2 tablespoons coconut oil, melted
  • 3 tablespoons brown sugar
  • 1 cup pumpkin puree
  • 2 egg whites, beaten to stiff peaks
  • 2 cups chopped frozen cheesecake
Instructions
  1. Preheat the oven to 200 degrees F. Place oven safe pan inside (to store pancakes until done so all are still warm)
  2. In a small bowl, whisk together flour, baking powder, baking soda and salt. Mix on low until smooth. Transfer to a bowl and stir in cheesecake pieces.

  3. In a large bowl, beat together buttermilk, melted coconut oil, brown sugar, and pumpkin puree until combined. 

  4. Slowly add the flour mixture to the pumpkin mixture. 

  5. Carefully fold in egg whites. 

  6. Add the chopped frozen cheesecake pieces and fold in slowly. 

  7. Coat a large non-stick skillet or griddle with cooking spray or butter and heat over medium low heat. 

  8. One at a time, pour batter into the skillet for each pancake (about 3/4 cup). Cook until bubbly on top, then flip and cook other side until golden brown (about 2-3 minutes).

  9. Transfer to oven safe pan until all are finished.
Recipe Notes

**Nutritional facts are just estimates. Please utilize your own brand nutritional values to double check against our estimates. 

Nutrition Facts
Pumpkin Cheesecake Pancakes Recipe
Amount Per Serving (1 pancake)
Calories 496 Calories from Fat 198
% Daily Value*
Fat 22g34%
Saturated Fat 12g75%
Cholesterol 74mg25%
Sodium 741mg32%
Potassium 268mg8%
Carbohydrates 63g21%
Fiber 2g8%
Sugar 32g36%
Protein 12g24%
Vitamin A 5260IU105%
Vitamin C 1.3mg2%
Calcium 195mg20%
Iron 2.3mg13%
* Percent Daily Values are based on a 2000 calorie diet.

Pin these pumpkin cheesecake pancakes for latter!

This post was originally published on October 11, 2012. We’ve gotten much better at photography since then.  Check out some of the old photos of our pumpkin cheesecake pancakes for giggles!

Filed Under: Breakfast, Home, Recipes Tagged With: breakfast, cheesecake, pumpkin, recipes

Homemade Blueberry Syrup

September 3, 2018 by Larisha Campbell 3 Comments

Homemade Blueberry Syrup is the perfect addition to your breakfast buffet. Add this easy homemade blueberry syrup to pancakes, waffles, french toast, or even ice cream!   

Any time that we go out to eat, we always take mental notes of how we can make dishes at home. Since we don’t eat out often in our home, we constantly want to be able recreate some of these dishes. It not only helps us save money, but because the ingredients are made in small batches at once, it’s usually ends up tasting better.  One of our favorites places to get recipe inspiration is IHOP (or is it IHOB now?). One of our favorite things we’ve made are these  Strawberry Cheesecake Pancakes With Homemade Whipped Topping. But another favorite is this Homemade Blueberry syrup we are sharing with you today!

Homemade Blueberry Syrup 

Growing up, we had plain jane syrup. Usually Mrs. Butterworth. My entire childhood food profile can be summed up with plain jane. We didn’t veer off of that much.  Luckily, I got out of that as an adult. If you’ve ever been to IHOP you know that nestled at the end of the table they have a variety of flavored syrups. One of those is blueberry syrup.  Andrew wanted us to try to make one at home and the result of this homemade blueberry syrup is better than anything we’ve ever had at any restaurant.  It’s even better if you can grab some fresh blueberries.

How To Make Blueberry Syrup

To a saucepan you add blueberries and maple syrup. Fresh or frozen blueberries can be used to make this easy homemade blueberry syrup recipe. Cook this mixture until the blueberries start to break down. After they start to breakdown, you’re going to add more blueberries and syrup, along with vanilla and lemon extracts, cinnamon and allspice. After the recipe is made, you can strain the blueberries out, blend it in a blender or leave it with chunks. Our girls love picking out the blueberries! This makes the the perfect blueberry syrup you’ve ever had. It’s even better than IHOP Blueberry syrup where we got the inspiration to make this recipe from.

Don’t worry about where to buy blueberry syrup any longer!  Make this homemade blueberry syrup recipe in under 15 minutes!

How do you use Blueberry Syrup

Homemade Blueberry Syrup is great on top of most main breakfasts options like french toast, pancakes, and waffles. Mix some into your oatmeal on put on top of your ice cream.

Here’s some great recipes for you to try homemade blueberry sauce on top of too:

  • Blueberry Cheesecake Pancakes
  • Pumpkin Cheesecake Pancakes
  • Fluffy Buttermilk Pancakes
  • Gluten Free Vegan Fluffy Pancakes
  • Vanilla Cheesecake Mousse
  • Classic French Crepes
  • Banana Chocolate Chip Oatmeal Pancakes
  • Einkorn Waffles
  • Classic Cream Scones
  • Paleo Plantain Pancakes
  • Dairy free & Eggless Pancakes

0 from 0 votes
Print
Homemade Blueberry Syrup Recipe
Prep Time
1 min
Cook Time
10 mins
Total Time
11 mins
 

Homemade Blueberry Syrup is the perfect addition to your breakfast buffet. Add this easy homemade blueberry syrup to pancakes, waffles, french toast, or even ice cream!  

Course: Breakfast, Condiments
Cuisine: American
Keyword: homemade syrup, blueberry recipes
Servings: 8 servings
Calories: 49 kcal
Author: Larisha Campbell
Ingredients
  • 2 cups blueberries, fresh or frozen, divided
  • 4 tbsp maple syrup, divided
  • 1/2 tsp vanilla extract
  • 1/4 tsp lemon extract
  • 1/4 tsp cinnamon
  • 1/8 tsp allspice
Instructions
  1. In a sauce pan, over medium low heat, add 1 cup blueberries and 2 tbsp maple syrup.

  2. Stir to combine. 

  3. Cook 5 minutes, stirring frequently. 

  4. Mash down the blueberries that are breaking apart

  5. Add in the remaining ingredients. 

  6. Stir to combine and cook for another 5 minutes. 

  7. Once all the blueberries have started to break down, remove from heat. 

  8. You can leave as is with chunks, strain out the blueberries, or put syrup in a blender to make more consistent, non-chunky texture. 

Recipe Notes

**Nutritional facts are just estimates. Please utilize your own brand nutritional values to double check against our estimates. 

Nutrition Facts
Homemade Blueberry Syrup Recipe
Amount Per Serving (2 tbsp)
Calories 49
% Daily Value*
Sodium 1mg0%
Potassium 50mg1%
Carbohydrates 12g4%
Sugar 9g10%
Vitamin A 20IU0%
Vitamin C 3.5mg4%
Calcium 13mg1%
Iron 0.1mg1%
* Percent Daily Values are based on a 2000 calorie diet.

Pin this Homemade Blueberry Syrup Recipe for later!

**This post was original published on 7/8/2014. Images to the original post are below. 
homemade blueberry syrup
This post was originally part of a blog hop we did called Time for Mom. Our fellow co-hosts were Rachel from Can’t Google Everything and Brie from {…a breezy life}. Two of the posts we featured were Summer Bucket List from Many Waters and Pool Noodle Bubble Blower from Domain of the Mad Mommy. Check them out!

Filed Under: Breakfast, Home, Recipes Tagged With: breakfast, recipes

Grilled Balsamic Steak

June 26, 2018 by Larisha Campbell Leave a Comment

This Grilled Balsamic Steak is the perfect conversation starter for your next summer get together! Pair it with delicious The Dreaming Tree Crush red wine for the ultimate pairing.

Disclosure: This shop has been compensated by Collective Bias, Inc. and its advertiser. All opinions are mine alone. The following content is intended for readers who are 21 or older. #SeedOfAGreatSummer #CollectiveBias

Summertime is one of my favorite seasons because it means grilling time. I mean, I typically grill year round, but in the summer, we grill way more often.  It also means more get togethers. There’s something about summer time and grilling with family that brings everyone around us joy. We love inviting our friends and family over to enjoy a meal together. As a culture, it’s what we were made to enjoy.  Being able to come together, share a meal and conversation, is the root of what makes us happy. And having the opportunity to do that with family brings us so much joy.

For special celebrations, we love making steak. This grilled balsamic steak is the perfection conversation starter. Your family will be begging for your how to make this delicious grilled balsamic steak. The homemade balsamic steak sauce recipe will have everyone asking for the recipe!

Pairing Wine with Grilled Balsamic Steak

I’ve been grilling for a long time.  As I’ve gotten older and we enjoy having people over, we’ve learned to always have a bottle (or a few if a big party) of wine that pairs nicely with the meal we are serving. Pairing wine with Grilled Balsamic Steak is easy thanks to The Dreaming Tree. Their red blend, Crush, has notes of smokey berry with a pop of raspberry jam, making it the ultimate shareable red wine with your favorite people.

The Dreaming Tree Wines

Whether you are serving this deliciously grilled Balsamic Steak with Crush red wine blend or looking for other options, The Dreaming Tree has the perfect wine to bring along or serve to share with family and friends. These high quality, delicious wines are made at an affordable price so everyone can enjoy. The Dreaming Tree has a goal to make high quality California wines available everywhere. Besides the delicious red blend, Crush, other available wines include:

  • Sauvignon Blanc
  • Pinot Noir
  • Cabernet Sauvignon
  • Chardonnay

How to make Grilled Balsamic Steak

This Grilled Balsamic Steak is super simple to make and a huge crowd please.  Combine those two things and you have all the conversation starter that you need for your next get together.  Start by making the delicious balsamic steak sauce from scratch. Don’t worry, we promise this is easy. Once you make the sauce, while you wait for it to chill, you make a simple steak with fresh cracked pink salt and black pepper. Grill it on both sides until done to your preferred cooking temperature.  Then, serve alongside the balsamic steak sauce and The Dreaming Tree Crush red wine blend.

0 from 0 votes
Print
Grilled Balsamic Steak
Prep Time
10 mins
Cook Time
40 mins
Resting Time
5 mins
Total Time
50 mins
 

This Grilled Balsamic Steak is the perfect conversation starter for your next summer get together! Pair it with delicious The Dreaming Tree Crush red wine for the ultimate pairing. 

Course: Main Course
Cuisine: American
Keyword: dinner, homemade steak sauce, steak
Servings: 4 people
Author: Larisha Campbell
Ingredients
  • 3/4 cup balsamic vinegar
  • 3/4 cup Ketchup
  • 2 tbsp Dark Brown Sugar
  • 2 tbsp Worcestershire Sauce
  • 1 Yellow Onion, largely sliced and separated
  • 1 tbsp Dijon Mustard
  • 4 cloves Garlic, peeled
  • 2 tbsp Low Sodium Soy Sauce
  • 1/4 tsp allspice
  • Salt and Pepper to taste
  • 2 tbsp butter
  • 4 strip steaks
Instructions
  1. In a medium sauce pot, add the ingredients except butter and steak.

  2. Stir and let come to a boil.
  3. Simmer for 30 minutes.

  4. Remove from heat. Stir in butter until melted.  

  5. Using a strainer, remove onions and garlic. 

  6. Set aside sauce. 

  7. Crack pink salt and black pepper on both sides of your steaks. 

  8. Heat grill to 400 degrees. 

  9. Cook steaks for 4 minutes on each side for medium. (Cook more or less time depending on preference). 

  10. Remove from heat and let rest for 5 minutes. 

  11. Cut steak and serve with balsamic steak sauce and Dreaming Tree Crush.

Recipe Notes

**Nutritional facts are just estimates. Please utilize your own brand nutritional values to double check against our estimates. 

The Dreaming Tree wines are available at your local grocery, drug or supercenter stores. A little trick – just go to their website and locate their wines here.

Filed Under: Dinner, Home, Recipes Tagged With: dinner, recipes

Green Bean Salad Recipe (Vegan Option)

June 25, 2018 by Larisha Campbell Leave a Comment

This easy green bean salad recipe may be simple, but it’s packed full of flavor. Be sure to take a potluck hit to your next get together with this simple side dish.

I’ve told the story before about how growing up, I’d only eat green bean in ketchup.  Thankfully, all my senses came together and had an awakening moment for my life. Slowly, but surely, I’ve came to love green beans and now, they are one of my favorite vegetables. I never realized at that time, but green beans are so versatile.  I remember reading before that you have to try new foods up to 10 times. I can totally see why now, because the versatility in what you can go with a set of ingredients, can completely change how you look at a food that you think you don’t like.

It’s also a great tool for teaching your children. For us, we explain to our kids that while you may not like something steamed, you may like it grilled, or roasted, or sautéed. You may like an ingredient mixed into something, but not by itself.  There are so many different ways to use and incorporate ingredients, that you should never give up on it the first time.

Green Bean Salad Recipe

This easy green bean salad recipe with feta is sure to be a crowd pleaser.  In our  home, it’s kid-approved, too! Our girls, love not only helping to make this, but being able to eat through all the flavor combinations as well. We start by sautéing fresh green beans in butter, with some freshly cracked black pepper and pink Himalayan salt.  While they are cooling down after cooking, we halve beautifully ripe cherry tomatoes. Then, we make a delicious, but simple lemon balsamic sauce. Finally, we combine everything with some sliced almonds and feta cheese. The end result is everything that you’ve wanted and more in a side dish!

4.5 from 2 votes
Print
Easy Green Bean Salad Recipe with Feta
Prep Time
10 mins
Cook Time
8 mins
Cooling Time
15 mins
Total Time
18 mins
 

While this easy green bean salad recipe may be simple, it's packed full of flavor. Be sure to take a potluck hit to your next get together with this simple side dish.

Course: Side Dish
Cuisine: American
Keyword: side dish, summer salad
Servings: 8 people
Calories: 154 kcal
Author: Larisha Campbell
Ingredients
  • 1 lb fresh green beans, ends snipped
  • 2 tbsp unsalted butter (use vegan butter if making vegan)
  • 1 pint cherry tomatoes, halved
  • 1/2 red onion, thinly sliced
  • 3 tbsp lemon juice
  • 3 tbsp balsamic vinegar
  • 1 tbsp olive oil
  • 1/4 tsp garlic powder
  • salt and pepper
  • 1/2 cup toasted sliced almonds (walnuts could be substituted)
  • 1/2 cup feta cheese (use vegan feta)
Instructions
  1. Melt butter in a skillet over medium heat.

  2. Add green beans and saute for 8 minutes, stirring frequently. Add salt and pepper to taste. 

  3. Remove from heat and put inside bowl. Let cool for 15 minutes. 

  4. In a small bowl, combine, lemon juice, balsamic vinegar, olive oil, and garlic powder. Stir together. 

  5. To bowl with green beans, add halved cherry tomatoes and thinly sliced red onions. Pour sauce combination over and stir gently, but well. 

  6. Taste test and add additional salt and pepper if necessary. 

  7. Add feta cheese and toasted almonds on top. 

  8. Serve warm or cold. 

Nutrition Facts
Easy Green Bean Salad Recipe with Feta
Amount Per Serving (0.5 cup)
Calories 154 Calories from Fat 99
% Daily Value*
Fat 11g17%
Saturated Fat 3g19%
Cholesterol 15mg5%
Sodium 116mg5%
Potassium 339mg10%
Carbohydrates 10g3%
Fiber 3g13%
Sugar 5g6%
Protein 5g10%
Vitamin A 810IU16%
Vitamin C 23.1mg28%
Calcium 101mg10%
Iron 1.4mg8%
* Percent Daily Values are based on a 2000 calorie diet.

Pin this deliciously easy Green Bean Salad Recipe for later: 

Filed Under: Dinner, Home, Recipes Tagged With: recipes, side dish

Summer Side Dishes

June 8, 2018 by Larisha Campbell Leave a Comment

 Looking for delicious summer side dishes? We’ve got you covered! Check out the best summer side dishes to have you ready in a pinch for any summer cookout. 

SUMMMMMMERRRRRR!!!!

Every time I think of summer now, I can’t help but sing the Olaf song from Frozen. And secretly, sometimes wish I was in winter.  It’s funny because summer was my favorite season growing up.  I mean, no school, no worries, lots of outside time, pools, etc. What kids isn’t going to love that?  Now however, it means more sweating as I chase my kids around in the heat, bugs seem to annoy me way more as an adult, and as a homeowner, more work. Regardless, I do find joy in watching my children love summer, just as much as I remember loving it.

Whether you like the warmer weather or not, you likely are going to attend a cookout or twelve during summer. Typically, unless you are hosting, you are going to be responsible to bring some sort of side dish. Or maybe you are just looking for easy side dishes for your own dinner.  Whatever the reason, we have some of the best summer side dishes from the internet all combined for you in one awesome post.

So, what’s your favorite summer side dishes? For me, I always want corn on the cob. Other favorite summer side dishes would have to be a great pasta salad, baked beans, fruit salad, potato salad, and sometimes just a big chunk of watermelon.

Summer Side Dishes

Now, which dish are you going to go make first? We hope you love this collection of summer side dishes for cookout time; however, if you feel like we missed an amazing dish, feel free to let us know in the comments so we can add it! Enjoy the summer!

An InLinkz Link-up


Filed Under: Home, Recipes Tagged With: recipes, side dish

Spicy Garlic Grilled Corn on the Cob (Vegan Option Included)

June 7, 2018 by Larisha Campbell 3 Comments

This Spicy Garlic Grilled Corn on the Cob is the perfect vegetable side dish for your next get together. Cooking corn in the husk on the grill will be your new favorite thing! 

Grilled corn on the cob just screams summer. We love going down to the local farm and grabbing fresh corn on cob throughout the summer season and we’re so sad when it ends. We all, especially our youngest, just love corn on the cob. I remember growing up and my mom would literally drench her corn in melted butter and sprinkle an absurd amount of salt all over one ear.  I used to laugh that she was eating corn soup and the butter was her broth. This recipe is much healthier, but every time I eat corn on the cob, I think about my mom.

How to Grill Corn in Husks

There’s so many ways to cook corn on the cob, but cooking corn in the husk on the grill is one of my favorites. First, soak the corn in water.  After that, carefully pull back the husk to about half an inch from the bottom. Then, remove the corn silks. Next, spread butter and seasoning mix onto the corn. Carefully pull the husks back up. Grill at approximately 400 degrees for 20 minutes or until fork tender, turning every 5 minutes.

How long do you have to soak corn before grilling?

When cooking corn on the cob on the grill, you should soak it in water for 30-60 minutes beforehand. Soaking in water softens the husks, making them easier to work with and get down as far as possible without breaking off.  Soaking corn also allows for more moisture to be retained so the corn doesn’t burn on the grill.

How long do you grill corn?

Grilling corn on the cob is easy peasy! Start by preheating the grill to 400 degrees.  Then, you want to place your corn on the cob in the husk on the grill for 20 minutes, rotating every 5 minutes. This will ensure perfectly cooked corn on the cob. After the 20 minutes, you can slightly peel back the husk and test with a fork. The corn kernels should be soft and easily pierced with a fork.

0 from 0 votes
Print
Spicy Garlic Grilled Corn on the Cob in Husk
Prep Time
35 mins
Cook Time
20 mins
Total Time
55 mins
 

This Spicy Garlic Grilled Corn on the Cob is the perfect vegetable side dish for your next get together. Cooking corn in the husk on the grill will be your new favorite thing! 

Course: Side Dish
Cuisine: American
Keyword: side dish, vegetable dish
Servings: 6 people
Calories: 188 kcal
Author: Larisha Campbell
Ingredients
  • 6 ears corn on the cob
  • 6 tbsp unsalted butter (use vegan butter if needed)
  • 3 tsp chili powder, divided
  • 3 tsp garlic powder, divided
Instructions
  1. Soak corn in husk for 30-60 minutes. 

  2. Heat grill to 400 degrees.

  3. Peal back the corn husks without removing them and then remove all the corn silk.

  4. Liberally rub 1 tbsp of butter over each ear of corn. 

  5. Then sprinkle 1/2 tsp chili powder and 1/2 tsp garlic powder over each ear. 

  6. Pull husks back up and over the ear of corn. 

  7. Place on grill and cook for 20 minutes, rotating every 5 minutes. Corn should be tender when pierced with a fork.

Recipe Notes

*Nutritional facts are just estimates. Please utilize your own brand nutritional values to double check against our estimates. 

Nutrition Facts
Spicy Garlic Grilled Corn on the Cob in Husk
Amount Per Serving (1 ear of corn)
Calories 188 Calories from Fat 108
% Daily Value*
Fat 12g18%
Saturated Fat 7g44%
Cholesterol 30mg10%
Sodium 38mg2%
Potassium 287mg8%
Carbohydrates 18g6%
Fiber 2g8%
Sugar 5g6%
Protein 3g6%
Vitamin A 925IU19%
Vitamin C 6.1mg7%
Calcium 10mg1%
Iron 0.8mg4%
* Percent Daily Values are based on a 2000 calorie diet.

**This post was original published on 9/9/2014. Images to the original post are below. 


Filed Under: Home, Recipes Tagged With: recipes, side dish

  • « Previous Page
  • 1
  • 2
  • 3
  • 4
  • …
  • 20
  • Next Page »


We're Parents is all about cooking and traveling our way through imperfect parenting. Learn More

SUBSCRIBE TO OUR WEEKLY NEWSLETTER & GET PARENT & ME COLORING SHEETS

Connect With Us

We're Parents is a unique mom and dad natural parenting blog focusing on topics such as breastfeeding, babywearing, and car seat safety. You'll also find Delicious recipes, inspired travel recommendations, and more as you journey with us through parenting. Learn More…

VIEW OUR PRIVACY POLICY

Even More Recent Posts

a black and white photo of a curly haired african american woman in a sweater holding a new born baby while standing up.

We’re Parents is a participant in the Amazon Services LLC Associates Program, an affiliate advertising program designed to provide a means for sites to earn advertising fees by advertising and linking to amazon.com

Copyright © 2026 · Foodie Pro Theme by Shay Bocks · Built on the Genesis Framework · Powered by WordPress

Rate This Recipe

Your vote:


A rating is required
A name is required
An email is required